
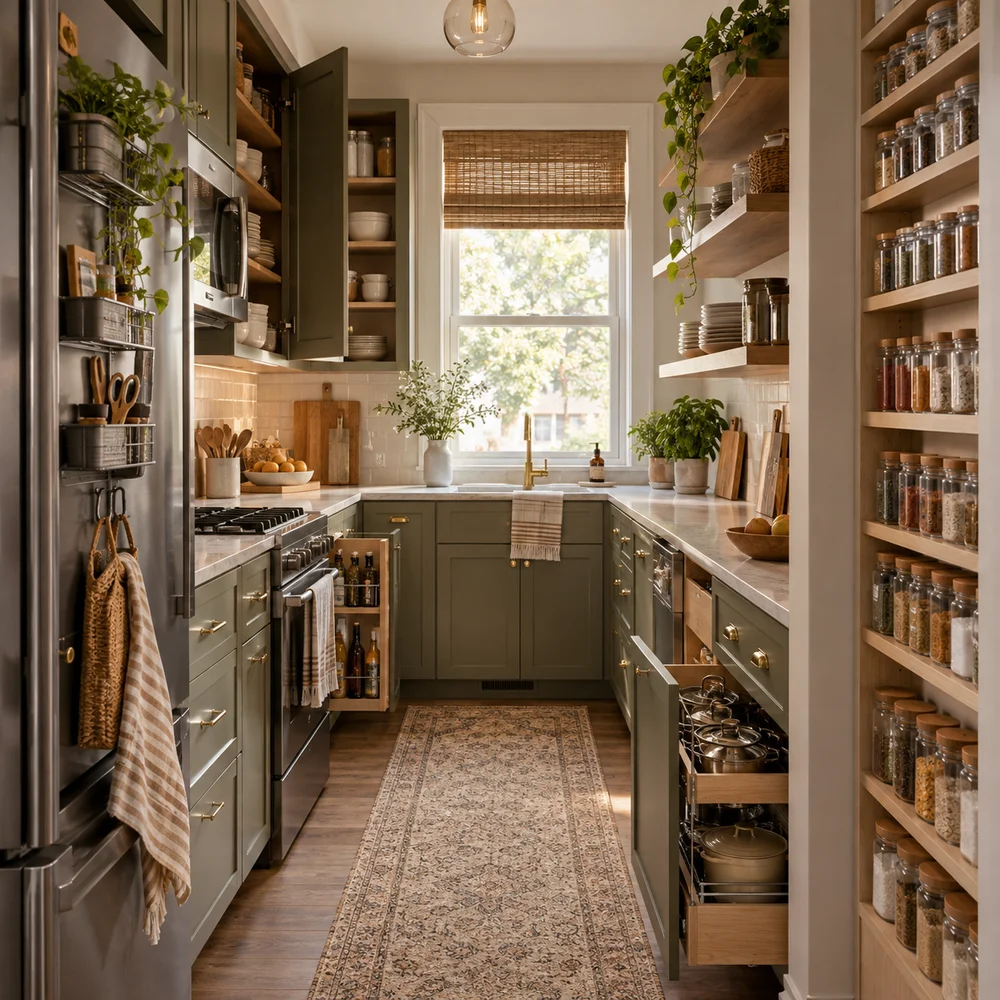
Practical Tiny Kitchen Storage Ideas That Save Your Time
By Emily | September 18, 2026
There’s a specific two minutes that repeats itself in a tiny kitchen more than any other moment in the house: you need one thing — the cumin, the good knife, the lid that matches this exact pot — and it’s not where you left it, because there was never really a “where” to begin with. You end up excavating a cabinet with both hands, setting three unrelated objects on the counter to reach the fourth, and starting dinner four minutes later than you meant to, mildly annoyed at a kitchen that isn’t even that small, just badly assigned.
That’s the real cost of a disorganized tiny kitchen. It isn’t mess, exactly — it’s friction, repeated daily, in a space too compact to absorb it the way a bigger kitchen can hide a chaotic drawer behind three others that work fine. Every wasted gesture in six square feet gets noticed in a way the same gesture never would in twenty.
This isn’t a general philosophy about decluttering before you buy, or a reminder that vertical space exists — you’ve heard both, and they’re true, but they don’t put anything back in your hand faster tomorrow morning. What follows is thirteen specific zones in a small kitchen that are almost always wasted, each paired with one exact product built to fix that zone in under fifteen minutes, no drilling, no renovation, no waiting for a weekend that never comes. The goal isn’t a prettier kitchen. It’s a kitchen where your hand finds the thing on the first try, every time, starting today.
1. Turn the Dead Gap Beside Your Stove Into a Spice Wall
 Save it
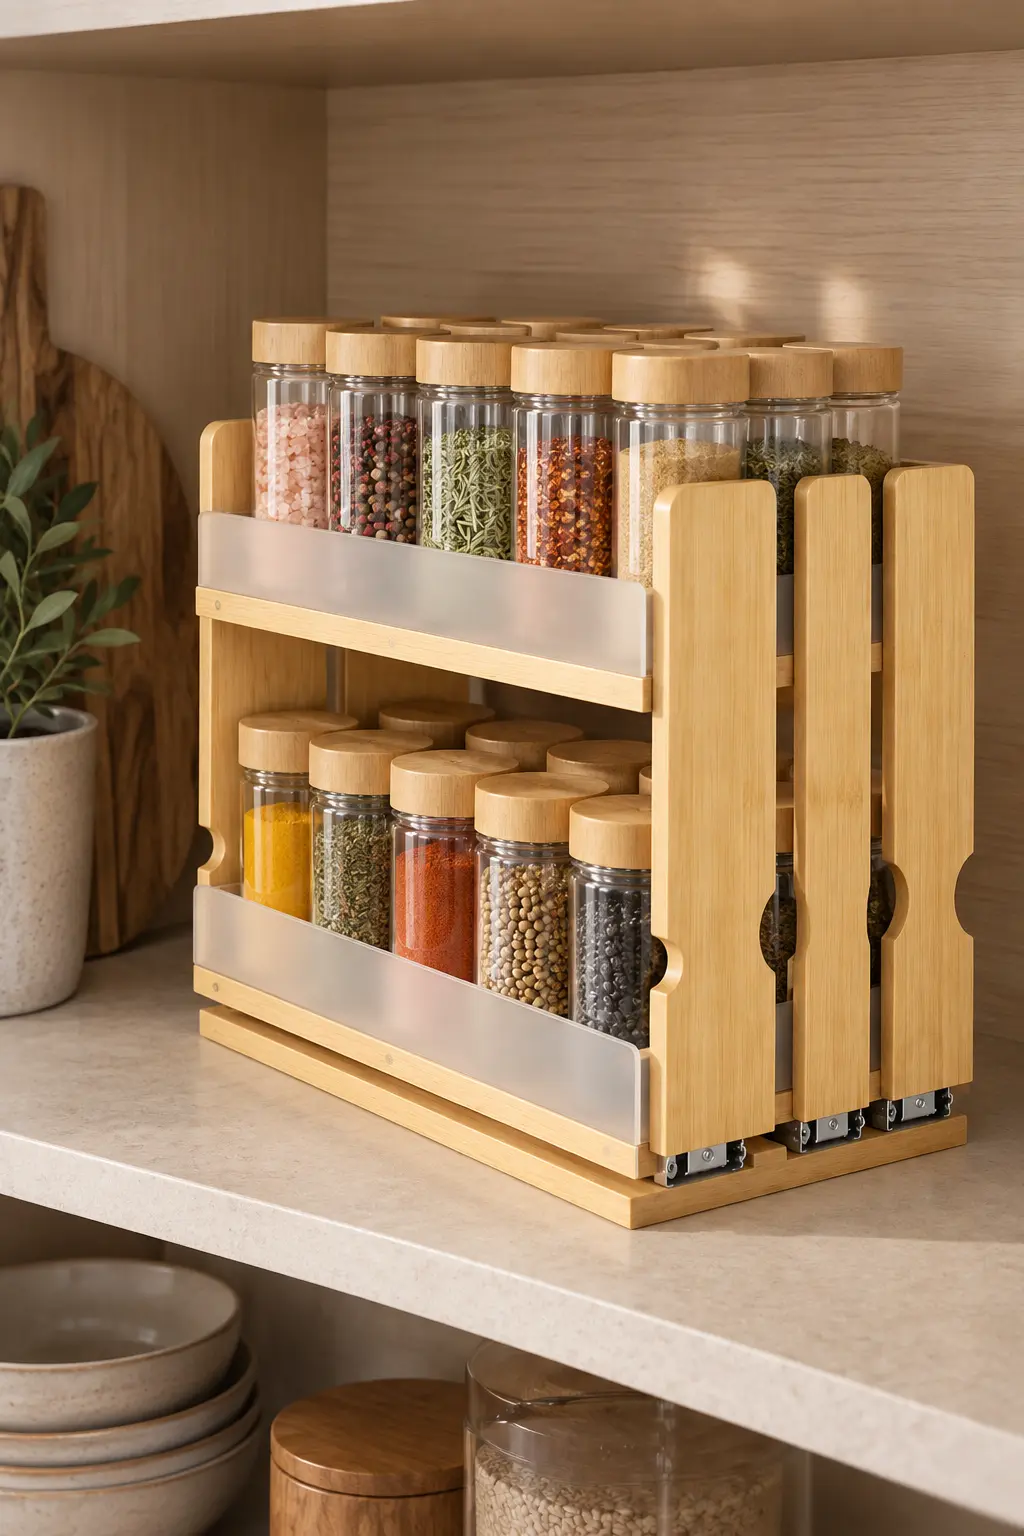
Almost every tiny kitchen has one: a sliver of unused wall or cabinet-side real estate, usually beside the stove or the fridge, too narrow for a shelf and too awkward to style, so it just sits there collecting nothing but dust and the occasional stray magnet. Meanwhile every seasoning you own is crammed into a single cabinet shelf in no order at all, which means finding the smoked paprika mid-recipe means physically removing six other jars first.
The fix isn’t a bigger spice cabinet. It’s recognizing that a vertical gap is a legitimate storage zone, not a leftover one. A slim rack that mounts into that exact sliver turns dead air into the single most-used shelf in the kitchen, because everything on it is visible at a glance instead of buried two jars deep in a dark cabinet.
What makes this work specifically for a tiny kitchen is the footprint: it claims almost no floor or counter space, which means it adds capacity without taking any away from somewhere else, the trade-off every other storage decision in a small room eventually runs into. Mount it at eye level rather than low, so the labels read without bending, and group jars by how often you actually reach for them rather than alphabetically — the everyday salt and pepper at hand height, the specialty blends you use twice a year up top.
The fifteen-minute install matters as much as the organizer itself. This is a fix you complete before dinner, not a project you schedule for Saturday, and that immediacy is the entire point of a “save your time” approach to a kitchen that’s been quietly costing you minutes for months.
Pay attention to proximity to the stove when you’re deciding exactly where the rack lands. Heat and steam from daily cooking will dull labels and, over time, shorten the shelf life of anything delicate, so a few extra inches of clearance from the burners is worth more than the convenience of having every jar directly overhead. If your kitchen runs on the humid side, favor jars with tighter seals over open pour-spouts, since the same gap that makes this zone so accessible also exposes contents to more ambient moisture than a closed cabinet would.
Once the rack is up, resist filling every slot immediately. Leave two or three open for the seasonings you’ll inevitably add later — a system that’s completely full on day one has nowhere to grow, and you’ll end up back in a cabinet drawer within a season anyway.
2. Claim the Blank Side of Your Refrigerator
 Save it
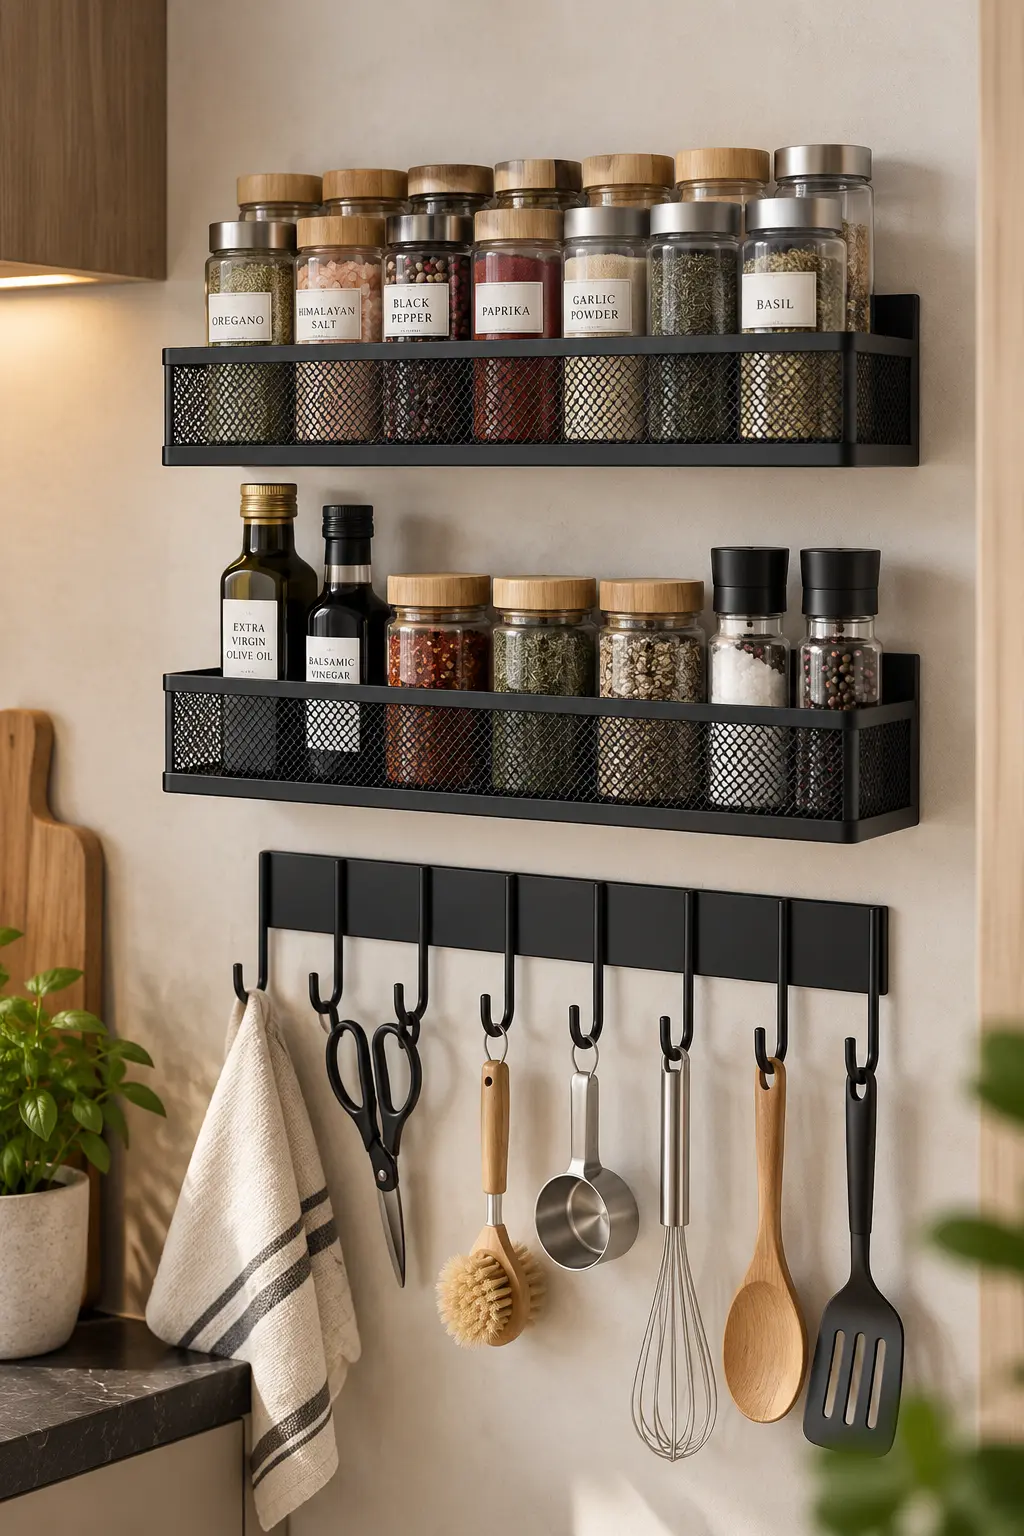
Refrigerators are the largest single object in most tiny kitchens, and the side of one — the flat panel facing the room, not the door — is almost always completely empty. It’s magnetic, it’s at arm’s reach from the stove, and in the average small kitchen it’s doing precisely nothing except taking up visual space that could be taking up storage instead.
This is the zone where counter clutter actually goes to die. Every jar, bottle, or tool currently living on your counter because “there was nowhere else for it” has a real home here instead — and moving even four or five items off the counter changes how the entire kitchen reads, the same principle covered in more depth in 10 Ways to Keep Kitchen Counters Stylish and Clutter-Free, which treats an assigned home for every object as the real fix for counter chaos, not a bigger counter.
A magnetic or adhesive-mount rack on the fridge side works because it’s install-free storage — no drilling into a rental-unfriendly wall, no screws into a cabinet you don’t want to damage. Load it with the items you reach for constantly during actual cooking: oils, everyday seasonings, a small jar of utensils. Skip anything decorative here; this zone earns its keep on function, and a fridge side crowded with pretty-but-unused objects defeats the entire purpose.
Check the weight rating before hanging anything heavy, and distribute weight evenly across the rack rather than loading one end — a small detail, but one that keeps an install-free solution actually staying installed.
Avoid mounting anything glass or breakable here if the fridge sits in a high-traffic path between the stove and the sink; a rack that gets brushed against daily needs contents that can survive the occasional bump. Plastic squeeze bottles, sealed tins, and lightweight jars hold up far better in this exact spot than anything fragile, no matter how good it looks in a product photo.
If your kitchen has more than one blank fridge side available — some galley layouts do — resist the urge to fill both with the same category of items. Split the zones by function instead: one side for cooking staples reached mid-recipe, the other for grab-and-go items like napkins or reusable bags, so each panel earns a distinct job instead of becoming a second, redundant version of the first.
3. Make Every Cabinet Shelf Do Two Jobs Instead of One
 Save it
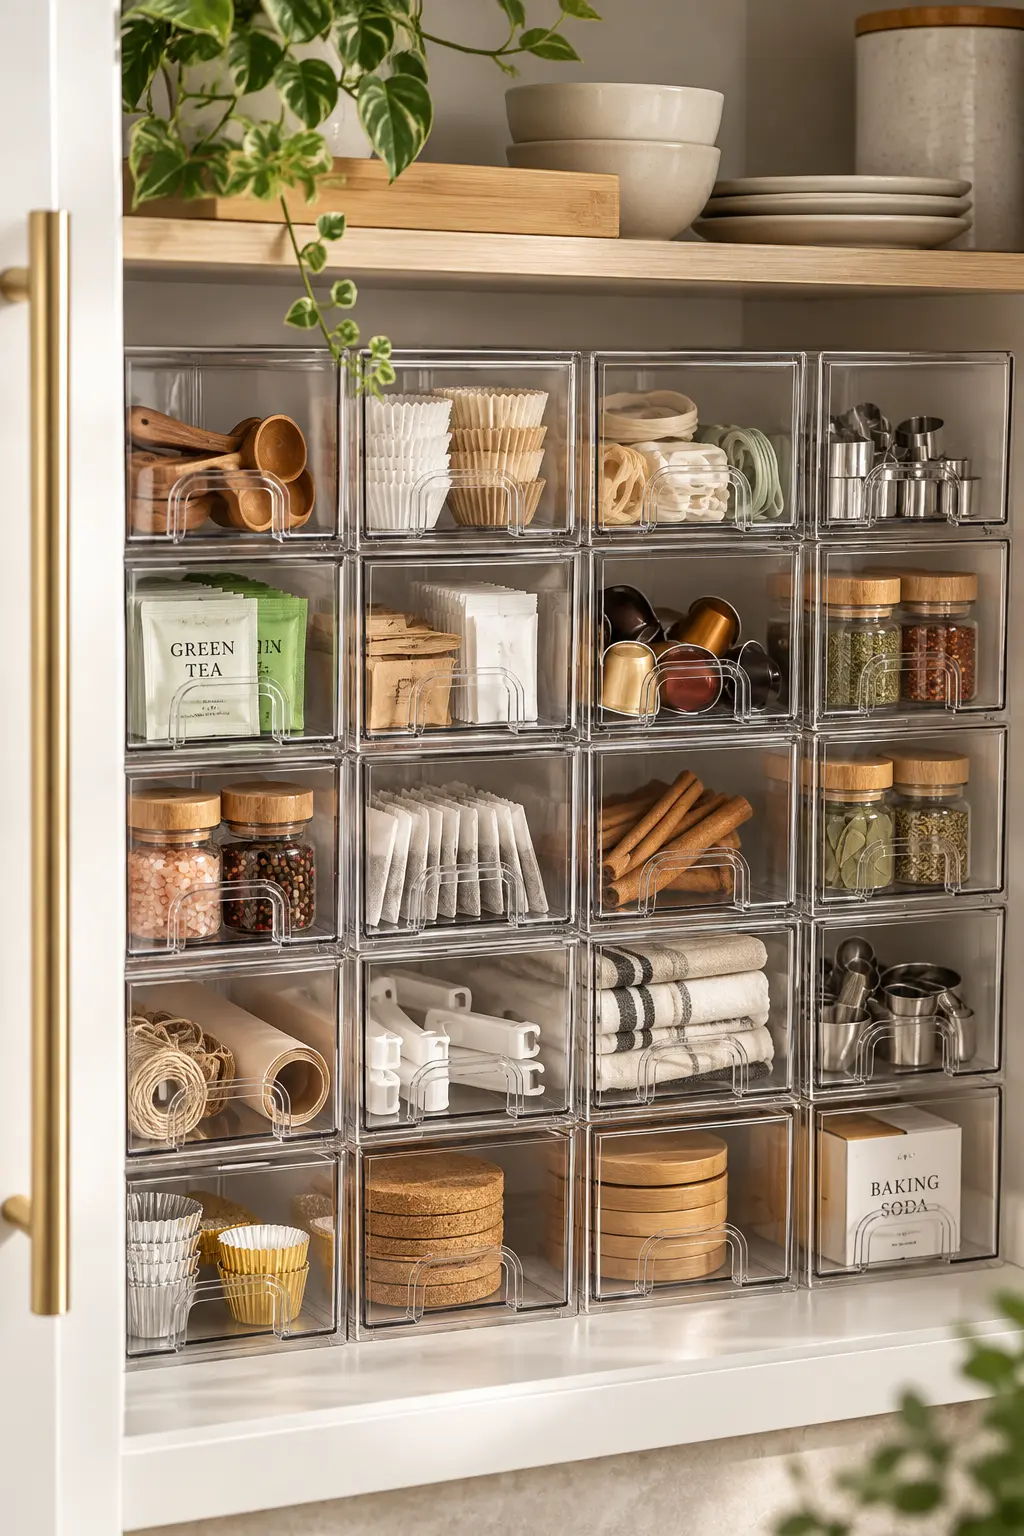
A standard kitchen cabinet shelf has roughly eight to ten inches of vertical clearance and almost nothing on it uses all of that height — a stack of plates, a row of bowls, a cluster of mugs, all leaving several inches of pure air above them that’s technically available and practically unusable, because nothing structural exists to hold a second layer.
That wasted air is the single biggest source of hidden capacity in a tiny kitchen’s cabinets, and it’s invisible until you actually stack something into it. How to Arrange Open Shelves in Your Kitchen Like a Designer covers the display logic for shelves you can see; this is the same principle applied to the ones you can’t, where function replaces visual composition as the only goal.
Clear, stackable bins turn one shelf into two functional layers — canned goods or boxed items on the bottom tier, a second tier of bins above holding smaller, less-frequently-grabbed items. The clarity matters more than it sounds like it should: opaque containers get forgotten within a month, while clear ones stay in active rotation because you can see the contents without lifting a lid.
Group by category, not by size, so a bin holds “baking” or “breakfast” rather than “medium-sized boxes.” That’s the difference between a system you maintain automatically and one that collapses back into chaos the first busy week you don’t have time to think about it.
Measure the shelf’s actual clearance before stacking, including the small gap most cabinets leave above the top shelf for the door hinge mechanism — a bin stack that’s a half-inch too tall will jam the door and undo the entire fix on day one. Choose a bin height that leaves a visible finger’s width of clearance even when the cabinet is fully loaded, since a system that’s technically too tall to close properly gets abandoned within the week.
Reserve the very top tier for items you restock rarely, since reaching it means either a step stool or a stretch, and save the eye-level shelf below for what you’re grabbing daily. This small hierarchy — frequency mapped directly to reach — is the difference between a stacked cabinet that saves time and one that just relocates the digging to a higher shelf.
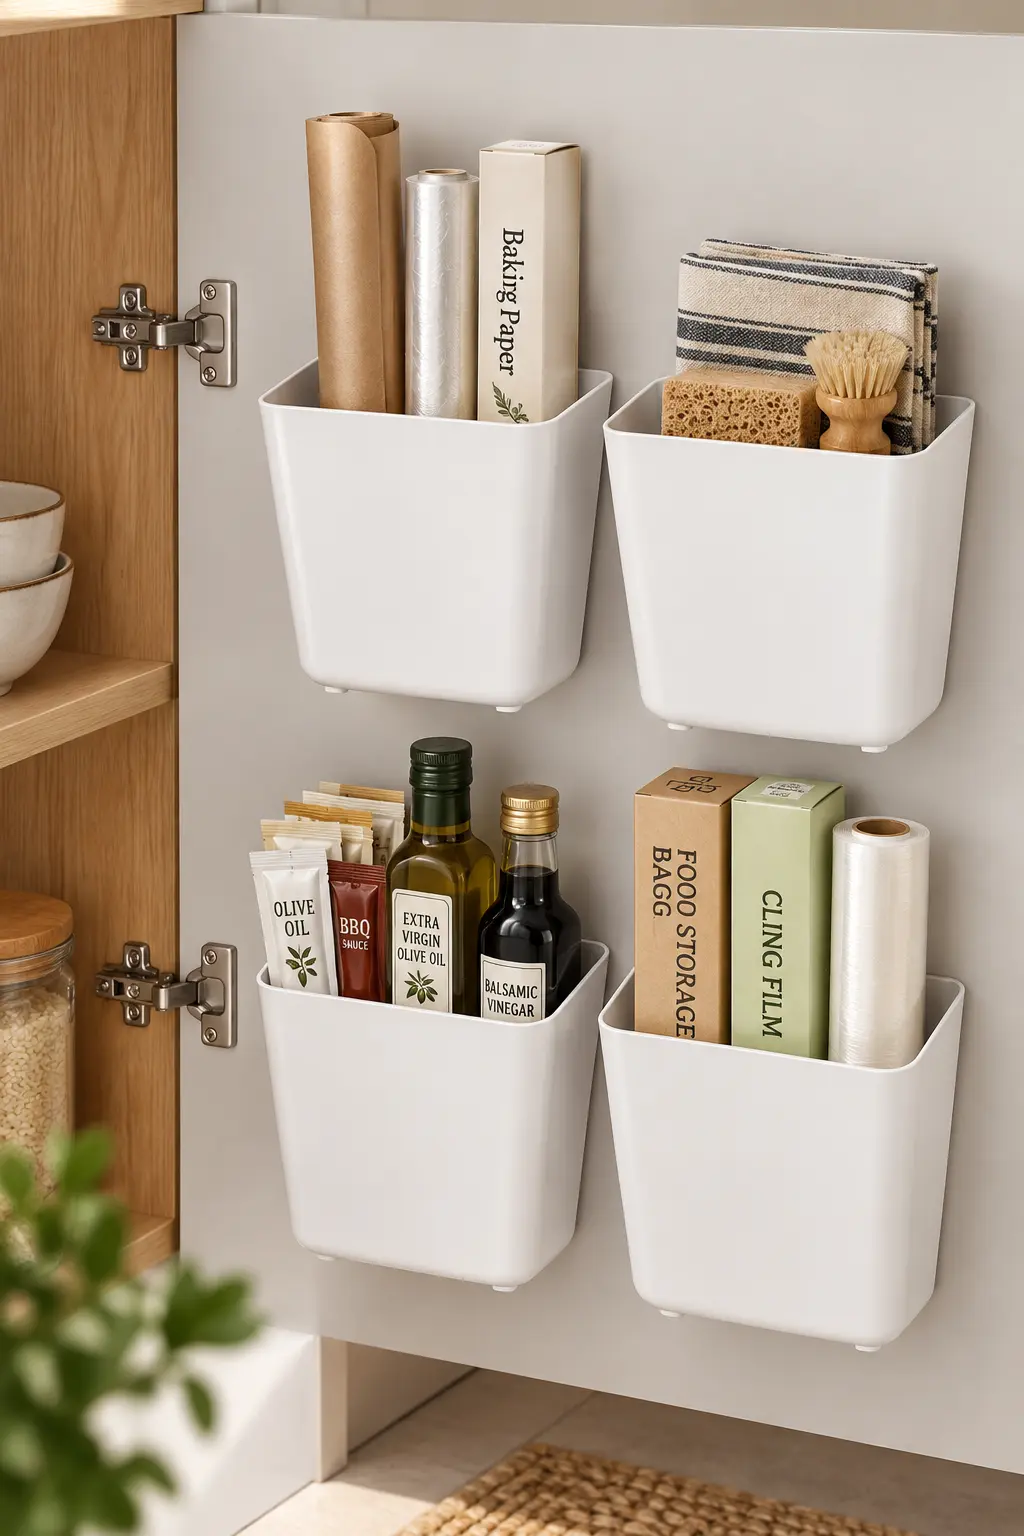
4. Turn a Blank Cabinet Door Into Storage You Forgot You Had
 Save it
The inside of a cabinet door is, structurally, wasted space in nearly every kitchen — a flat panel a few inches deep, facing directly into the cabinet’s own interior, doing nothing but swinging open and shut. In a full-size kitchen that’s a minor inefficiency. In a tiny one, it’s several square feet of missing storage hiding in plain sight behind every single door you own.
This is especially valuable in a rental, where drilling isn’t an option and every storage decision has to double as a decorating one — a constraint explored in full in The Best Small Kitchen Decor Ideas for Apartments, which treats reversibility as the actual design brief rather than a limitation to work around.
An adhesive-mount organizer solves this without a single hole in the door — strong mounting strips hold it flush against the panel, and it comes off clean when you move. Use this zone for flat, lightweight items that are hard to store anywhere else: cutting boards you’re not currently racking elsewhere, foil and wrap boxes, cleaning cloths, anything with a thin profile that would otherwise eat shelf depth it doesn’t need.
Measure the door’s actual swing clearance before mounting — a rack that’s too deep will hit the shelf behind it every time the door closes, which turns a clever fix into a daily annoyance. Mount low enough that the door still closes freely with the organizer loaded, not just when it’s empty.
Choose the hinge side carefully. A door-mounted organizer positioned near the hinges rather than the outer edge swings through a shorter arc, which means less stress on the adhesive over time and a lower chance of the whole thing working itself loose after months of daily open-and-close cycles. If you’re outfitting more than one door, stagger what lives on each rather than duplicating the same category twice — one door for wraps and flat goods, a second for cleaning cloths and smaller loose items.
This is also the fix most worth revisiting a few weeks in. Adhesive mounts settle into their final grip after the first several days of use, so a quick check-in — pressing along the edges, confirming nothing has started to peel — catches a loose corner before it becomes an organizer on the floor.
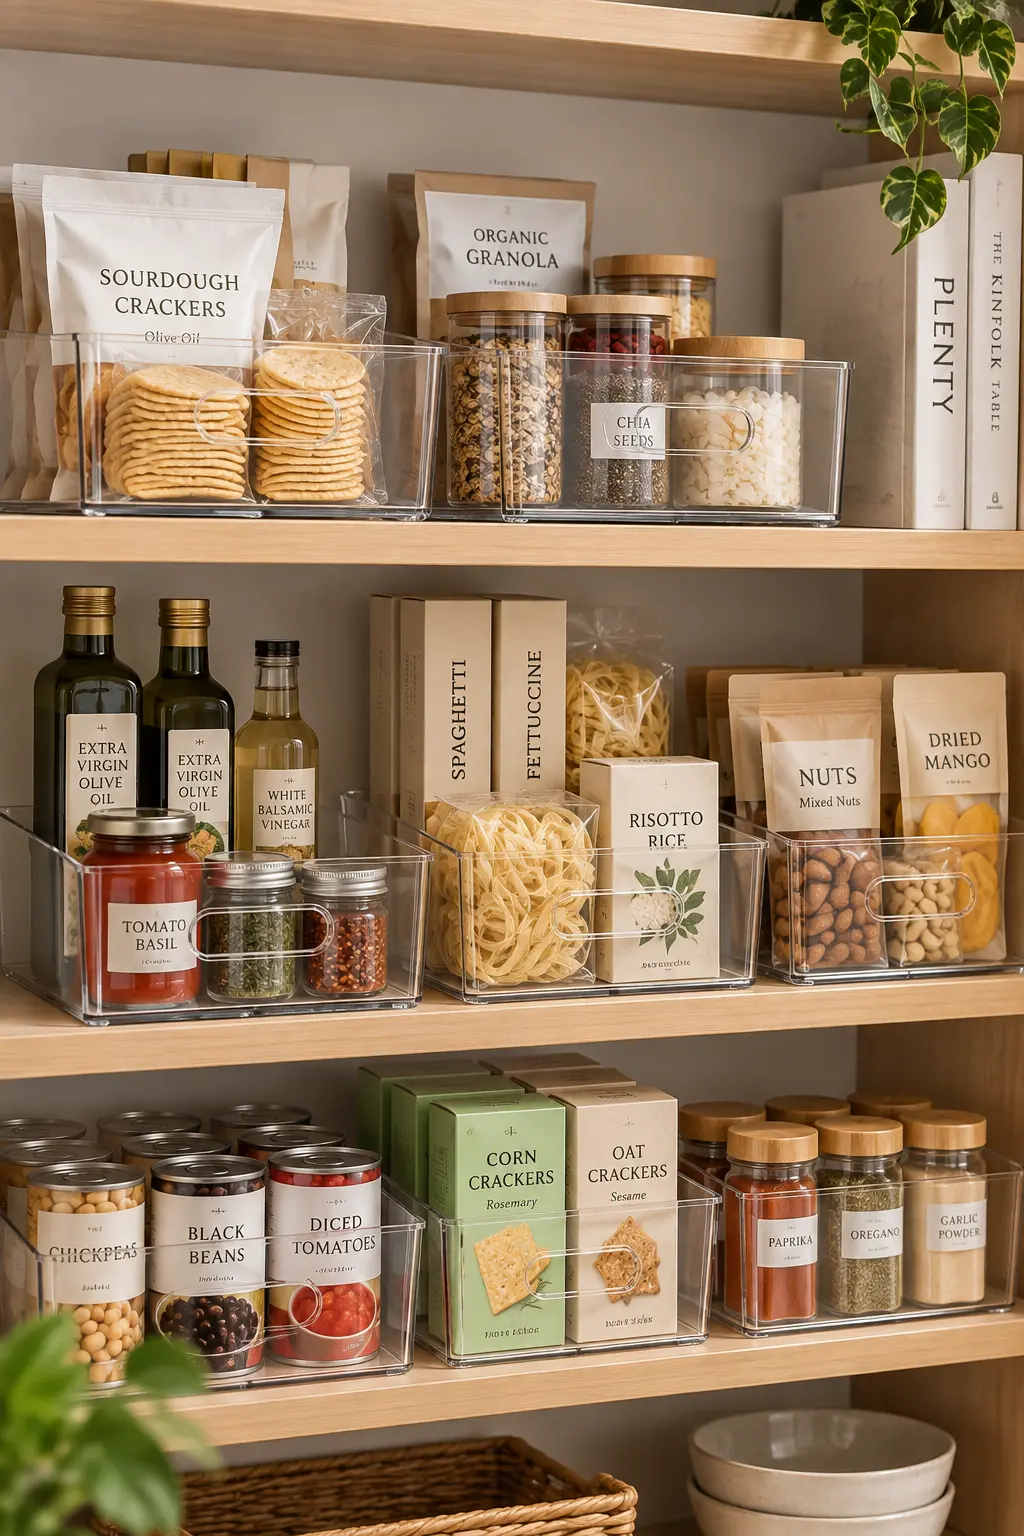
5. Rescue the Cabinet Where Pots Go to Disappear
 Save it
Every tiny kitchen has one cabinet that’s technically for pots and pans and functionally a game of Jenga — lids that don’t match what’s underneath them, a stockpot wedged sideways, and a retrieval process that involves pulling out four items to reach the fifth. It’s not a small-kitchen problem exactly; it’s a no-system problem that a small kitchen simply can’t absorb the way a bigger one might.
A structured organizer set — dividers or a tiered rack sized for the cabinet’s actual interior — gives every pot a fixed, vertical slot instead of a horizontal pile. Vertical storage means you pull exactly the one pan you need without disturbing the four stacked on top of it, which is the entire difference between a cabinet that works and one that fights you every single time dinner starts.
Sort before you install, not after. Pull everything out, keep what you actually cook with weekly, and box up the specialty items — the fish poacher, the extra-large stockpot — for a less-trafficked cabinet or a top shelf. The organizer works best with a realistic inventory, not the full collection you’ve accumulated over a decade of gift-giving occasions.
Once it’s installed, resist the temptation to wedge in “just one more thing” that doesn’t fit the assigned slots. A system with one exception stops being a system within a month; the whole value here is that everything has exactly one home, every time, without negotiation.
Match lids to their pots at install time, not later. Slot dividers work best when a lid and its pot occupy adjacent positions, so retrieving one means the other is already within reach — a small sequencing detail that saves a second, separate search every time you cook, which adds up across a week faster than it sounds like it would.
If the cabinet also has to hold baking sheets or cutting boards alongside cookware, give those flat items their own dedicated vertical slot at one end rather than laying them flat across the top of everything else. A single flat item resting on top of a sorted system is usually the first thing that knocks the whole arrangement back into disorder.
6. Double a Single Shelf's Capacity in One Move
 Save it
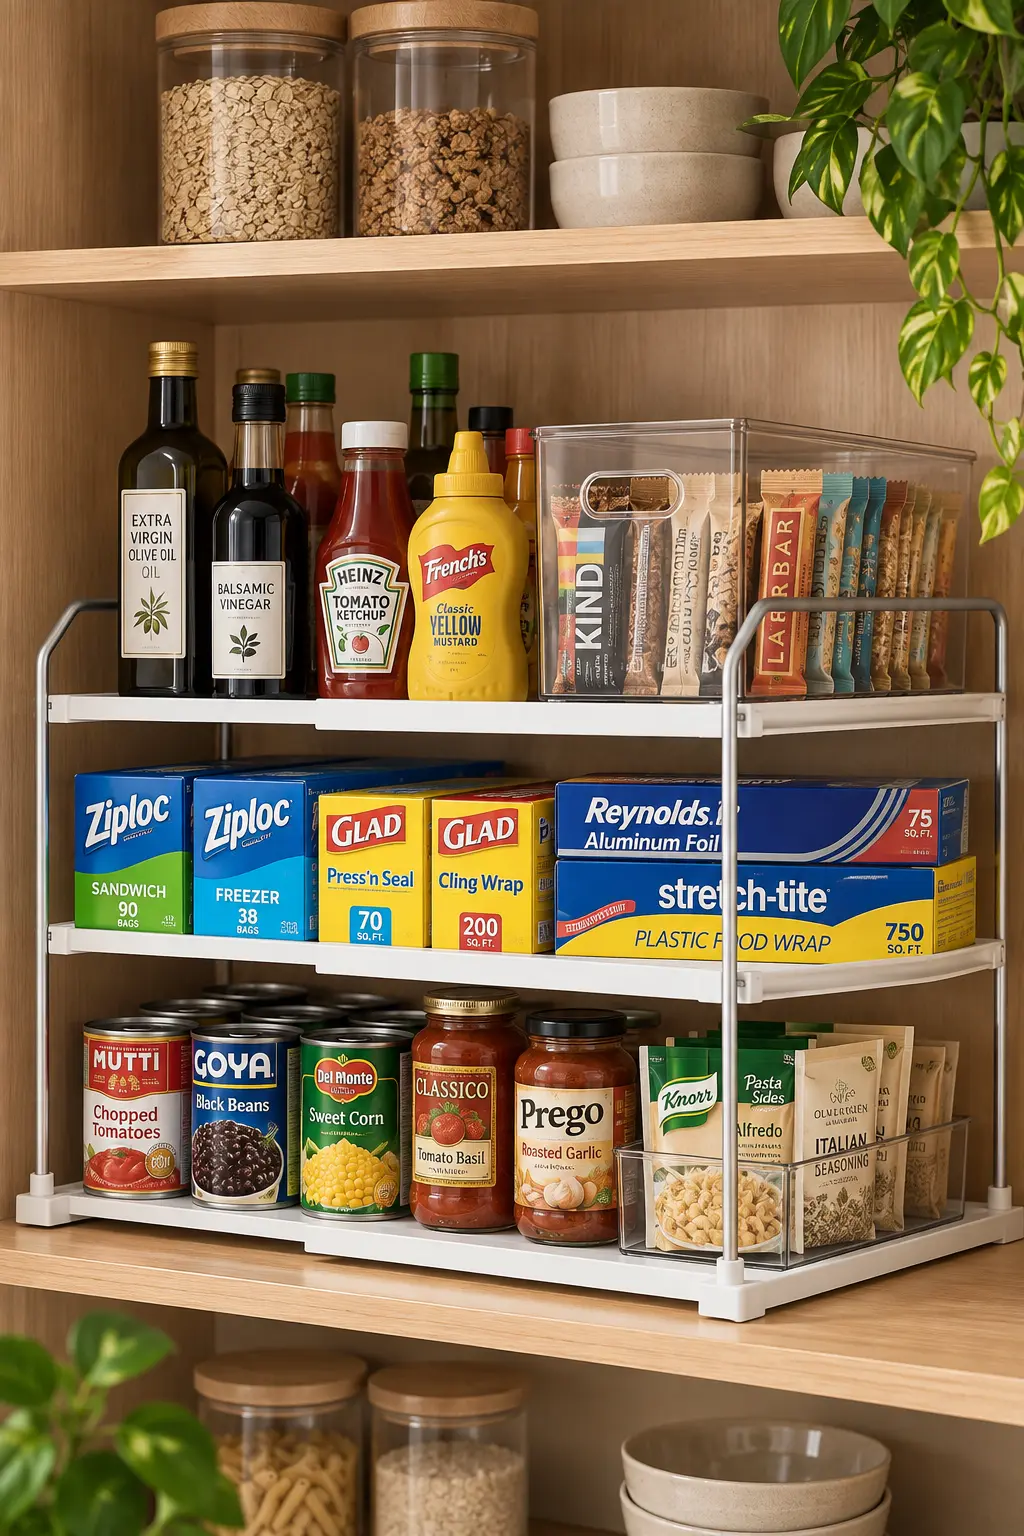
Not every cabinet needs a full organizer set — sometimes the fix is simpler than that: one shelf, currently holding a single layer of items with wasted height above it, that just needs to become two shelves instead of one. This is the lowest-effort, highest-return fix on this entire list, because it requires no sorting decisions, no category system, nothing but adding a physical second tier.
An extendable riser sits directly on the existing shelf and expands to fit the cabinet’s actual width, creating a stable second level above whatever’s already there. It requires zero tools and zero permanence — lift it out, and the cabinet returns to exactly how it was, which makes it one of the few fixes on this list that’s genuinely completed in under two minutes.
Use the new upper tier for lighter, smaller items — spice jars, small boxed goods, tea tins — since the riser’s weight rating is lower than the shelf itself, and use the lower level, still fully visible underneath, for what you were already storing there. The net result: the same footprint, meaningfully more usable surface, and nothing about the cabinet’s structure permanently altered.
This is also the fix to reach for first if you’re not sure where to start. It’s cheap, instant, and reversible, which makes it a low-risk way to prove to yourself that a small change in one cabinet is worth doing before you commit real time to the more involved zones on this list.
If one shelf works, look for a second candidate before you stop. Most tiny kitchens have at least two or three cabinets with the same wasted vertical gap — above stacked mugs, above canned goods, above stacked bowls — and each one takes the same two minutes to fix once you know to look for it. Treat the first riser as proof of concept, not a one-time exception.
Watch how the riser performs under its actual, loaded weight for the first week rather than assuming the packaging’s rating tells the whole story; cheaper models can flex slightly under an uneven load, and it’s easier to redistribute items early than to discover a sag after the shelf’s been set for a month.
7. Give Your Cutting Boards a Home That Isn't "Leaning Against Something"
 Save it
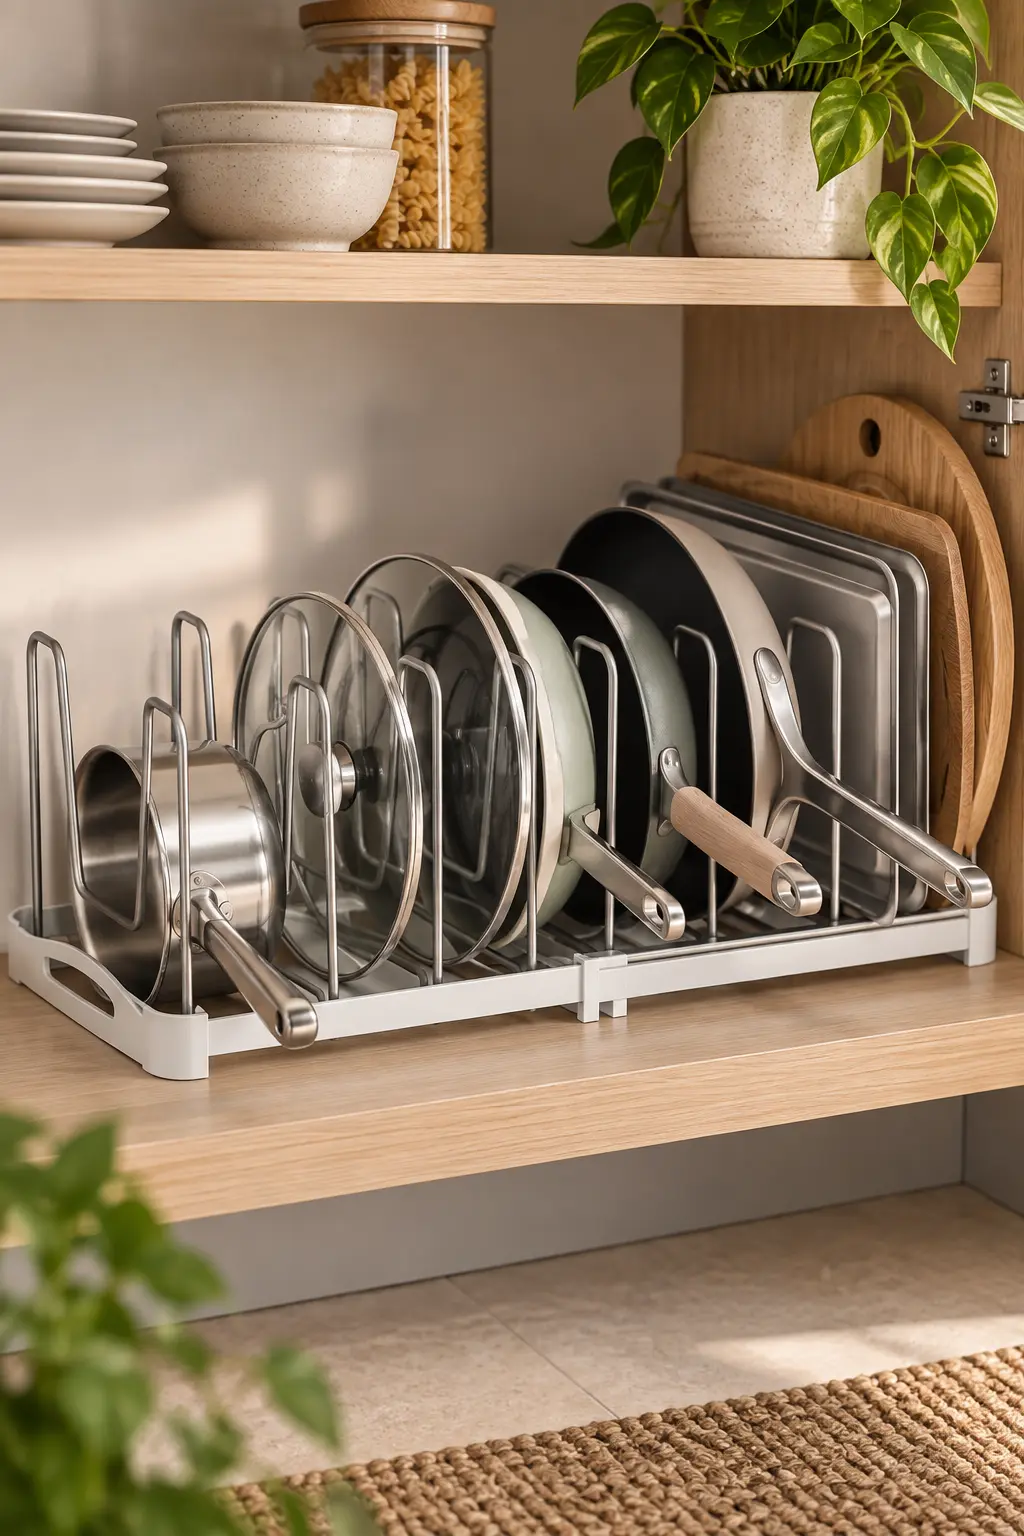
Cutting boards are among the most-used objects in any kitchen and, in a tiny one, among the most homeless. They end up leaning against the backsplash, propped behind the stove, or stacked flat inside a cabinet where they crush whatever’s beneath them — because a flat, wide, awkwardly-shaped object rarely fits neatly into a cabinet designed around round pots and square boxes.
Solving this is part of a broader pattern worth understanding: making a genuinely small kitchen work isn’t about fighting its footprint, it’s about rethinking vertical space the way Modern Kitchen Decor Ideas for Small Spaces to Copy Now approaches an entire small room — treating height as the resource you actually have plenty of, even when floor and counter space are gone.
This organizer solves two problems in the same footprint: it extends to fit a cabinet’s width the same way a shelf riser does, while also including a dedicated vertical slot that racks a cutting board on its edge rather than flat. Storing boards vertically means they take up a few inches of width instead of the full depth of a stacked pile, and it means grabbing the one you want doesn’t require moving three others first.
Assign one slot per board and load them by size, largest at the back, so the one you reach for most — probably the mid-size everyday board — sits closest to hand. If you own more boards than the unit has slots, that’s usually a sign it’s time to donate the ones that haven’t been used since last year rather than force a sixth board into a five-slot system.
Make sure boards are fully dry before racking them vertically, especially wood ones. A damp board stored on edge in a tight slot dries unevenly, which is one of the more common ways a good cutting board starts to warp over time. A quick towel-dry or an hour on a drying rack before it goes back into the organizer costs almost nothing and meaningfully extends how long the board stays flat and usable.
If the same unit’s extendable shelf section is also holding boxed goods, keep the cutting board slot itself completely dedicated — mixing food storage and board storage in one physical compartment makes cleaning the zone properly a lot more of a hassle than treating them as two separate jobs sharing one piece of hardware.
8. Reinforce the One Cabinet That's Always Overloaded
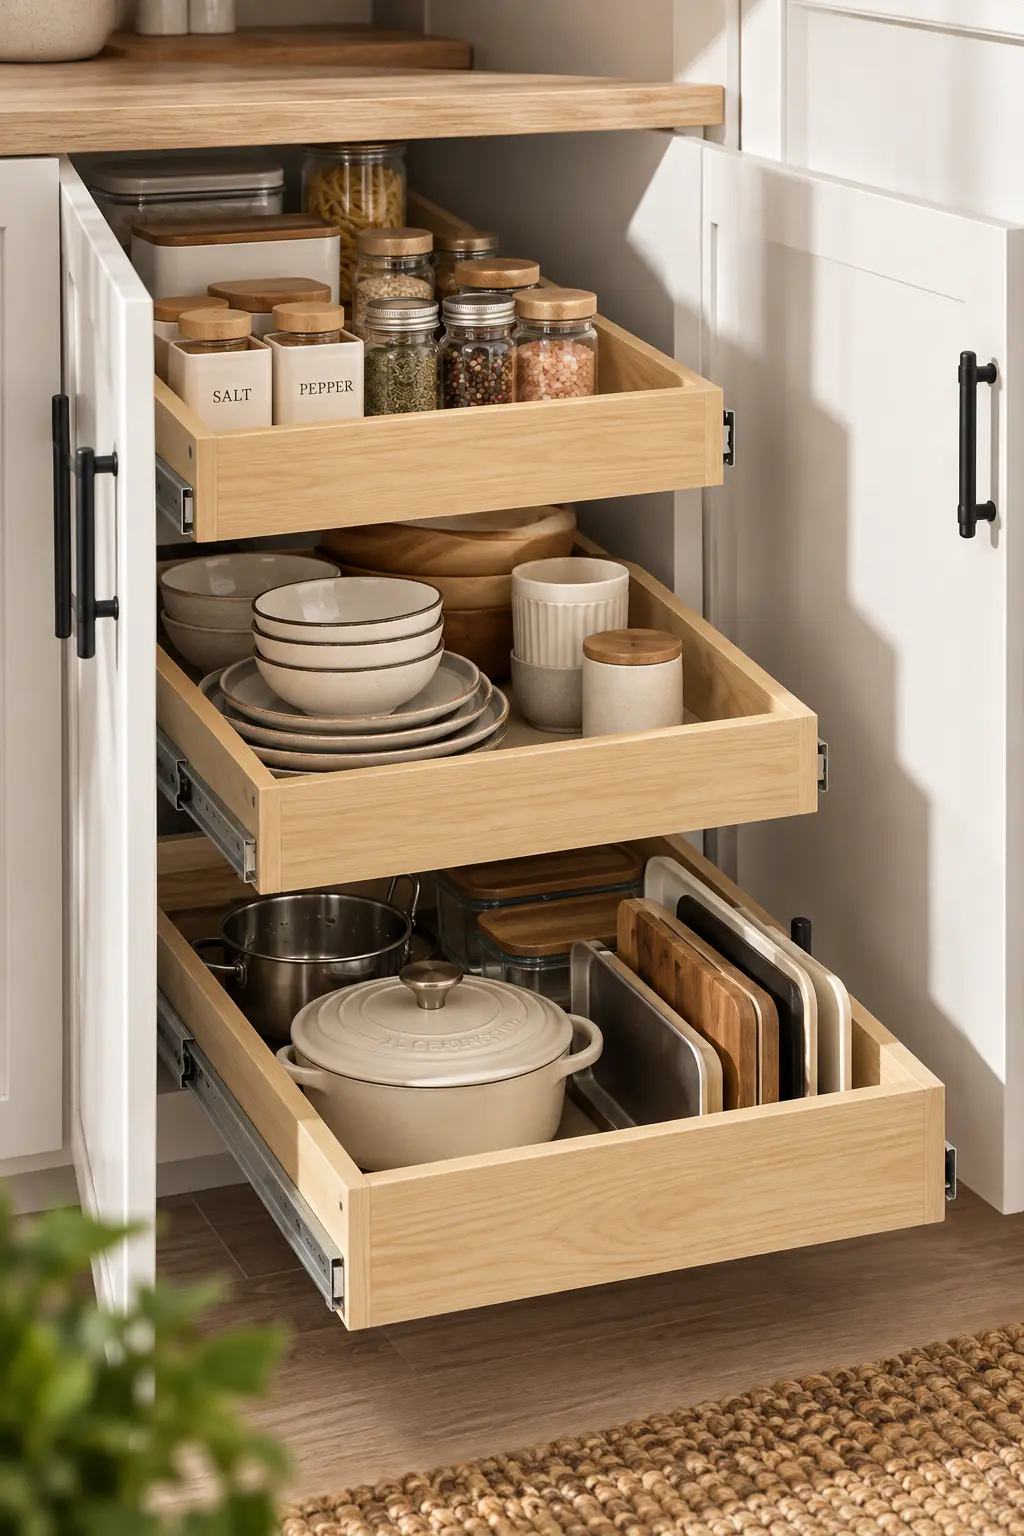
 Save it
Every kitchen has a cabinet that takes more weight than it was ever really designed for — the one holding the cast iron, the stand mixer attachments, the heavy stoneware — and in a tiny kitchen that cabinet gets used constantly because there’s nowhere else for those items to go. Standard wire or thin plastic organizers buckle under that kind of load within a few months, which means the fix has to start with hardware rated for actual weight, not just volume.
A heavy-duty organizer built for genuine load-bearing use changes what that cabinet can safely hold without sagging shelves or a rack that slowly bends out of shape. Reserve it specifically for the cabinet’s heaviest, most frequently used items — the pieces you’d otherwise be lifting out from the bottom of an unstable stack every single time you cook.
Check the stated weight capacity against what you actually plan to store, and err toward the sturdier option if you’re between two choices; replacing a bent organizer six months in costs more time than buying the right one the first time. Position it toward the back of the cabinet if the door swing allows, so the heaviest items aren’t the first thing shifting every time the door opens and closes.
This is the one fix on this list where durability matters more than speed of install, because a cabinet doing real structural work needs to hold up under daily use, not just look organized on day one.
Give the surrounding shelf a quick check for sag or wear before you install anything heavy-duty on top of it. A shelf that’s already showing stress from years of overload needs reinforcement of its own — a shelf-support bracket or a sturdier peg — before a new organizer, however well-built, can actually solve the underlying problem rather than just repeating it on a nicer rack.
Rotate what sits at the very front occasionally, even within a well-organized heavy cabinet. The items closest to the door get lifted out and set back in far more often than anything toward the rear, and that repeated handling is where wear actually accumulates — spreading it across the whole set rather than always the same front piece keeps everything performing evenly for longer.
9. Organize Under the Sink Without Fighting the Pipes
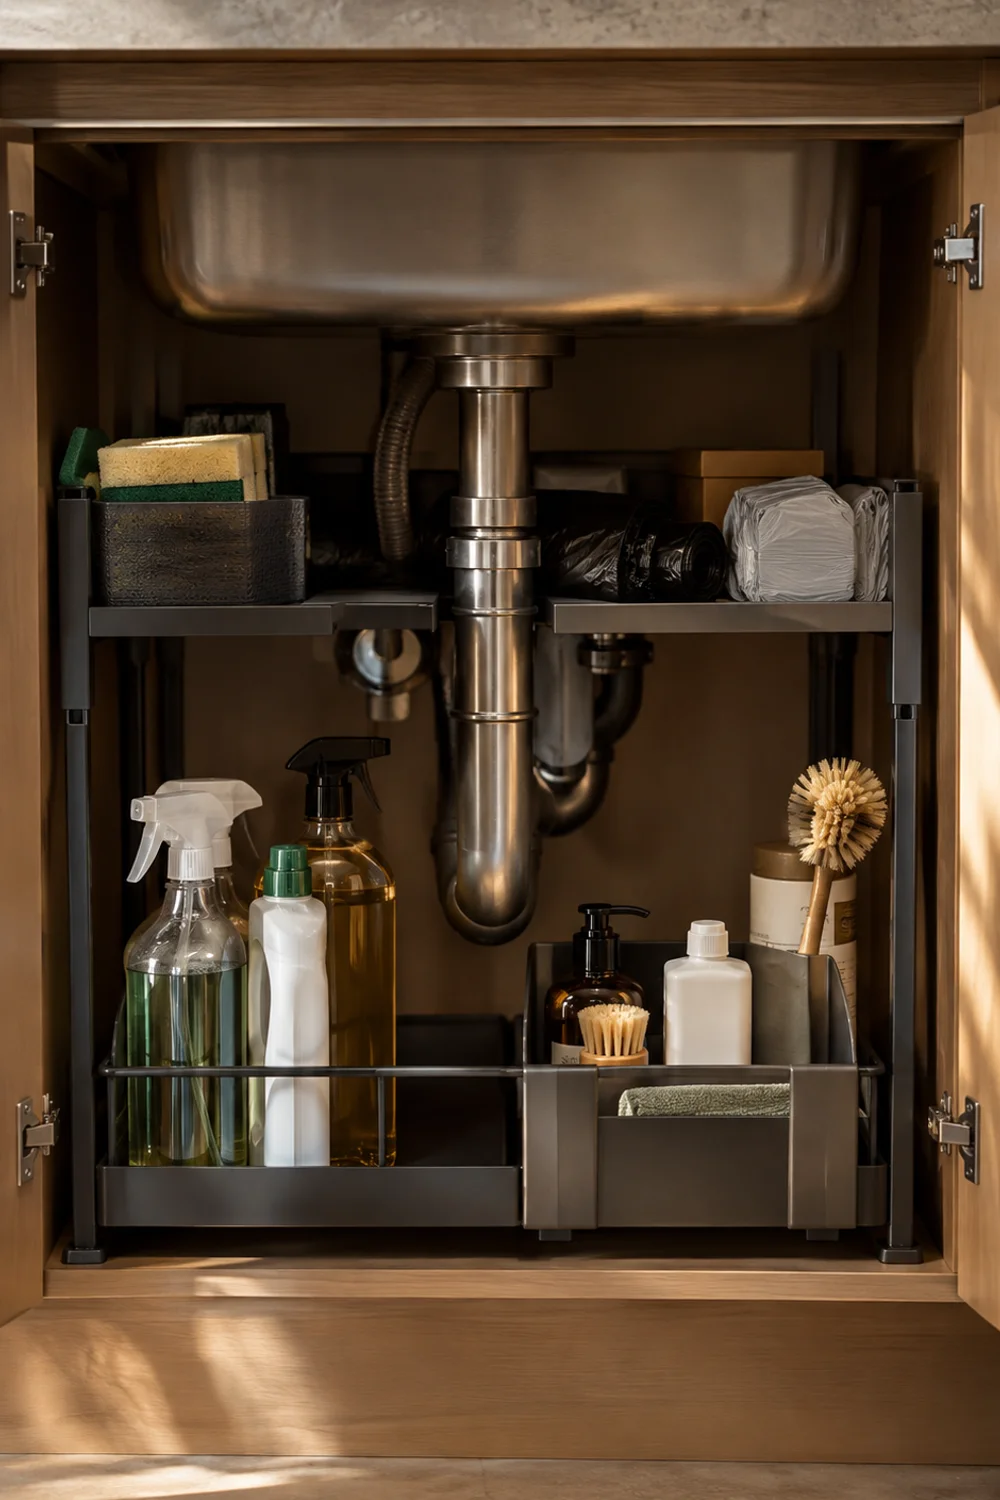
 Save it
The cabinet under the sink is uniquely difficult to organize because it isn’t actually one rectangular space — a drain pipe, a P-trap, and sometimes a garbage disposal all interrupt the interior at irregular heights, which means most standard organizers either don’t fit at all or waste the exact space they were bought to reclaim.
An organizer designed to work around plumbing obstructions, rather than assuming an empty rectangle, is the difference between a functional under-sink zone and a cabinet you avoid opening because everything inside has been shoved in around the pipes with no real order. Look for adjustable or two-tier designs that can flex around whatever configuration your specific sink has, since no two under-sink cabinets are built quite the same.
Keep cleaning supplies in the front, easy-access zone and anything used less often — extra sponges, spare trash bags — toward the back or on a higher tier. Consider a small tension rod or hook system for spray bottles specifically, since they’re often the most awkward items to stack flat and the ones most likely to tip and roll into the pipe cavity where you can’t easily reach them.
This is a zone most people organize once and never revisit, which makes it worth getting right the first time rather than treating it as a lower priority than the cabinets you see every day.
Line the cabinet floor itself before you install anything on top of it, even if the organizer sits above the actual leak-prone zone. A thin, wipeable liner turns an inevitable minor drip from a project into a thirty-second cleanup, and it protects whatever’s stored just above from moisture that migrates further than you’d expect in a small, enclosed space.
Do a final pass with the cabinet door closed and reopened a few times before calling the zone finished. Under-sink doors are often shallower than standard cabinet doors, and a tall bottle or an organizer’s top edge that clears the frame when the door’s wide open can still catch on a mostly-closed swing — worth catching now rather than every time you reach for dish soap.
10. Contain Countertop Clutter in One Single Move
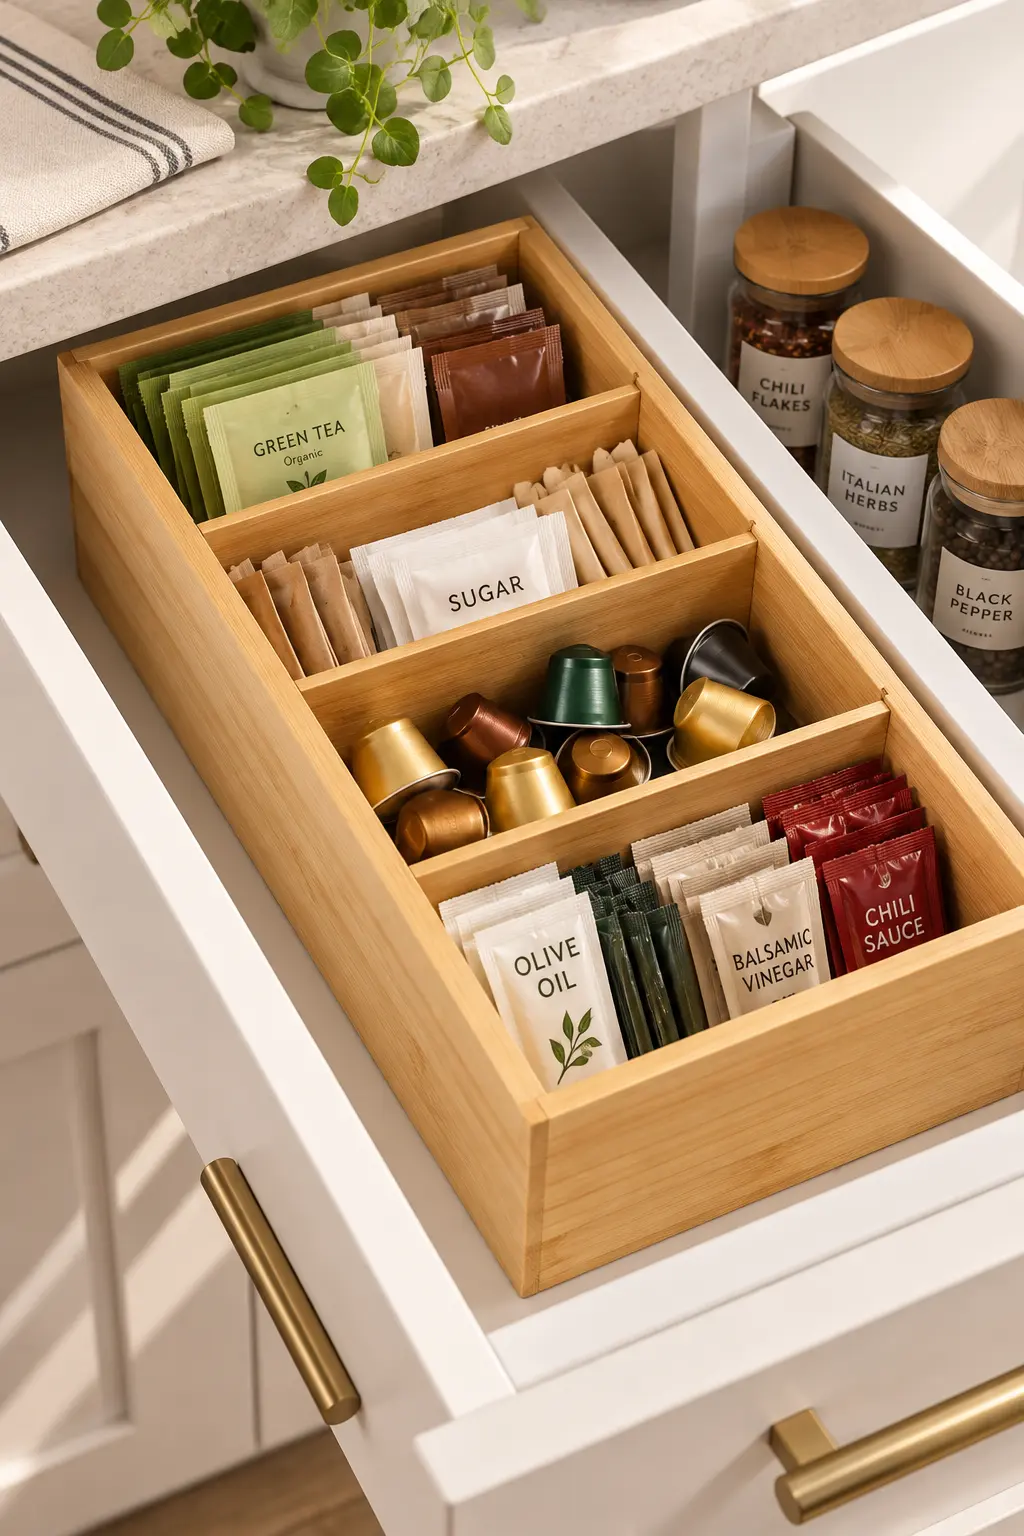
 Save it
A tiny kitchen counter accumulates orphaned objects fast — a pair of scissors, a roll of tape, loose utensils, a phone charger — each one small enough to feel harmless on its own, but collectively responsible for a counter that never quite looks clear no matter how many times you wipe it down. The problem usually isn’t too much stuff; it’s stuff with no assigned container.
The same idea drives How to Style Kitchen Trays for a Perfectly Organized Countertop, which treats a tray as functional infrastructure for one specific job rather than a single decorative object — the difference between corralling clutter on purpose and just letting it accumulate in whatever configuration happens.
A multi-section caddy gives each category of small object its own compartment in a single footprint, which means the fifteen small items currently scattered across your counter become one contained unit instead. Assign each section a specific job — writing tools in one, cooking utensils in another — rather than letting it become a catch-all, or you’ll simply have relocated the clutter instead of solving it.
Place it in the zone you actually use most, typically beside the stove or near where mail and keys land when you walk in, so the container works with your existing habits instead of asking you to build new ones. A good test: after a week, check whether you’re actually returning items to their sections or if they’re drifting back onto open counter — if it’s the latter, the caddy is in the wrong spot, not the wrong product.
Keep the caddy’s contents genuinely functional rather than letting it slowly absorb decorative objects too. It’s tempting to add a small plant or a decorative object to “finish” the composition, but every non-functional item that moves in takes a compartment away from something that was actually solving a clutter problem, which quietly defeats the whole purpose of a containment tool.
If the counter still feels crowded once the caddy is in place, that’s usually a sign there’s a second category of object — mail, chargers, non-kitchen items — that doesn’t belong on a kitchen counter at all rather than a sign you need a bigger caddy. Not everything scattered across a counter needs a kitchen solution; some of it just needs a different room.
11. Dispense Dry Goods Instead of Digging Through Bags
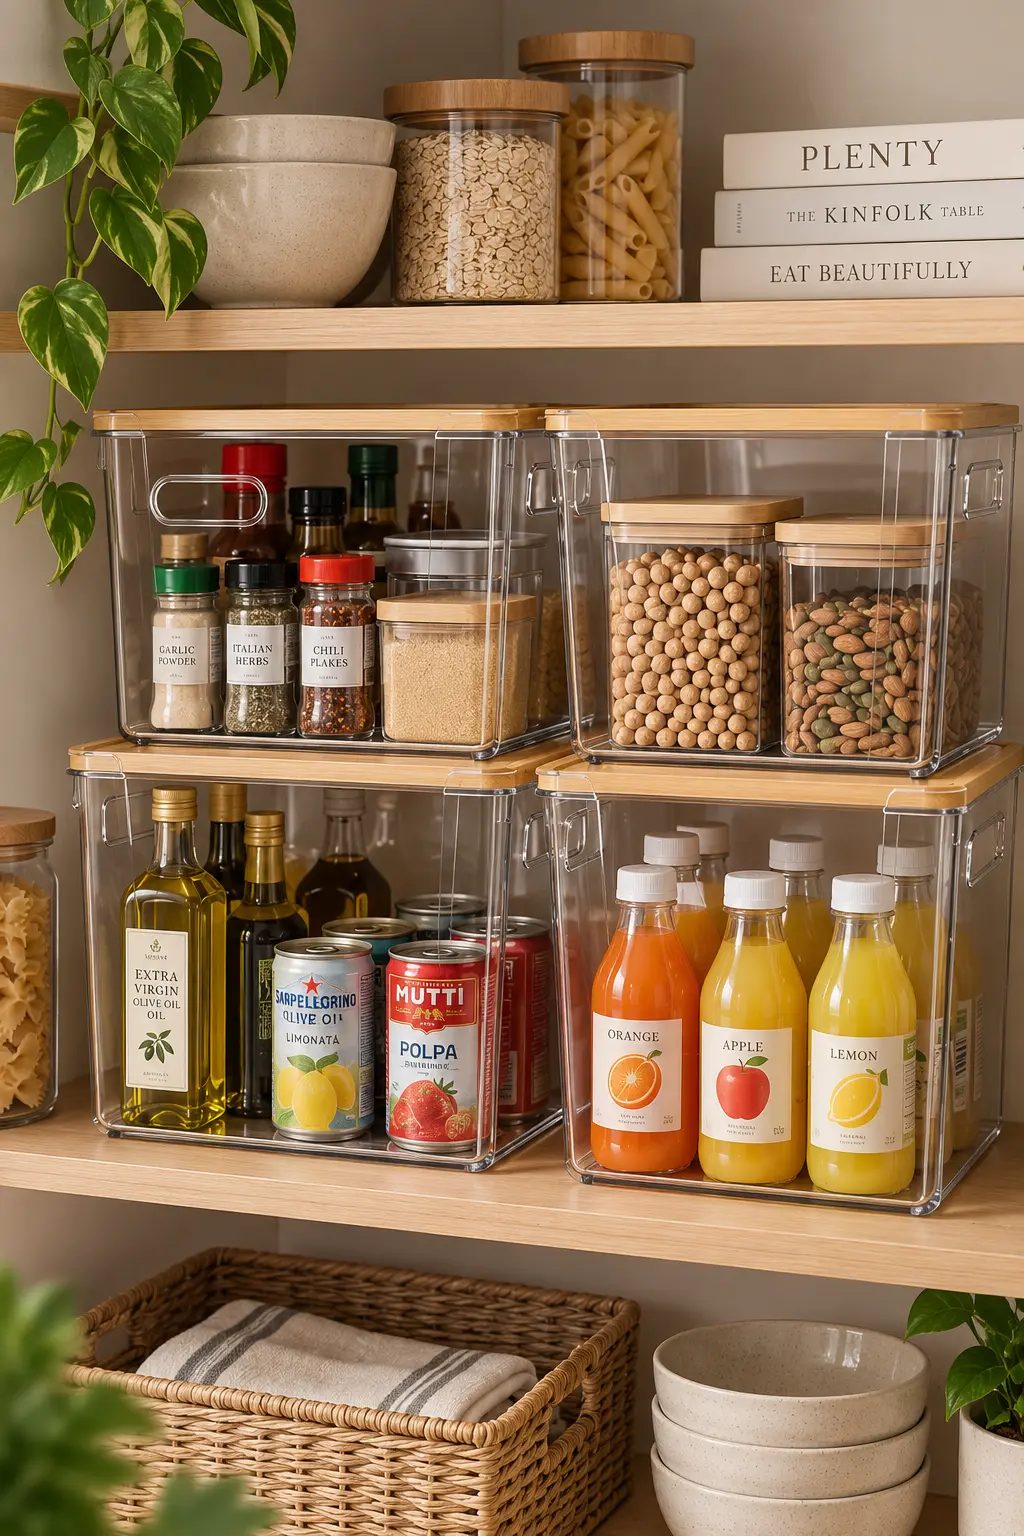
 Save it
Bagged dry goods — rice, pasta, cereal, flour — are one of the least space-efficient ways to store food in a small kitchen. Bags slump, tear, and stack unevenly, which means a shelf of them wastes height and makes portioning a genuine chore every time you cook, especially with rice or flour where you’re eyeballing a measurement out of an awkward, half-full bag.
A gravity-fed dispenser replaces that entire process: fill it once, and every future use is a lever pull or a flip-top scoop instead of wrestling an unstable bag. Beyond the convenience, dispensers store more efficiently than bags do — rigid, stackable containers use a shelf’s full height and depth in a way a slumping bag never can, which is real reclaimed capacity in a kitchen where every inch counts.
Transfer dry goods immediately after grocery shopping rather than letting bags pile up “to deal with later” — the entire benefit disappears if the dispenser sits empty while three backup bags wait beside it. Label each one with the contents and, if you like to plan ahead, the purchase date, since a clear container makes it easy to see what’s running low before you’re out entirely.
This is a small shift in daily behavior more than a storage fix, but it’s the kind of behavior change that compounds — a few seconds saved on portioning, every single time you cook, adds up faster than almost anything else on this list.
Keep a small funnel or scoop stored directly beside the dispensers rather than in a separate drawer across the kitchen. The entire time savings of this fix depends on the transfer being genuinely fast, and a five-second detour to find a funnel every time you restock is exactly the kind of small friction this whole approach is meant to eliminate.
Start with the two or three dry goods you go through fastest — usually rice, pasta, or a household staple — rather than converting the entire pantry at once. A gradual rollout means you’re only ever refilling containers you’ve already emptied through normal use, instead of decanting an entire pantry’s worth of half-full bags in a single sitting.
12. Build Storage That Adjusts to What You Actually Own
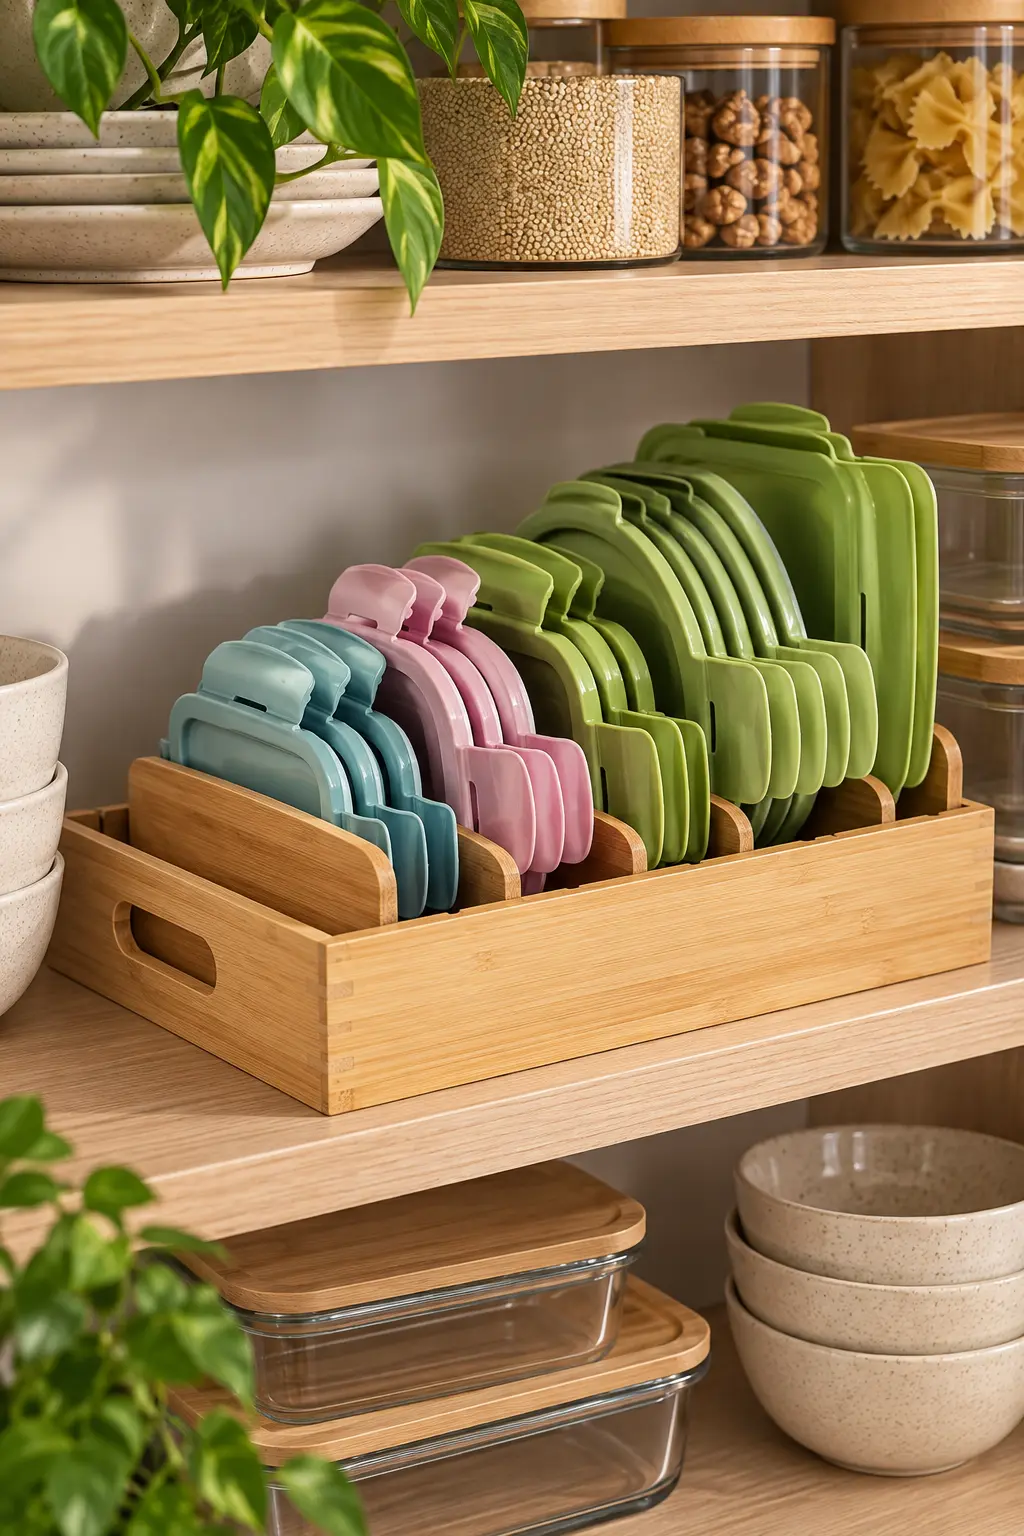
 Save it
Most storage products are built for average use, which means they’re subtly wrong for almost everyone — bins sized for a family of four when you’re cooking for one, or dividers spaced for standard cans when half your pantry is oddly-shaped snack bags and specialty jars. Fixed-size storage works fine until your actual inventory doesn’t match the assumption it was built around.
An adjustable organizer solves this by letting the compartments themselves flex to match what you’re actually storing, rather than asking your groceries to conform to a fixed layout. That flexibility matters most in a tiny kitchen specifically, where there’s no slack to absorb a container that’s the wrong shape for its contents — every inch of mismatch is an inch you don’t have to spare.
Reconfigure it seasonally or whenever your shopping habits shift meaningfully, rather than setting it once and assuming it stays optimal forever; a system built to adjust only pays off if you actually use that flexibility instead of treating the default configuration as permanent. Keep the items you buy most consistently in the most accessible compartments, and reserve the awkward corners for things you restock rarely.
The larger lesson here applies beyond this one container: a tiny kitchen rewards storage that bends to your actual habits far more than it rewards storage that looks impressive but assumes a version of your kitchen that doesn’t quite match the real one.
This is also the organizer worth pulling double duty outside the kitchen proper, in the drawer or cabinet closest to it — cleaning supplies, spare kitchen linens, even light tools, if that’s genuinely what’s crowding a nearby shelf. An adjustable system’s real value isn’t the specific category it was marketed for; it’s the willingness to reconfigure around whatever irregular category of stuff needs a home next.
Note which compartment sizes you end up using most after the first month, and let that inform how you set it up the next time you reconfigure. Most people default to even divisions the first time and discover their actual inventory is lopsided — a few large items, many small ones — which is exactly the kind of real-use data a fixed-size bin could never have given you.
13. Build a Pantry Wall Even When You Don't Have a Pantry
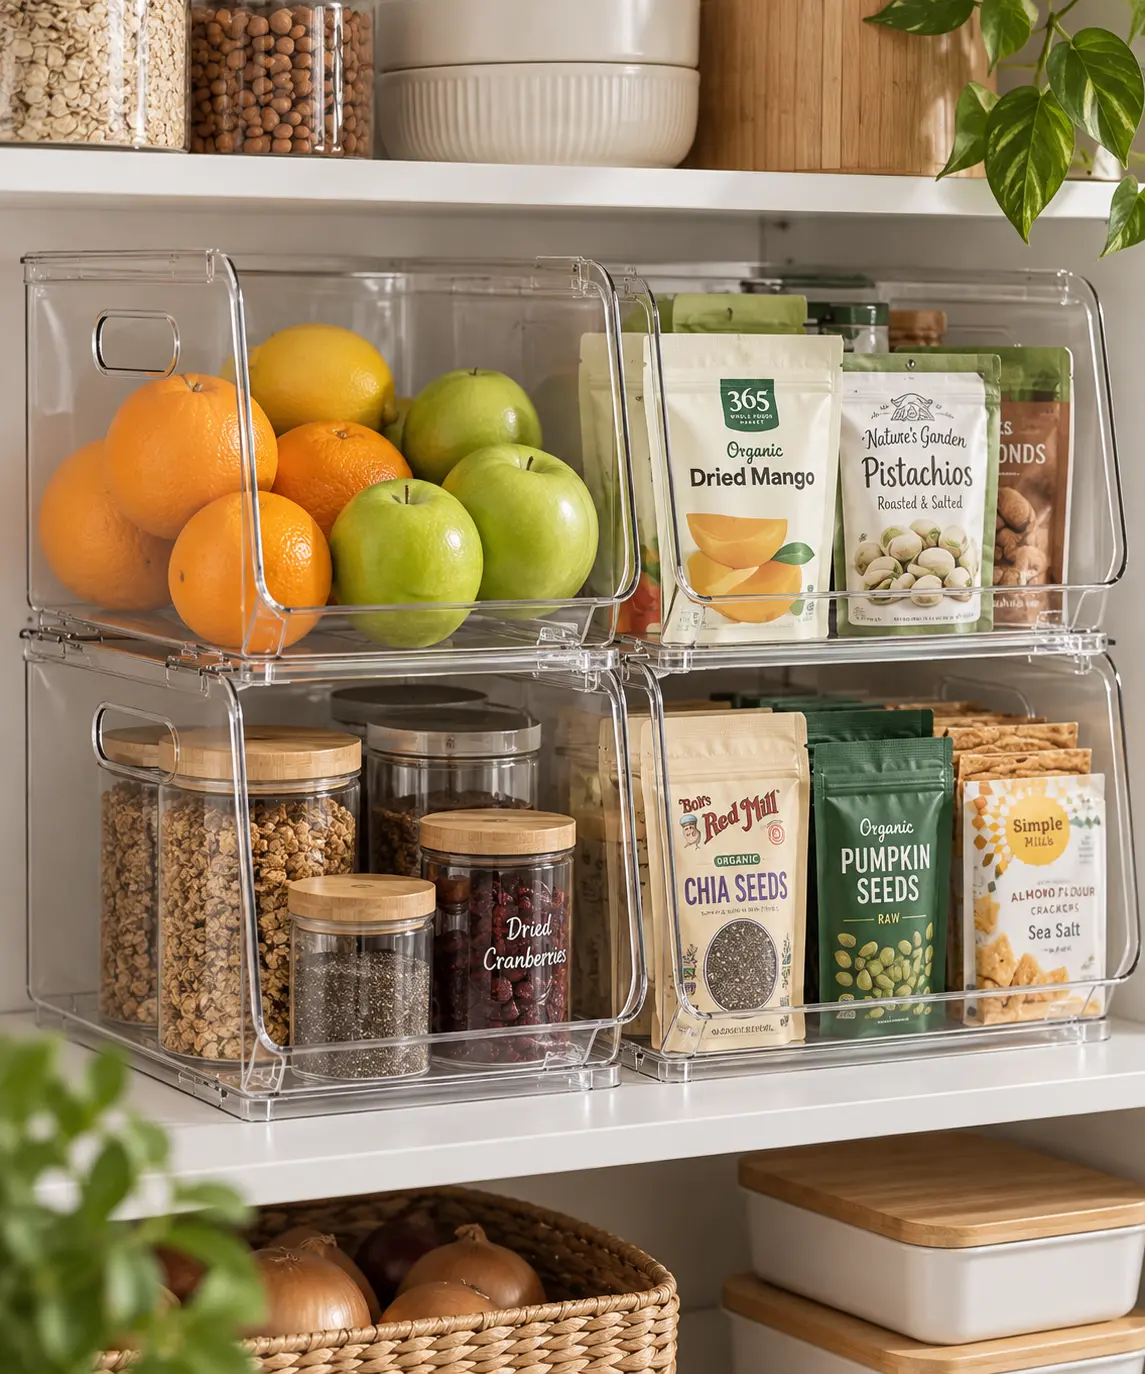
 Save it
The single hardest constraint in most tiny kitchens isn’t cabinet space — it’s the complete absence of a dedicated pantry, which means every dry good, snack, and backup ingredient has to live somewhere inside cabinets already stretched thin by everything else. Without a system, this is where kitchens quietly lose the war: a shelf that starts as “extra pantry space” and within a month is an unsorted pile nobody can fully account for.
Stackable, uniform containers solve the pantry-less kitchen the same way modular storage solves a walk-in closet: by imposing a consistent shape on a category of items that would otherwise take up wildly inconsistent space. A shelf of matched, stackable canisters holds meaningfully more than the same shelf of mismatched bags and half-empty boxes, purely because uniform shapes stack without the wasted gaps irregular packaging leaves behind.
Dedicate one full shelf to this system rather than scattering canisters across multiple cabinets — a single, complete pantry wall is easier to shop from and easier to maintain than the same containers split across three different locations. Stack by how often you restock, keeping the most frequently used canisters at eye level and the rarely-touched ones on top, where a little extra reach costs you nothing.
This is the fix that ties every other zone on this list together: once dry goods have one clear, contained home, the cabinets around them stop absorbing the overflow, and the entire kitchen starts operating like it has more space than it actually does.
Pair this shelf with the vertical seasoning rack from earlier in this list if your layout allows it, so the pantry wall and the spice wall sit within a few steps of each other. Grouping the entire “ingredients” category — spices through dry goods — into one general zone of the kitchen means meal prep involves far less back-and-forth across the room than scattering these categories wherever a free cabinet happened to exist.
Label consistently across the whole shelf, and pick one labeling method — printed, handwritten, whatever you’ll actually maintain — rather than mixing styles as you add containers over time. A shelf where half the labels are neat printed text and half are guesswork based on color reads as unfinished even when every container is technically full and organized.
Common Mistakes
1. Buying organizers before measuring the actual space
It’s tempting to order the first well-reviewed product that matches the general category you need, but cabinet depths, shelf heights, and door clearances vary enough between kitchens that a product perfect for someone else’s space can be unusable in yours. Measure the actual cabinet or gap first, every time, even when it feels like an unnecessary extra step.
2. Solving every zone at once
Thirteen fixes in a single weekend sounds efficient, but it usually means none of them get the sorting and thought they actually need — items get shoved into new organizers just to clear the counter, and the whole project quietly recreates the same disorganization in a new, nicer-looking container. Tackle one or two zones at a time and let each one actually settle into a habit before moving to the next.
3. Choosing a product for its looks over its actual fit
A beautiful organizer that doesn’t match your cabinet’s real dimensions, your actual inventory, or your daily habits will sit half-used within a month, no matter how well it photographs. Function has to come first in a tiny kitchen specifically, because there’s no spare space to absorb a decision that doesn’t quite work.
4. Skipping the sort-before-you-store step
Installing a beautiful new organizer and then loading it with everything you already owned — including the duplicate tools and expired spices — just relocates clutter instead of eliminating it. Every zone on this list works best after a quick pass to keep only what you actually use.
5. Treating a fix as permanent the moment it’s installed
Habits and inventory shift — you cook differently in winter than summer, your grocery list changes, your cooking habits evolve. A storage system that isn’t revisited occasionally will eventually stop matching how you actually live, even if it was perfectly suited to your kitchen the day you set it up.
Frequently Asked Questions
Do I need to renovate to make a genuinely tiny kitchen feel organized?
No. Every fix in this article is a product-based solution designed to install in minutes without altering cabinets, walls, or plumbing. Renovation solves structural problems; these solutions solve the far more common problem of existing space being used inefficiently.
Which zone should I tackle first if I only have time for one?
Start with whichever cabinet or counter area causes you the most daily friction — usually the spice zone or the counter clutter catch-all, since both are fast to fix and produce an immediate, noticeable change in how the kitchen feels to use.
Will adhesive-mounted organizers actually hold up over time, or do they loosen?
Quality adhesive-mount hardware, installed on a clean, properly prepped surface and kept within its stated weight rating, holds securely for months to years of normal use. Clean the mounting surface thoroughly before installing and avoid exceeding the listed weight capacity, and it will perform closer to a permanent fixture than a temporary fix.
How do I keep a newly organized tiny kitchen from sliding back into clutter?
The systems in this article hold up because every item has exactly one assigned home — the moment something is stored “just for now” outside its zone, the system starts to erode. A quick weekly reset, putting anything that’s drifted back to its assigned spot, keeps the whole structure intact with almost no ongoing effort.
Final Thoughts
None of this required a contractor, a weekend of demolition, or a kitchen big enough to absorb a design mistake. It required looking at thirteen specific pieces of wasted space — a gap beside the stove, the side of a fridge, the air above a shelf — and giving each one exactly one job, done by exactly one product built for that job.
That’s the real shift a tiny kitchen needs, and it has almost nothing to do with square footage. A small kitchen with an assigned home for everything operates faster and calmer than a large one where nothing has a fixed place, because the friction that slows you down was never really about size. It was about the four extra seconds spent searching, repeated dozens of times a day, every single day you cook.
Start with one zone tonight. Not the whole list, not a weekend project — one cabinet, one gap, one fifteen-minute fix. The kitchen that gives you back your time isn’t the one you renovate someday. It’s the one you start organizing, one zone at a time, starting now.
This post contains affiliate links. I may earn a small commission at no extra cost to you.

Get cozy inspiration delivered to your inbox.
✓ 14-page beautifully designed ebook
✓ Cozy decorating ideas
✓ Practical room-by-room inspiration
You’re in! 🎉
Thanks for joining the NestFlowHome community!
Your free ebook is already on its way to your inbox. If you don’t see it within a few minutes, please check your Promotions or Spam folder.
Join the NestFlowHome community for weekly decorating inspiration.

Timeless home decor ideas and slow living inspiration for a calm, beautiful life.