
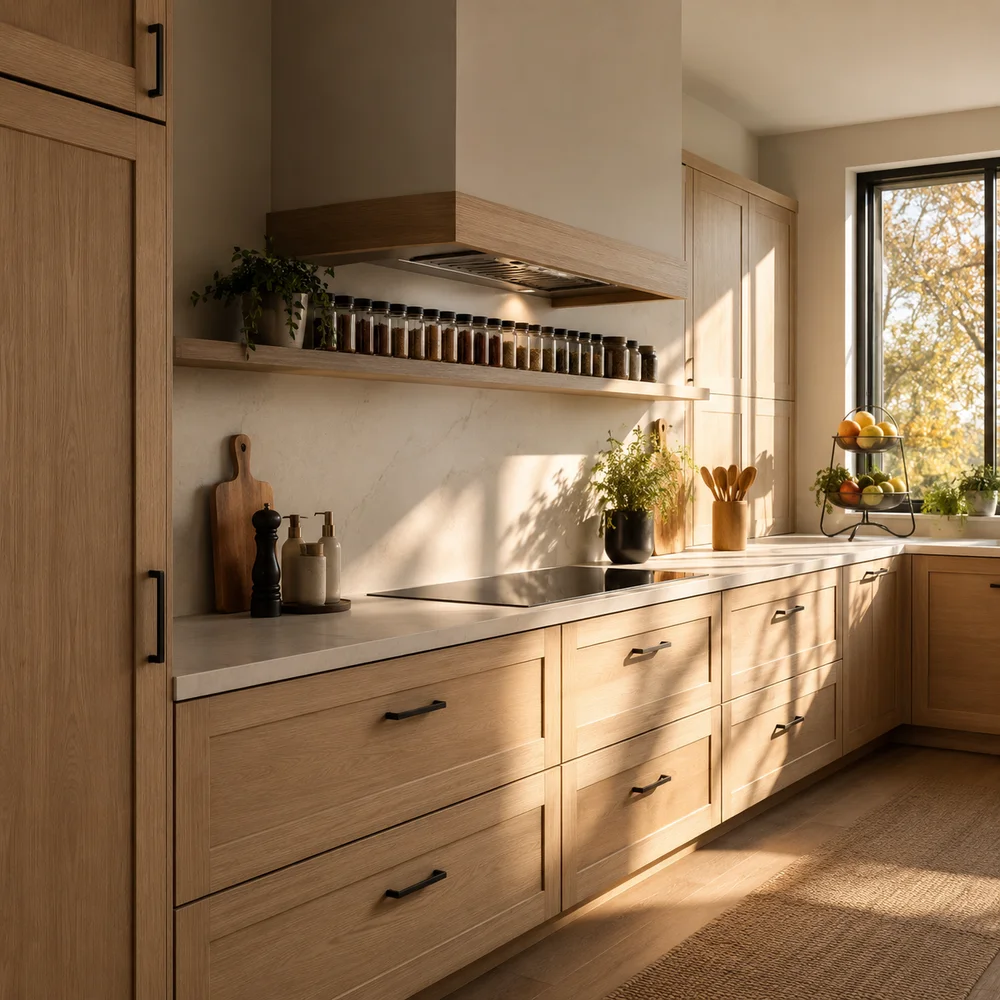
10 Ways to Keep Kitchen Counters Stylish and Clutter-Free
By Emily | August 21, 2026
There’s a particular kind of counter that looks abandoned mid-task even when nobody’s used the kitchen in hours — a charger cord draped over the edge, three mismatched bowls holding things that aren’t fruit, a cutting board leaning against the backsplash because it never found anywhere else to live. None of it is dirty. None of it is even really out of place. It just never had a place to begin with, and that absence is what your eye catches before you can name it.
Most advice about kitchen counters treats the problem as one of taste — buy prettier canisters, group your objects into threes, edit down to what’s beautiful. That helps, but it skips the actual mechanism. A counter stays cluttered not because you own too much, but because most of what lands there was never assigned anywhere else to go. The blender migrates back because its cabinet is a fight to reach. The mail pile grows because there’s no other flat surface near the door. Style is what a counter looks like after the real problem gets solved, not a substitute for solving it.
This guide works through ten specific zones and objects on a typical counter, and gives each one an actual job — a place it belongs when it isn’t in use, so what stays visible is there on purpose. Some of these ideas move things into cabinets and drawers you already own. A few ask you to add one new piece of hardware. None of them require gutting the kitchen. Work through them in the order that matches your own worst offender first, whether that’s the corner nobody reaches or the charger cords tangled by the outlet.
1. Reclaim the Dead Corner With a Turntable Zone
 Save it
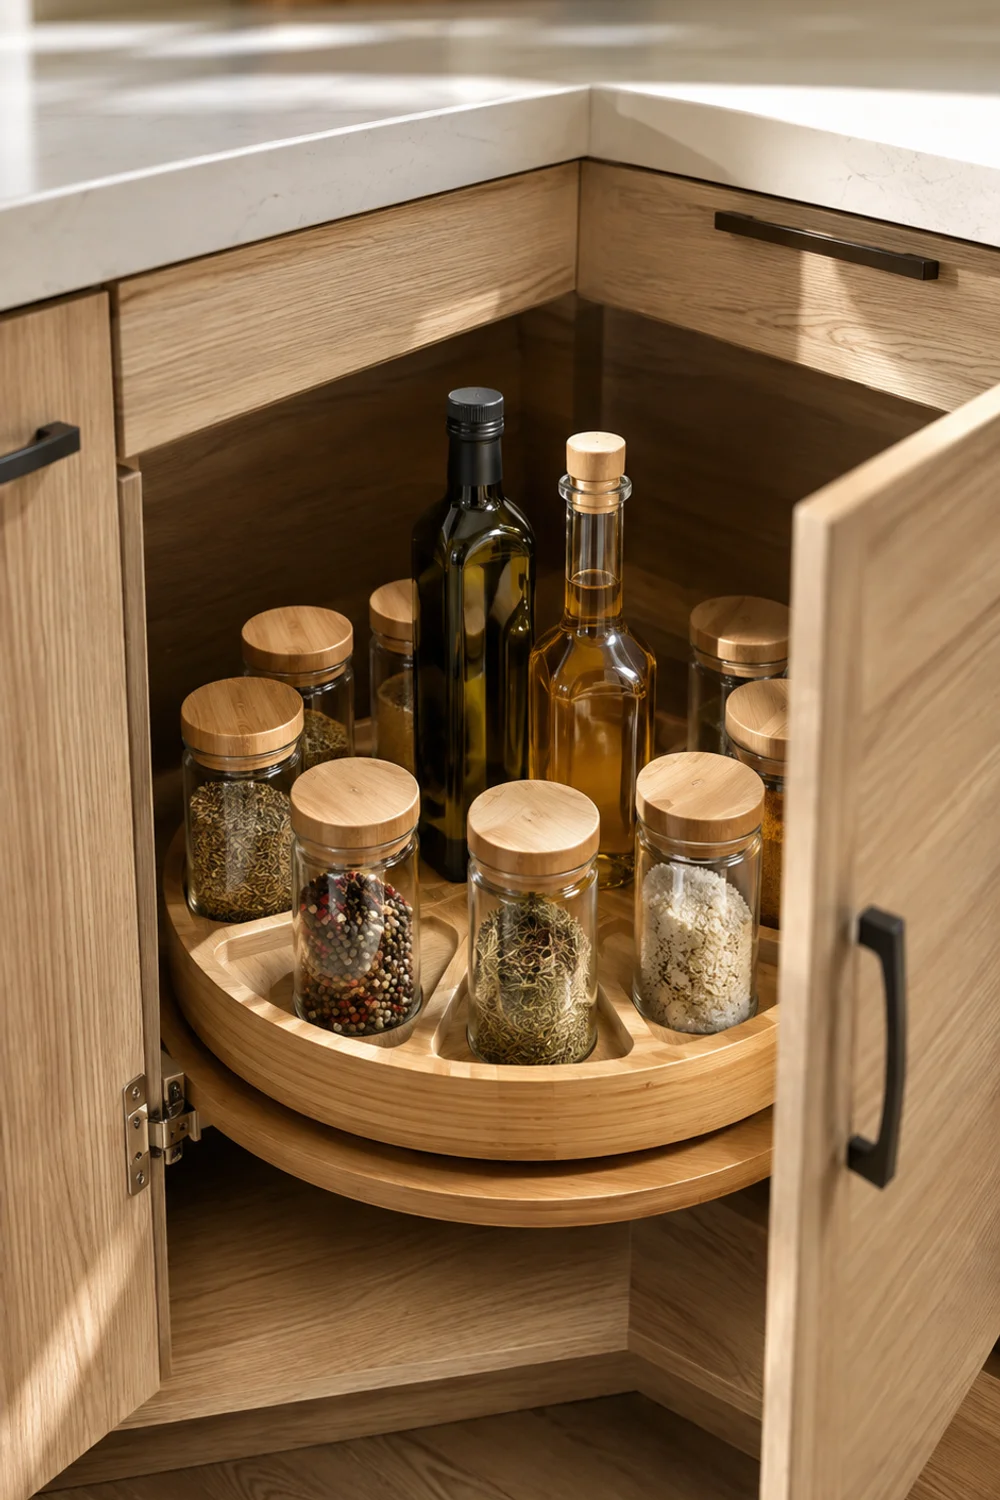
Every kitchen with an L-shaped or U-shaped counter run has one blind corner cabinet that’s technically storage but functionally useless — you can see the front three inches of whatever’s in there and nothing else. So the oils, the vinegar, the backup spice jars all end up permanently parked on the counter instead, because reaching into that corner means kneeling and groping around blind. The counter absorbs the overflow from a storage spot that failed at its job.
A turntable zone fixes this by making the entire depth of that corner cabinet usable with one motion instead of a search. Everything on it rotates into reach, so there’s no reason for a single bottle to live outside the cabinet anymore. This is a different fix than grouping bottles into a styled cluster on the counter itself — The Secret to Beautiful Yet Functional Kitchen Counter Decor takes that grouping approach for objects that are meant to stay visible, but the corner zone works precisely because what’s on it disappears from view entirely.
Set it up by depth, not by category — the turntable actually goes inside the corner cabinet, not on the counter itself. Tall bottles toward the back where the cabinet is deepest, anything you reach for daily toward the front edge closest to the door. Once everything in that rotation has a spot, there’s no argument left for keeping a backup vinegar bottle sitting out by the stove. The corner stops being dead space and starts pulling weight the rest of the counter has been carrying for it.
It’s worth doing this before touching anything else on this list, since the corner cabinet is usually the single largest chunk of unused storage in an average kitchen, and every bottle it absorbs is one less object competing for space near the stove. Measure the cabinet opening before buying — a turntable that’s even slightly too wide will catch on the door frame every time it spins, which is the fastest way to abandon a fix that should have worked.
2. Give Prep Its Own Runway
 Save it
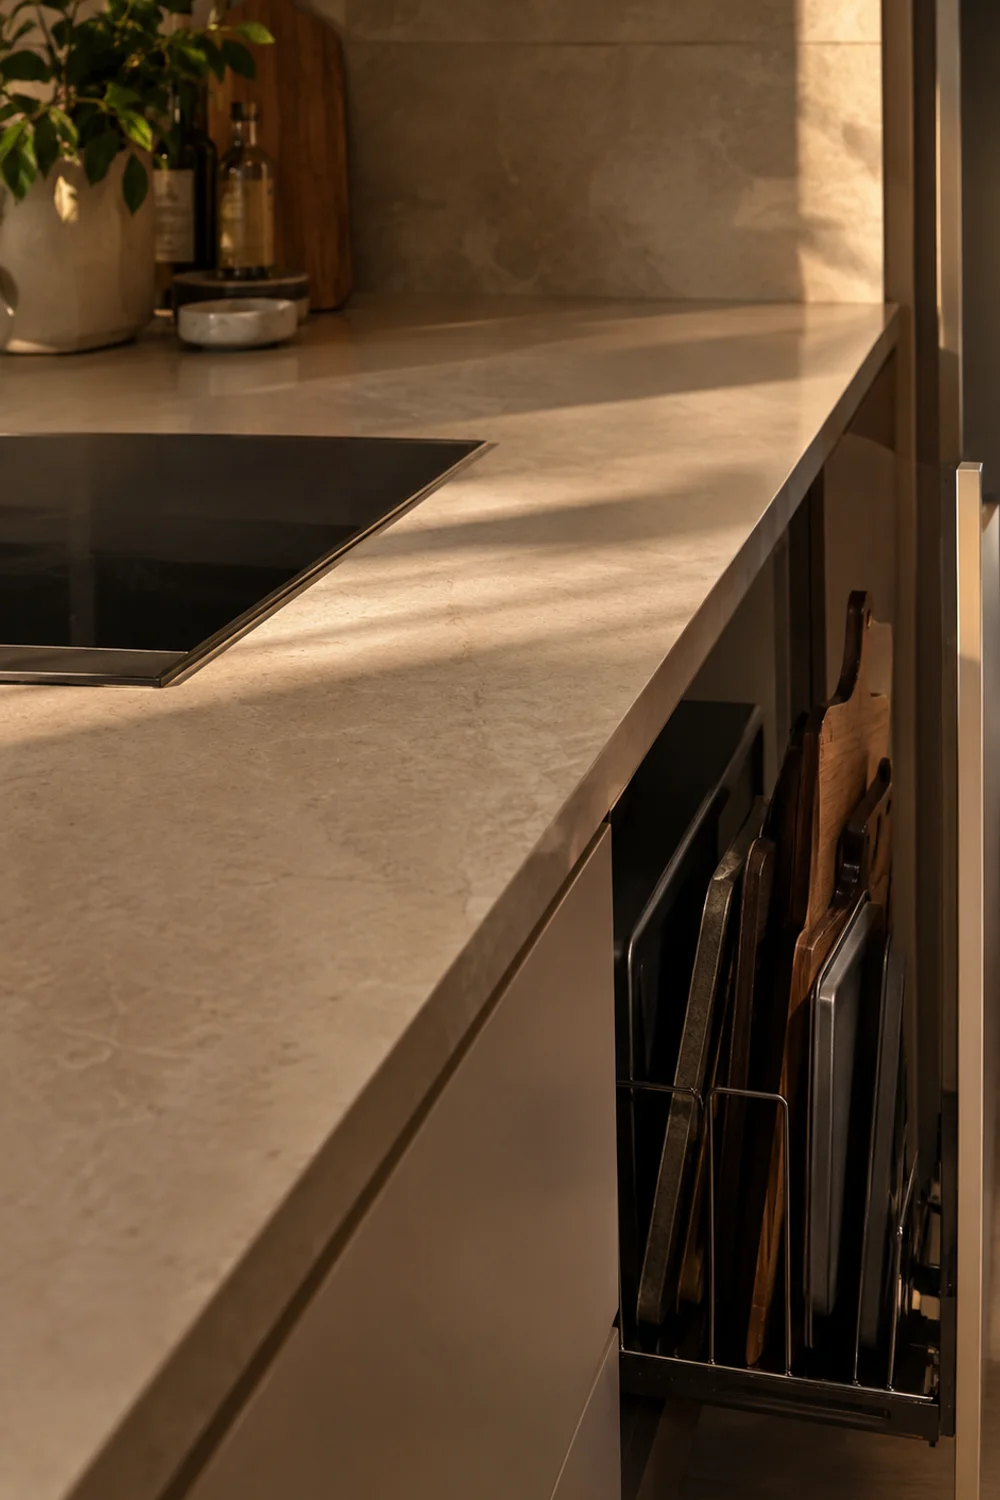
Ask anyone with a genuinely usable kitchen counter what matters most to them and most will say the same thing: one long, unbroken stretch of clear surface near the stove where they can actually cut, mix, and stage ingredients without shuffling things aside first. That stretch disappears fast when cutting boards, sheet pans, and cooling racks are all stacked loose against the backsplash or leaned in a precarious pile at one end.
The fix isn’t a bigger counter. It’s storing boards and bakeware vertically, in a fixed slot, instead of stacking them flat where they compete for space. A slotted rack does this by holding multiple boards and trays upright in individual channels, so each one lifts straight out without disturbing the others — and critically, it lives inside a cabinet or pantry shelf, not on the counter, which is what actually frees the runway rather than just relocating clutter six inches to the left.
The difference shows up the first time you need to prep a meal that uses two boards back to back. Instead of digging a second board out from under a stack, you slide it free and get back to the knife work. A runway that’s actually clear changes how a kitchen feels to cook in more than almost any single decorative choice you could make, because it removes the friction between wanting to cook and being able to start.
The same logic extends to baking sheets and cooling racks, which tend to get shoved into whatever gap is left once the boards are accounted for. Give those their own slots in the same rack rather than leaning them against a cabinet wall where they inevitably slide and clatter. A runway only stays clear if everything that used to crowd it has an equally convenient place to go, which is the whole reason this fix earns its spot second on the list, right after the corner.
3. Move Utensils Off the Counter and Into the Drawer
 Save it
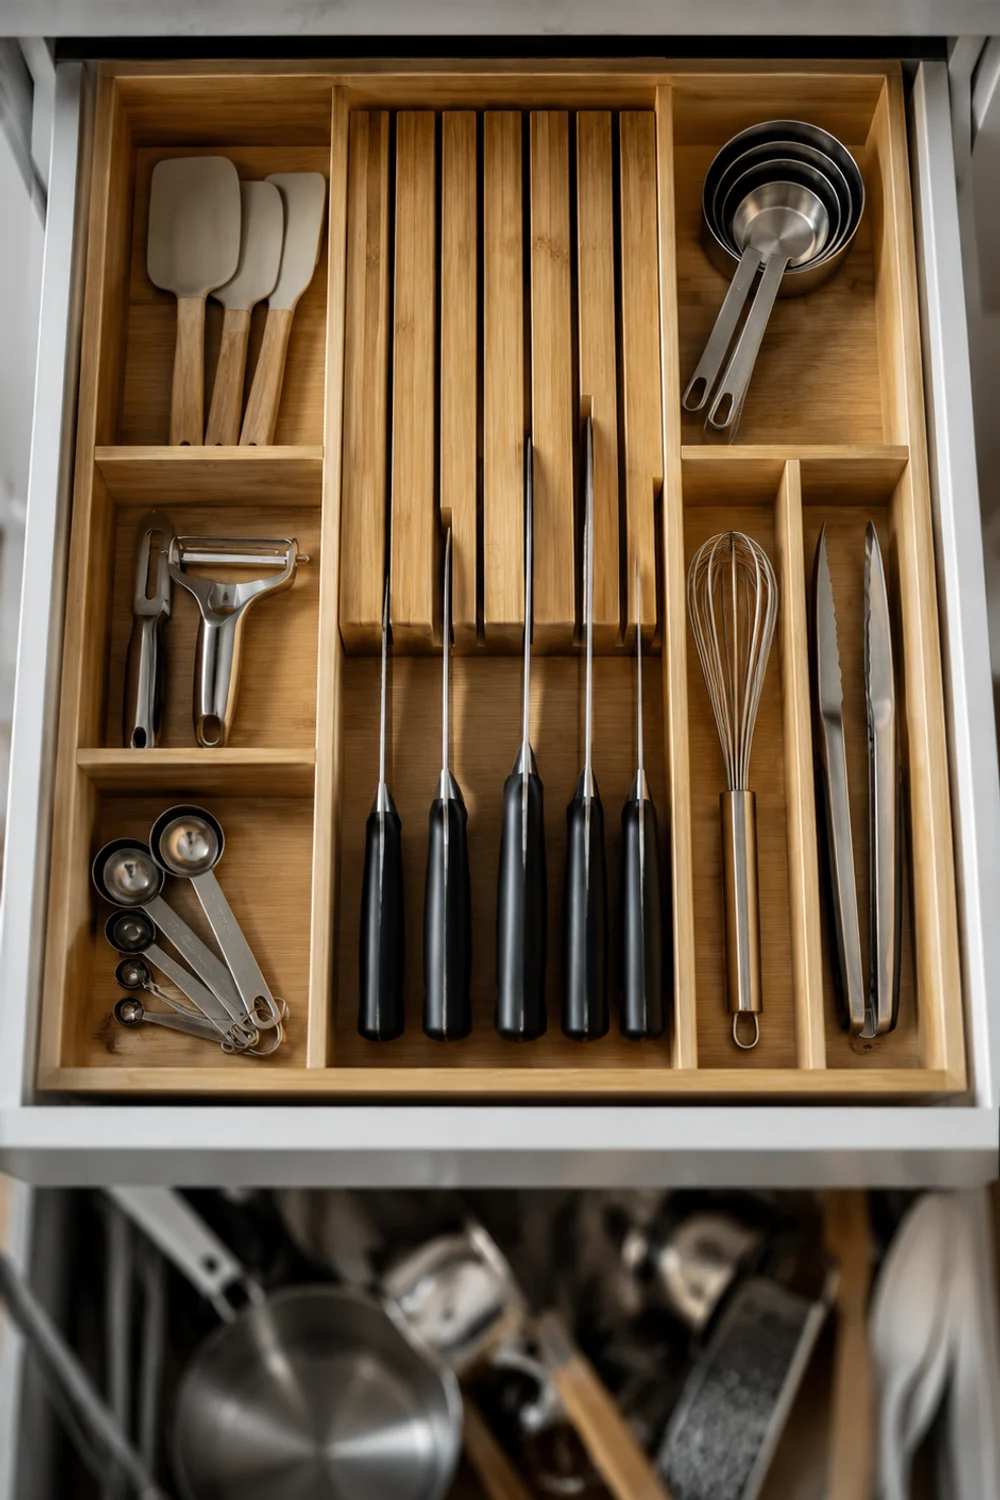
A utensil crock is one of those objects that feels like a solution and quietly becomes a problem. It holds fifteen tools, but you reach for the same four constantly, and the other eleven just sit there collecting splatter and dust, taking up a permanent footprint of counter real estate near the stove that never earns its keep. Worse, the crock itself becomes visual clutter the moment its contents outgrow it, handles fanning out at odd angles no matter how carefully you arrange them.
An in-drawer organizer solves the actual problem, which is that knives and prep tools need a home that keeps them both accessible and out of sight. A slotted insert holds knives at a safe, fixed angle and separates spatulas, peelers, and measuring spoons into their own channels, all one drawer-pull away from the exact spot where you’re standing when you need them. It’s faster to grab a knife from a drawer at hip height than to dig one out of a crowded crock at eye level.
This single change is often the one that makes the rest of a counter reset feel possible, because it removes the largest, most visually chaotic object from the surface in one move. If your kitchen has felt permanently busy no matter how much you tidy, How to Create a Clutter-Free Kitchen You Actually Enjoy walks through the same logic applied to the whole room, not just this one drawer — worth reading once this zone is handled, since the discipline carries over everywhere else cabinets meet counters.
Don’t underestimate how much a single crowded crock skews how the entire counter reads. Even a spotless, well-organized kitchen can look chaotic if one object near the stove is visually loud, and a crock full of mismatched handles is almost always that object. Clearing it is disproportionately effective for how little effort it takes.
4. Hang a Tool Rail Instead of Stacking a Crock
 Save it
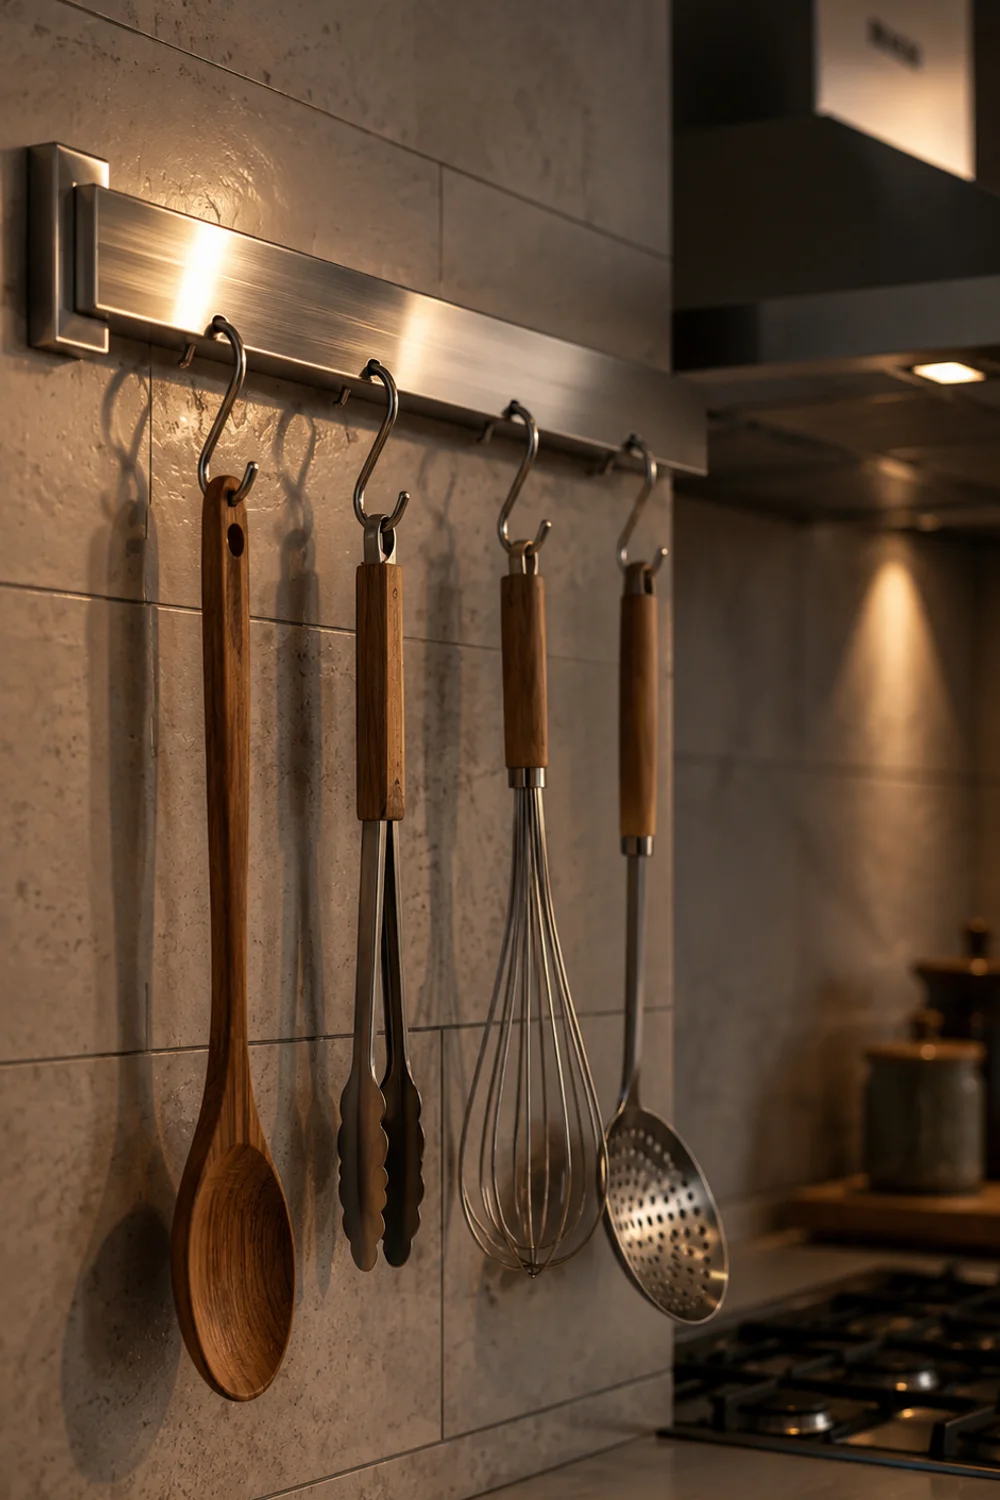
Not every tool belongs in a drawer, though. The handful of things you actually grab mid-stir — a wooden spoon, tongs, a whisk — need to stay within arm’s reach while something’s on the stove, and burying those in a drawer just means you’re opening it with one greasy hand while the other stirs. The instinct is to solve this with a second crock near the stovetop, which brings back the exact clutter the drawer insert just solved.
A wall-mounted rail with S-hooks gives those specific tools a vertical home instead, hanging just above the counter line rather than sitting on it. Nothing touches the surface, nothing tips over when you bump the counter reaching for something else, and everything stays visible enough that you’re never hunting mid-recipe. The distinction that matters here is frequency — the rail holds only what you use daily during active cooking, not general storage overflow.
Keep the rail disciplined to four or five tools maximum. The moment it starts collecting everything you’re not sure where else to put, it becomes exactly the cluttered crock it replaced, just mounted vertically instead of sitting on the counter. A rail with breathing room between each hook reads as intentional; one crammed edge to edge reads as overflow with nowhere left to go.
Position matters as much as tool count. Mount it slightly to the side of the stove rather than directly above it, so steam and splatter don’t coat the handles constantly, and so the rail doesn’t visually compete with a range hood or backsplash tile pattern that’s already doing its own work in that sightline.
Coordinate the finish with whatever hardware is already on your cabinets. A rail that matches your pulls and hinges reads as a built-in feature of the kitchen; one that clashes reads as an add-on, no matter how useful it is functionally. That small consistency is often what separates a rail that looks designed from one that looks improvised.
5. Let a Tiered Stand Replace Three Loose Bowls
 Save it
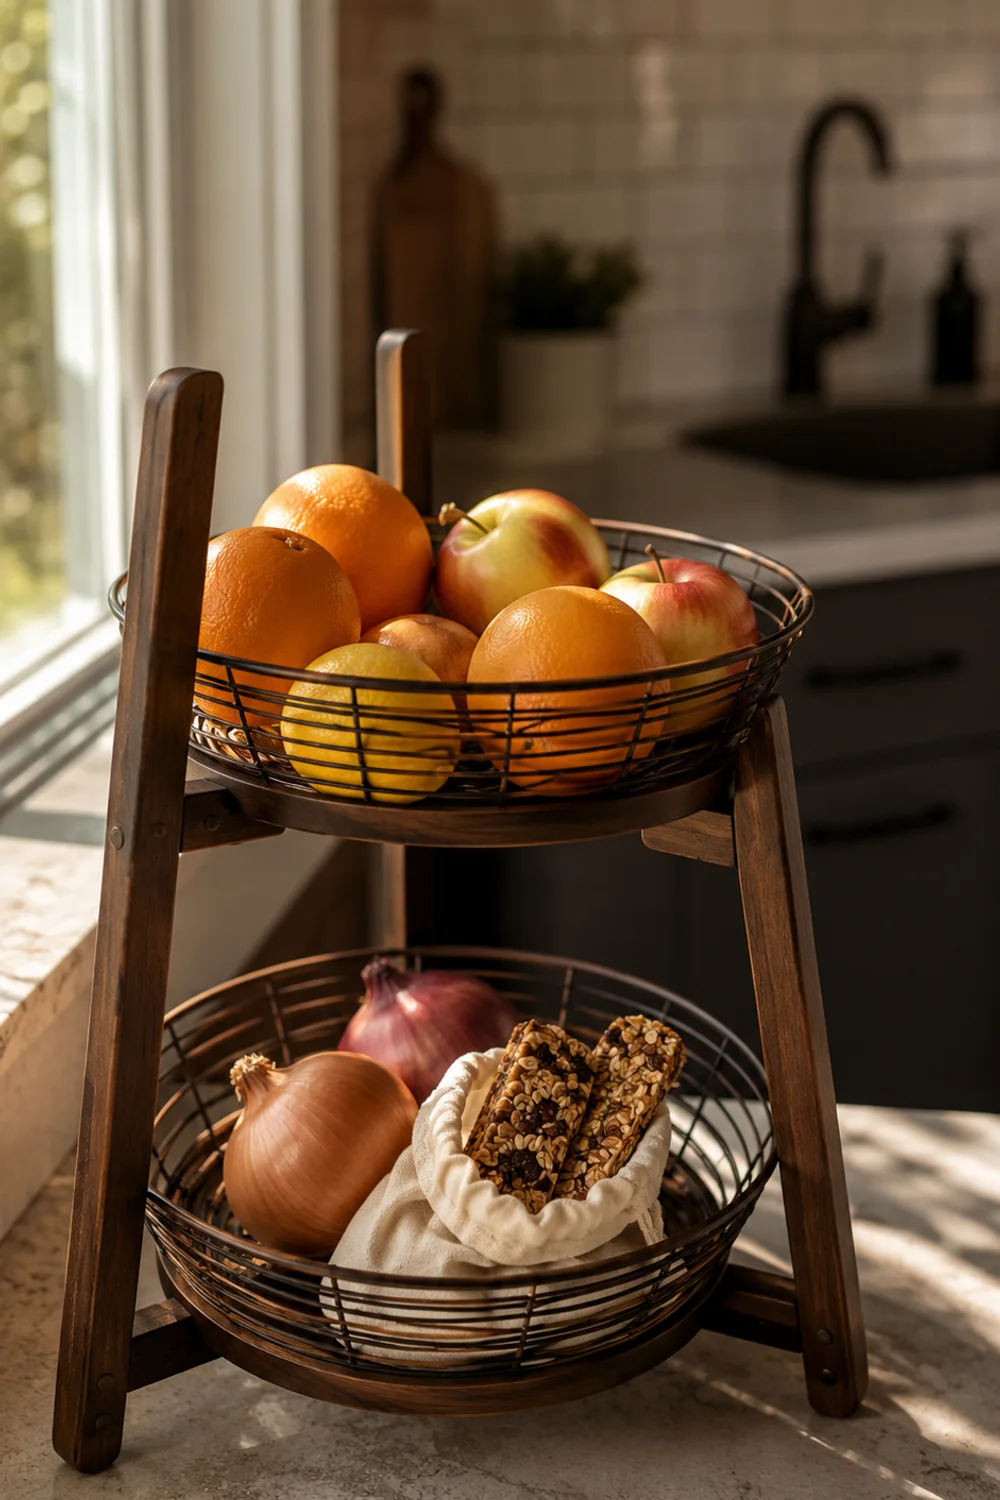
Fruit in one bowl, avocados ripening in another, snack bars and granola packets loose in a third — most counters accumulate this exact pattern because each item felt like it deserved its own container, and nobody stopped to ask whether three separate footprints were actually necessary. The bowls multiply, and so does the counter space they claim, even when the total volume of stuff hasn’t grown at all.
A two-tier stand consolidates that sprawl into a single vertical footprint, giving daily produce a top shelf and pantry snacks or root vegetables a lower one, all stacked instead of spread across the width of the counter. It reads as one considered object instead of three competing bowls, and it actually holds more than the three bowls combined while taking up roughly a third of the surface area.
Choose the finish deliberately rather than grabbing whatever’s cheapest — a stand in a warm wood or matte metal that echoes your cabinet hardware or open shelving will read as furniture, not as one more organizer competing for attention. Simple Kitchen Color Palettes That Work in Any Home is worth a look here if you’re unsure which finish actually pulls the room together, since the same undertone logic that governs paint and hardware applies just as much to the objects you choose to keep out.
Placement matters too — set the stand somewhere it catches natural light rather than tucked in a corner shadow, since produce left in dim light is easy to forget about until it’s overripe. A spot near the window that also happens to be visible from the sink is usually the sweet spot between good light and staying top of mind.
Resist stacking the tiers unevenly out of habit — heavier items belong on the lower shelf both for stability and so the whole piece doesn’t look top-heavy against the rest of the counter. A stand that’s loaded thoughtfully reads as furniture; one that’s loaded carelessly reads as one more precarious pile, just elevated.
6. Build a Spice Ledge Above the Backsplash
 Save it
Spice collections have a way of outgrowing whatever container first held them, and once they do, the overflow lands directly on the counter next to the stove — the one spot where clutter is most visible because it’s exactly where you’re standing and looking down every time you cook. A cabinet shelf solves storage but adds a step between wanting oregano and having it, which is usually why the jars end up back on the counter within a week.
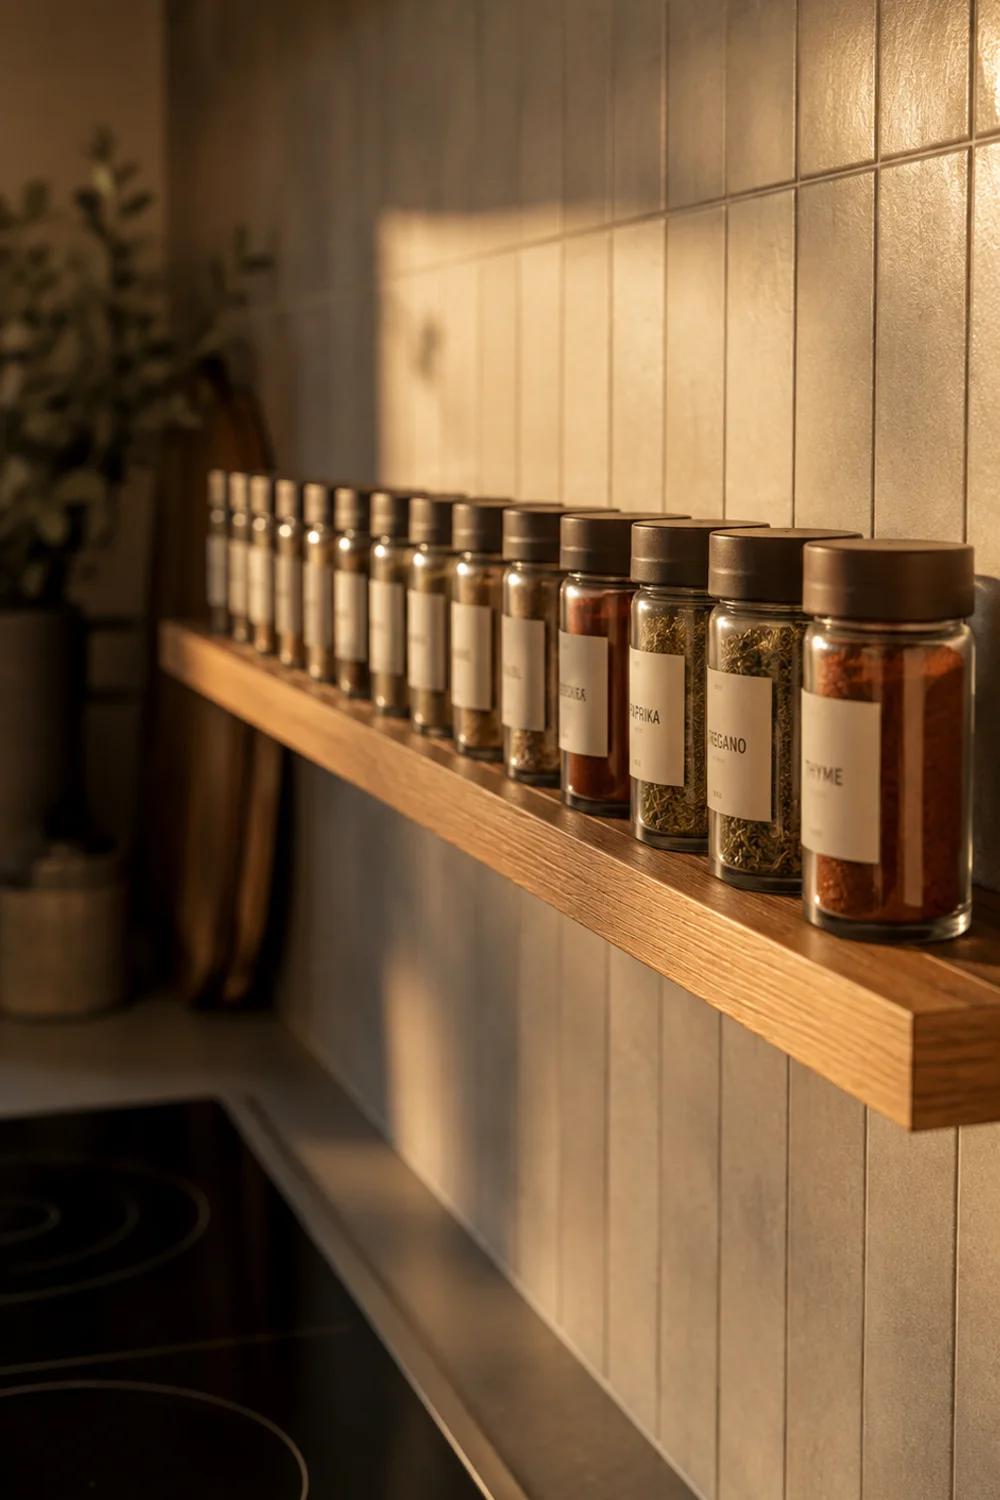
A narrow floating ledge mounted just above the backsplash reclaims a strip of vertical space that was doing nothing before — too high to be counter, too low to be a normal shelf, and exactly at the height where a hand reaches without looking. Jars line up in a single row, fully visible, fully in reach, and the counter beneath them goes back to being clear workspace instead of overflow storage.
Measure the depth carefully before mounting — a ledge that’s too deep will hide jars behind each other and defeat the entire point, while one sized to hold a single row keeps every label readable at a glance. The narrower the ledge, the more disciplined the collection has to stay, which is exactly the constraint that keeps this zone from sprawling back onto the counter six months from now.
Standardize the jars while you’re at it. A ledge full of mismatched packaging still reads as clutter even once it’s off the counter and organized by height, while a uniform set of jars with a consistent label style reads as intentional the second you glance over at the stove, no matter how many spices are actually on it.
Resist the urge to fill the ledge to capacity just because there’s space left. A row with a little air between jars still functions perfectly and looks considered; a row packed shoulder to shoulder starts to resemble the same overflow problem the ledge was meant to solve, just relocated a few inches up the wall.
7. Corral the Chargers Inside the Cabinet, Not on Top of It
 Save it
Every kitchen counter near an outlet eventually becomes a charging station by default, and the visual result is rarely good — a tangle of cords running to a phone, a tablet propped against the backsplash, sometimes a laptop wedged in beside the toaster. It’s the kind of clutter that photographs badly and functions worse, since the cords themselves become a hazard the moment anything wet is nearby.
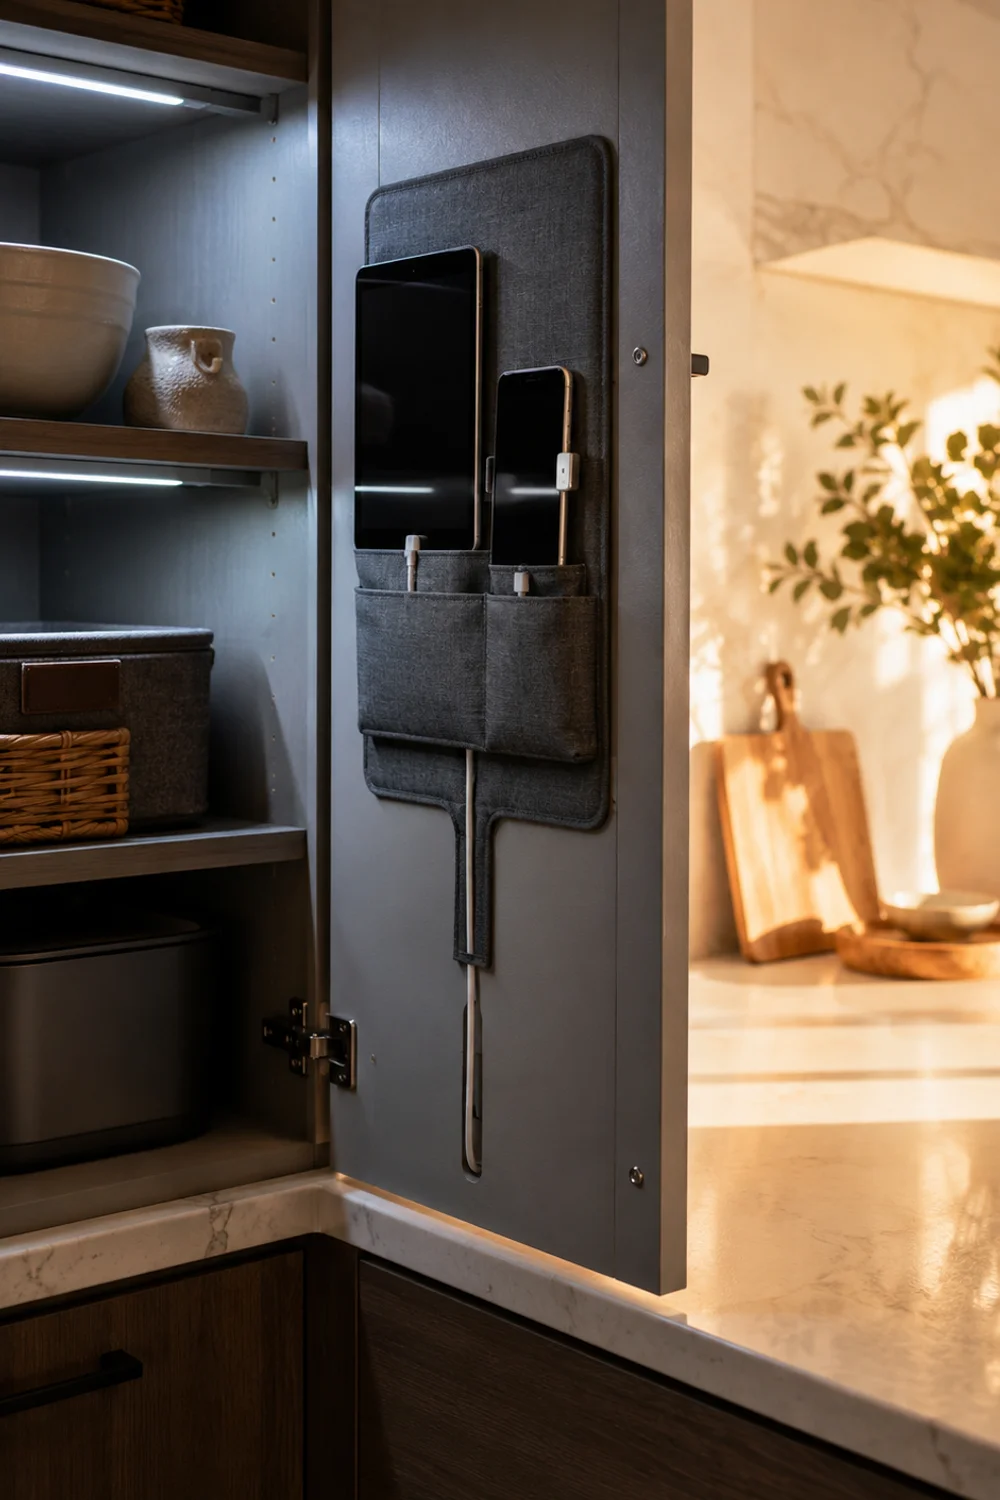
A cabinet door-mounted organizer moves the entire charging setup inside a door you already open constantly, with a fixed pocket system that holds devices upright while cords route through a channel instead of trailing loose. Close the door and the counter shows nothing; open it and everything is exactly where it was left, charged and contained.
Mount it on the inside of a cabinet nearest the outlet you already use, so you’re not adding a new habit, just relocating an existing one a few inches. The counter’s job was never to be a charging dock; once that function moves off the surface entirely, the outlet area stops being the one corner of the kitchen that always looks unfinished in photos.
If the household uses this spot constantly throughout the day, keep the cabinet door itself easy to swing open one-handed rather than wedged behind other stored items, since a charging system that’s annoying to access gets abandoned within a week no matter how well it’s organized.
Run a single power strip inside the cabinet rather than relying on one outlet split multiple ways, so every device charges at once without cords crisscrossing behind the door. It’s a small detail, but it’s the difference between a system the whole household actually uses and one that quietly gets ignored after the first busy week.
If more than one person in the household charges devices in the kitchen, label each pocket by name or device rather than leaving it as an open free-for-all. A shared system without any structure tends to collapse back into a tangle within a month, even inside a cabinet designed specifically to prevent that.
8. Store Overflow Vertically, Not Horizontally
 Save it
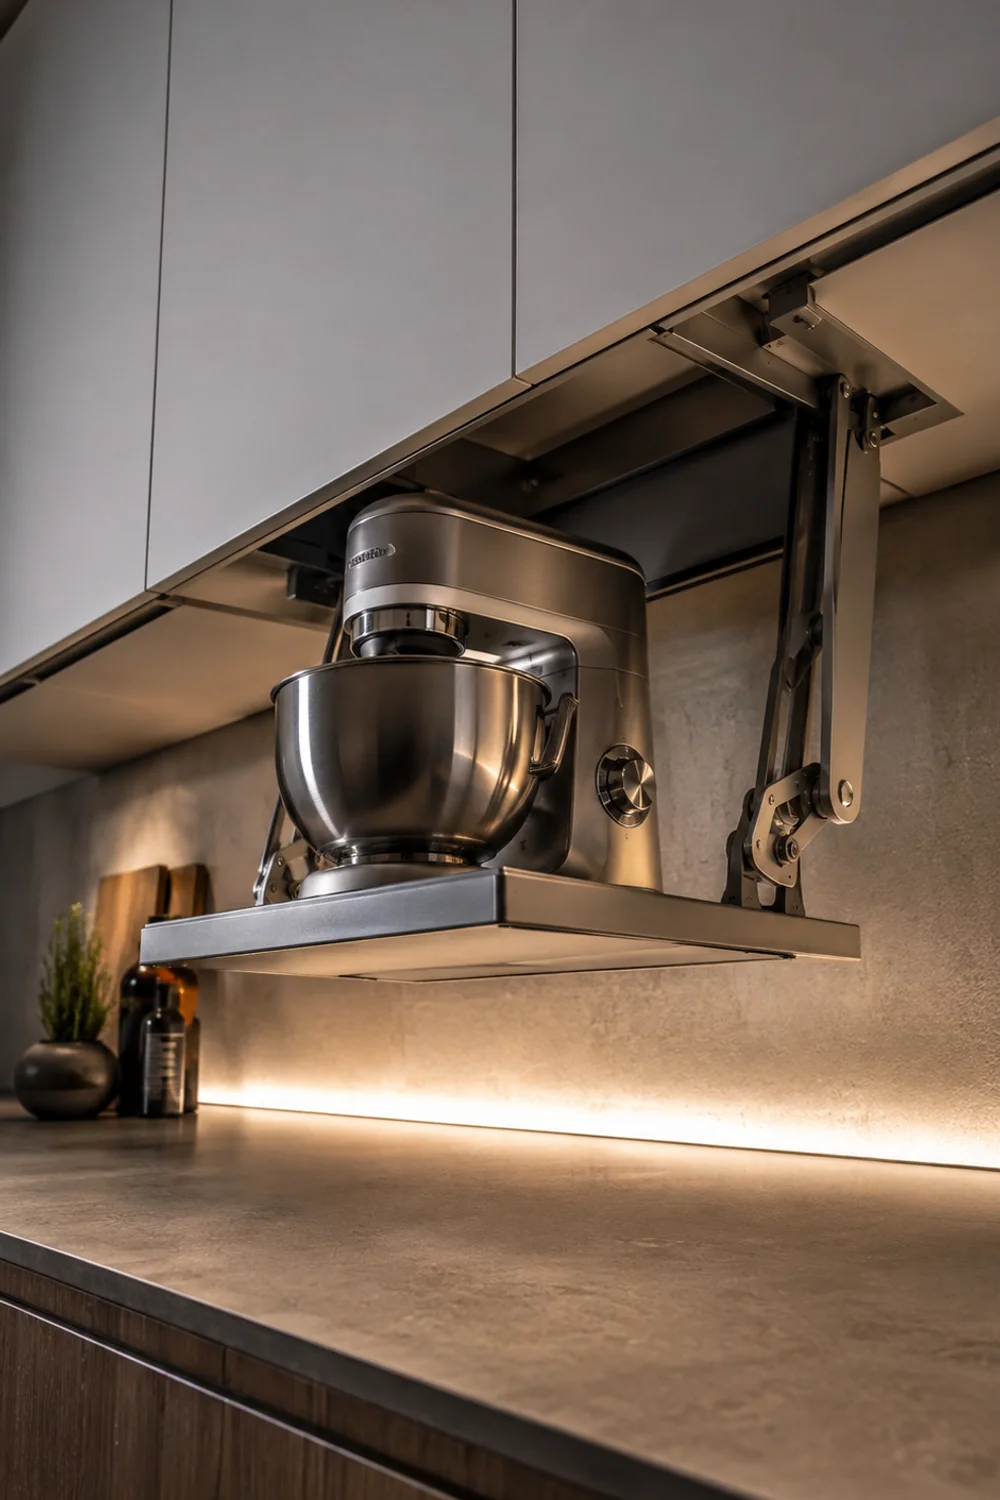
Stand mixers, blenders, and slow cookers are the single biggest footprint offenders on most counters, and the usual advice — “just put it away when you’re not using it” — ignores how heavy and awkward these appliances are to lift in and out of a low cabinet several times a week. So they stay out permanently, camped along the back edge of the counter, because the alternative genuinely is more effort than it’s worth.
Moving that storage up and under the cabinets instead of down into them changes the physics of the problem. A pull-down rack mounted beneath the upper cabinets lowers to counter height for loading and lifts back up out of the way, which means heavy appliances travel a few inches vertically instead of being wrestled into a floor-level cabinet. The counter gets its back edge back, and the appliance is still faster to retrieve than it would be from deep storage.
This pairs naturally with reclaiming the space directly above your refrigerator for anything that’s used even less often — Above Fridge Styling Ideas for a Beautiful and Organized Kitchen covers how to make that zone functional instead of a dead shelf collecting dust, which matters once the counter-level appliances have somewhere better to go and you’re deciding what else can move up and out entirely.
Weight capacity is worth checking before you buy, not after — a rack rated for light cookware will sag under a stand mixer within a few months. Look for a model with a stated load rating that comfortably clears the heaviest appliance you’re planning to store, with room to spare.
Check the clearance below the rack, too, before you install it. It needs to lower fully to counter height without hitting your backsplash or existing under-cabinet lighting, so measure the drop distance before mounting rather than after, when the only fix left is drilling new holes.
9. Give the Small Stuff a Stacked, Labeled Home
 Save it
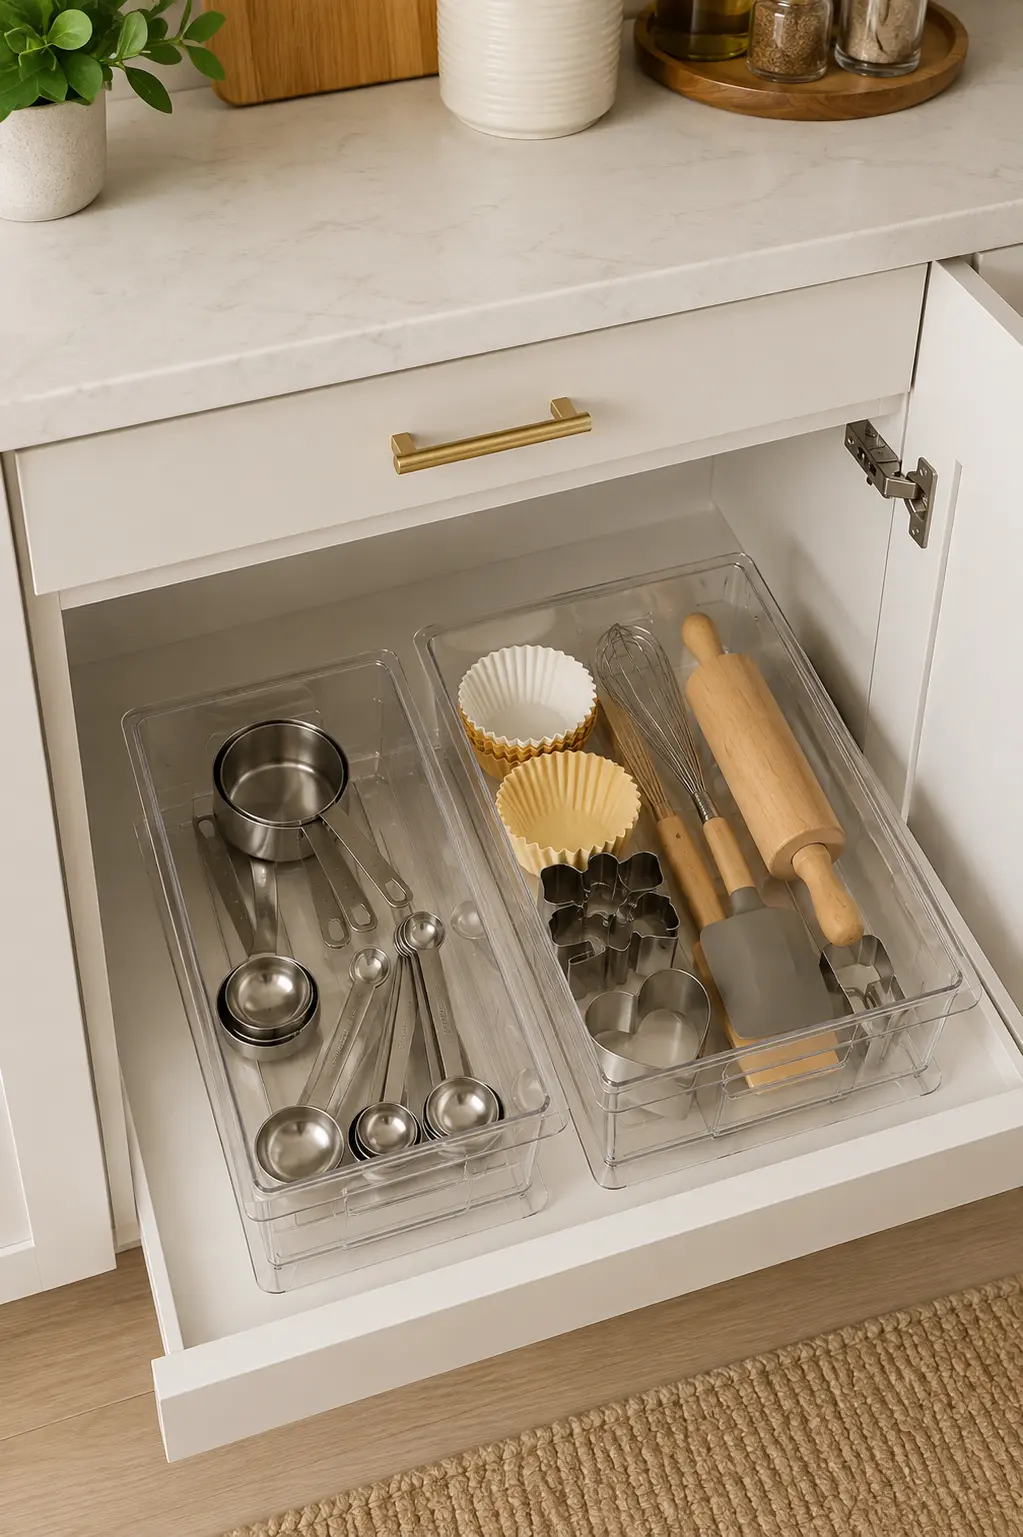
It’s rarely the big items that make a counter feel chaotic — it’s the accumulation of small ones. A garlic press, a can opener, three types of measuring cups, a wine key, rubber bands from produce bags. Individually each is reasonable to keep nearby. Together, loose on the counter or crammed into an overflowing junk drawer, they’re what makes a kitchen feel like it’s losing the battle even when the big-ticket items are all properly stored.
Stackable, labeled bins inside the cabinet beneath the counter give every one of those small objects an actual category and a fixed spot, rather than a general pile that grows until someone gets frustrated enough to dump it out and start over. Once everything has a labeled bin, the test for what’s allowed to sit out on the counter becomes simple: does it belong to a category, or is it just loose? If it’s loose, it goes in a bin. If you’ve deliberately chosen one object to leave out — a cutting board you love, a ceramic piece that earns its spot — it now reads as a choice, because everything competing with it for attention has somewhere else to live.
That’s the real difference between a counter that looks minimal because everything is hidden and one that looks minimal because everything has a job. 15 Minimalist Kitchen Counter Styling Ideas You’ll Love leans further into the concealment side of that equation if a fully bare counter is the look you’re chasing; this approach gets you most of the same visual calm while still leaving room for one or two objects you actually want to see every day.
Label the bins by category rather than by exact item, so the system doesn’t fall apart the moment you buy a new gadget that doesn’t fit an overly specific tag. “Baking tools” holds up over time in a way that “measuring cups only” doesn’t, and that flexibility is what keeps a labeled system from quietly reverting to a loose pile a few months later.
10. Anchor the Stove Zone by Storing Lids Elsewhere
 Save it
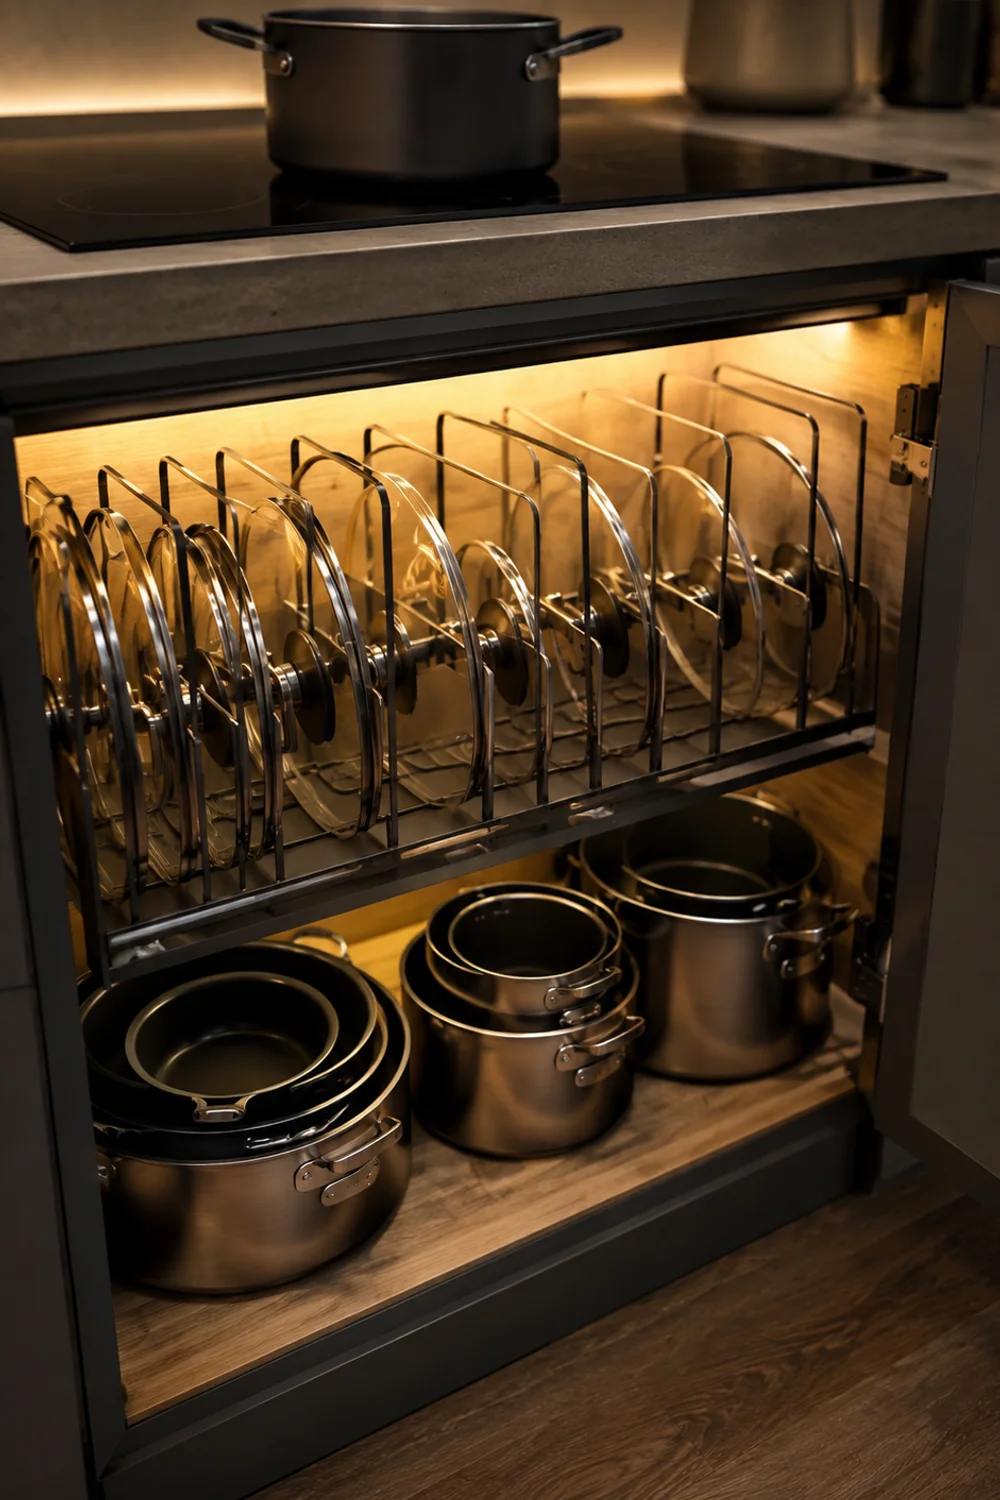
Pot lids are chaos agents disguised as kitchen tools. They’re awkward shapes, they don’t stack cleanly, and the moment one gets separated from its pot, it ends up leaning against the backsplash or balanced on the edge of the counter near the stove, usually still slightly damp from the last time it was used. That single object, more than almost anything else near the range, is what makes an otherwise tidy stove zone look unfinished.
A cabinet-mounted lid rack, installed inside the cabinet where the pots themselves live, gives every lid a fixed vertical slot sized to its diameter, so pot and lid are stored together and neither one ends up as counter overflow. Retrieval takes the same amount of time as grabbing a lid off the counter would, but nothing sits out between uses.
This is a small fix relative to the others on this list, but it’s often the one that finishes the job — the stove zone is usually the last holdout after everything else on a counter has been given somewhere to go, precisely because lids feel too awkward to bother storing properly. Once they’re not an issue anymore, there’s genuinely nothing left near the range that doesn’t belong there.
Most racks adjust to fit a range of lid diameters, so measure your largest stockpot lid before installing rather than assuming a standard size will fit. Getting this one detail right the first time is the difference between a rack that quietly disappears into the cabinet and one you end up wrestling with every time you cook.
Install it in the same cabinet as the pots themselves rather than a separate one across the kitchen, even if that means reorganizing what’s already in there. A perfectly designed lid rack still fails at its job if grabbing a lid means walking to the other side of the room while something’s actively on the stove.
Common Mistakes
1. Buying containers before deciding what needs a container
It’s tempting to walk into a home goods store, find something beautiful, and bring it home hoping it’ll solve a clutter problem you haven’t actually diagnosed yet. This almost always backfires, because the container ends up holding the same loose items in the same disorganized way, just inside something prettier. Figure out which specific objects need a job first — then shop for the exact solution that job requires, not the other way around.
2. Treating every flat surface as available storage
A counter, a windowsill, the top of a microwave — if it’s flat, it becomes a landing zone by default unless you decide otherwise on purpose. The problem compounds because once one flat surface starts collecting overflow, everything nearby follows the same pattern, and the clutter spreads sideways rather than getting solved. Assign a purpose to every flat surface deliberately, including the ones you’re tempted to ignore.
3. Styling before organizing
It’s satisfying to arrange a few beautiful objects on a counter and call the job done, but if the underlying clutter — the chargers, the mismatched lids, the crowded crock — hasn’t actually been relocated, it just resurfaces a week later and undoes the styling entirely. Organization has to happen first. Styling is what you do to the small amount of space that’s left over once everything else has a real home.
4. Ignoring vertical space until the counter is already full
Most kitchens have significant unused space between the counter and the upper cabinets, or inside cabinet doors that never get touched. That space usually gets considered only as a last resort, after the counter is already overwhelmed, which makes the whole project feel harder than it needs to be. Map your vertical and inside-door space at the start, not the end — it’s often where the easiest wins are hiding.
Frequently Asked Questions
What’s the fastest way to see a difference if I only have one afternoon?
Start with whatever single object currently bothers you most every time you look at it — for most kitchens that’s either the utensil crock or the charger tangle near the outlet. Solving one clearly visible offender changes how the whole counter reads far more than spreading a little effort across ten smaller fixes.
Do I need to buy new organizers for every zone at once?
No. These ten changes work independently of each other, and most kitchens see the biggest visual shift from the first two or three they tackle. Prioritize by whichever zone currently has the most stuff piled on it, since that’s where the payoff will be most obvious.
Will this work in a small kitchen with limited cabinet space?
Vertical solutions like the spice ledge, the wall rail, and the under-cabinet rack are actually more valuable in a small kitchen, since they add usable storage without claiming any additional floor or counter footprint. The corner turntable specifically requires an existing blind corner cabinet, so skip that one if your layout doesn’t have one.
How do I decide what’s allowed to stay out permanently?
A useful test is whether the object earns its spot through daily use or through genuine visual pleasure — a cutting board you reach for constantly, a ceramic piece you chose deliberately. Everything else, no matter how reasonable it seemed when you bought it, belongs behind a door, in a drawer, or on one of the vertical zones covered above.
Final Thoughts
None of this requires a renovation, and it doesn’t require owning less than you currently do. It requires deciding, zone by zone, where each category of object actually belongs when it isn’t in active use, and then following through on that decision consistently enough that things stop drifting back to the counter out of habit.
The payoff isn’t just a counter that photographs well, though it will. It’s a kitchen that feels calmer to stand in every single day, because your eye isn’t constantly negotiating with a dozen small unresolved decisions every time you walk in to make coffee. Start with the one zone that’s bothered you the longest, get it right, and let the rest follow at whatever pace actually fits your kitchen.
You don’t need to tackle all ten zones in a single weekend, and trying to will likely just leave half of them half-finished. Pick one, solve it completely, and notice how it changes the way the rest of the counter reads before moving to the next. A kitchen built this way, one resolved zone at a time, holds up in a way that a single frantic overhaul never quite does.
This post contains affiliate links. I may earn a small commission at no extra cost to you.
Get cozy inspiration delivered to your inbox.
✓ 14-page beautifully designed ebook
✓ Cozy decorating ideas
✓ Practical room-by-room inspiration
You’re in! 🎉
Thanks for joining the NestFlowHome community!
Your free ebook is already on its way to your inbox. If you don’t see it within a few minutes, please check your Promotions or Spam folder.
Join the NestFlowHome community for weekly decorating inspiration.

Timeless home decor ideas and slow living inspiration for a calm, beautiful life.