
Simple Hot Cocoa Bar Ideas That Look Styled, Not Cluttered
By Emily | October 13, 2026
There is a particular moment at every hot cocoa bar, usually about ten minutes after the first guest arrives, when the whole thing either settles into a quiet, glowing little scene or tips into chaos. A mug is wedged between a bag of marshmallows and a jar of sprinkles. The spoons have wandered off. Someone is holding a cup of steaming milk and looking around for somewhere, anywhere, to set it down. The ingredients were all lovely. The arrangement simply had no order to it.
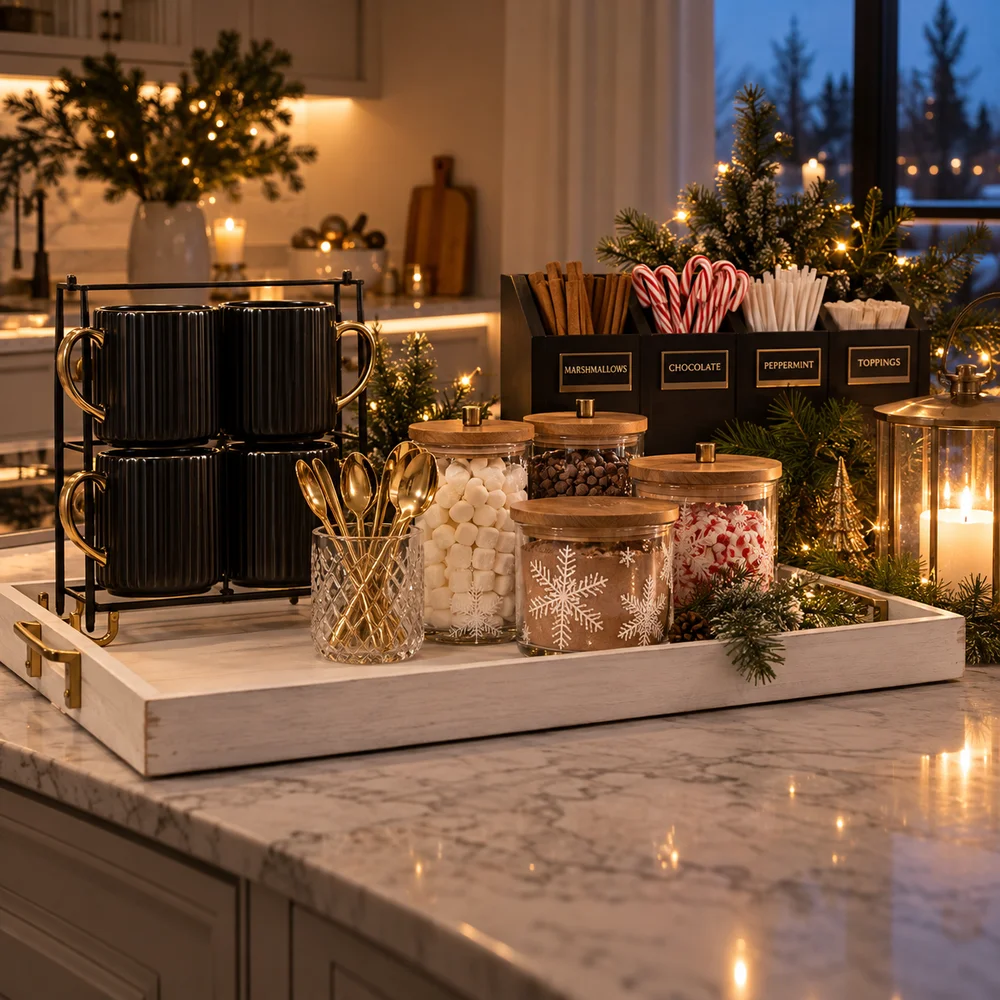
That is the real difference between a styled bar and a cluttered one. It is rarely about how much you own or how festive the pieces are. A bar looks composed when every object sits exactly where a hand expects to find it, in the sequence a person actually moves: cup first, then cocoa, then toppings, then the stirrer, then the first sip. When the layout follows that path, the surface looks calm even when it is full, because your eye reads a line instead of a pile.
This guide builds a cocoa bar in that order, one decision at a time. We begin with the surface that defines the footprint, move through the cups, the mix and the toppings, and end with the small details and the question of where the bar should live once the season is over. Each step is paired with one specific piece you can buy, along with practical notes on scale, spacing and how to combine it with what you already have.
One honest note before you start. Eight ideas does not mean eight purchases in one weekend. Several of these solve the same problem in different ways, a stack of mugs or a mug tree, glass jars or lidded cells, and the most polished bars choose one answer per job. Read through, decide which version suits your counter and your crowd, and let the rest go. Editing is the whole trick.
1. Start With One Tray That Sets the Boundary
 Save it
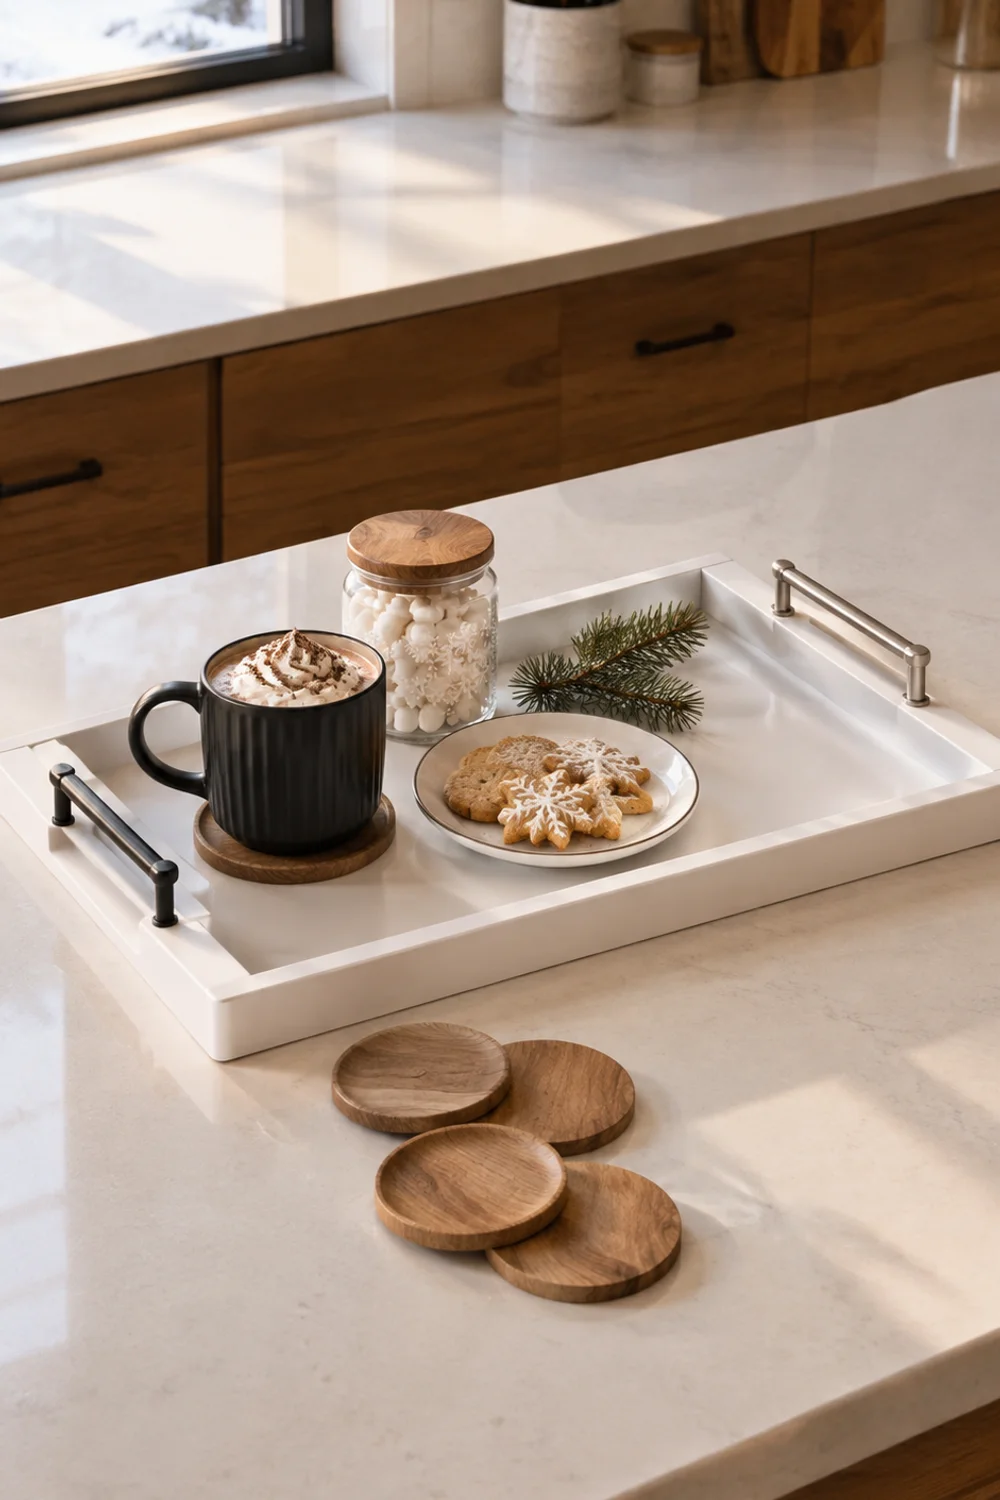
Every composed cocoa bar begins with a border. Without one, supplies drift across the counter a little at a time until the bar has no edges and the kitchen has lost its landing spot for mail, keys and fruit bowls. A single tray solves that before anything else is placed, because it tells everyone, including you, exactly where the bar begins and ends.
A white wood serving tray is a good example of the right proportions. It measures 16.5 by 13 inches with a shallow rim, which is large enough to hold a stack of mugs, a couple of jars and a small plate, yet small enough to move with two hands when it is time to wipe the counter underneath. The white painted finish does something useful as well: it works as a quiet backdrop that makes darker mugs and glass jars look deliberate, and it keeps the bar from competing with wood cabinetry or a busy backsplash.
The listing includes two sets of metal handles, matte black and polished silver, so you can match the hardware on your cabinets or faucet and let the tray read as part of the room rather than an add-on. Four round wooden coasters come with it too, and they earn their place at a cocoa bar, where a hot mug will inevitably be set down on the counter edge instead of the tray.
Fill the tray to about two thirds of its surface and stop. The empty third is not wasted; it is the space that makes the rest look arranged, and it gives guests a spot to set a cup while they reach for a topping. Place the tallest piece at the back left or right corner rather than the center, which keeps sightlines open and prevents the arrangement from looking like a store display.
If you enjoy the idea of treating trays as the organizing device for a whole countertop, How to Style Kitchen Trays for a Perfectly Organized Countertop walks through how to give each tray one clear job, which is exactly the mindset a cocoa bar rewards.
2. Stack the Mugs at the Start of the Line
 Save it
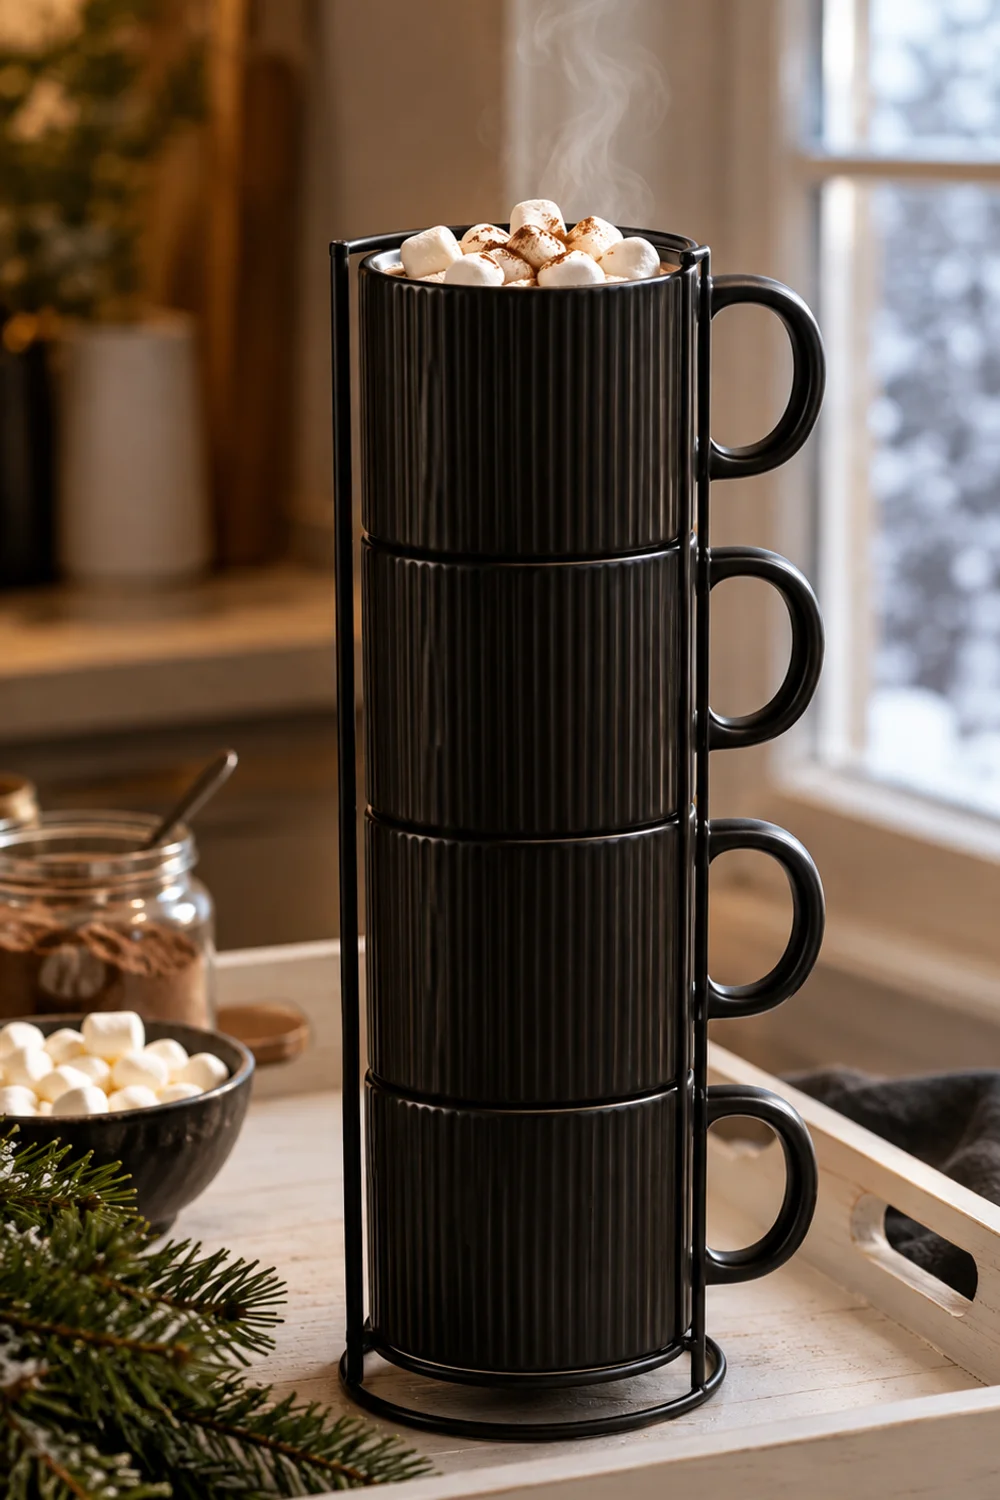
The cups are the largest objects on any cocoa bar, and they are also the first thing a guest reaches for, so they deserve the first position and the most deliberate treatment. Mugs set out in a loose group take up more room than any other item and tend to look mismatched even when they are not. Stacked on a stand, they become a sculptural moment rather than a problem.
This set of four porcelain mugs comes with its own metal stand, and the design suits a styled bar for a simple reason: the vertical ribbed pattern gives the black mugs texture and shadow, so they look sophisticated even before anything is poured into them. Each holds 15 ounces, which is a generous pour for a cocoa topped with marshmallows or whipped cream, and the listing specifically names hot cocoa among the intended uses.
Place the stand at the beginning of the line, on the side where guests naturally approach the bar, so that picking up a mug is step one and the rest of the arrangement reads left to right or right to left from there. Set it on the tray if the tray is large enough, or directly beside it on the counter with a coaster underneath if the surface matters.
Dark mugs against a white tray give you a strong contrast with very little effort, and that contrast is what makes a simple bar look intentional. If your kitchen is already dark, with black hardware or a charcoal backsplash, consider setting the stand against a lighter wall or on a pale cutting board so the ribbing does not disappear into the background.
Four mugs is the right number for a typical household bar. If more people are coming, you do not need a bigger stack. You need a refill strategy, which the next idea handles.
3. Hang the Overflow Mugs on a Tree
 Save it
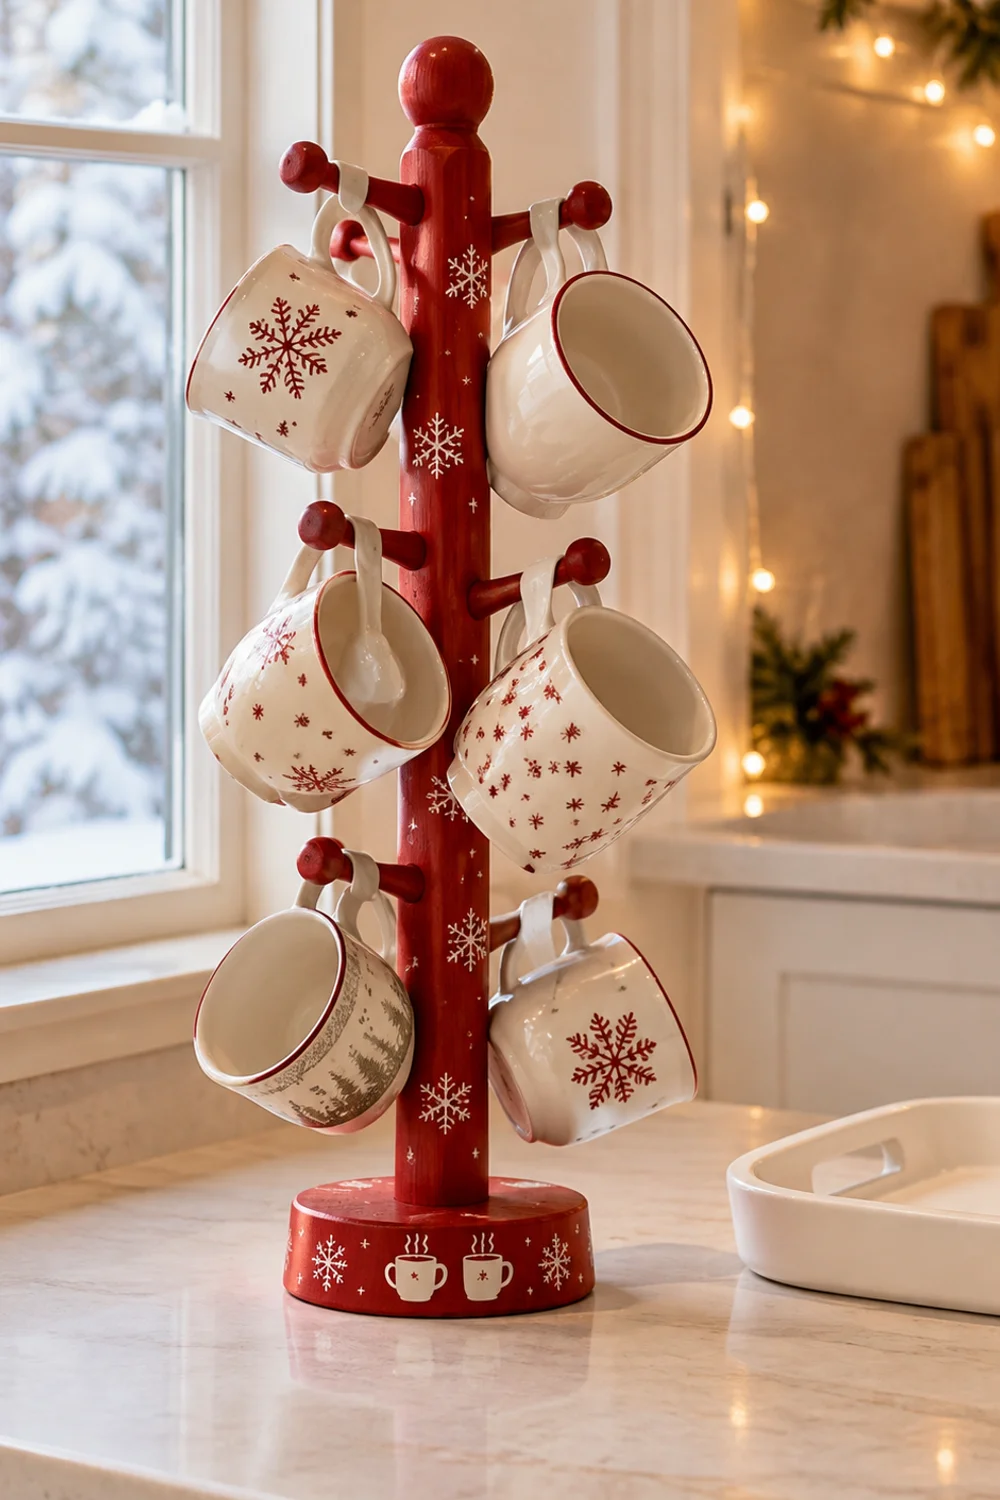
When the guest list grows beyond four, the instinct is to bring out every mug in the cabinet and line them up on the counter. That is the moment a styled bar becomes a cluttered one. A better solution is to take the extra cups off the surface entirely and hang them, which adds height, gives the eye a place to travel upward, and leaves the tray free for what actually needs to sit on it.
A red mug holder tree is built for exactly that. It measures about 13.8 by 6.3 inches and holds up to six standard mugs on its hooks, and it is made from solid wood, which gives it enough weight to feel stable with a full set of cups hanging from it. Its red finish and cocoa and snowflake motifs mean it works as seasonal decor even when it is empty, so it earns space on the counter instead of merely storing something.
Because it is red and decorated, treat it as the single color accent in the whole arrangement. If the mugs on it are white or cream, the tree reads as a deliberate focal point; if they are red patterned mugs, the effect becomes too busy. Keep the surrounding pieces neutral, white, clear glass and wood, and let the tree carry the festive note on its own.
Placement matters as much as the object. Set it at the far end of the bar, opposite the main mug stand, so the two cup stations bracket the arrangement and guests can enter from either side without crowding. If counter depth is limited, a corner position works well because the vertical shape uses space that would otherwise sit empty.
You do not need both the stand and the tree for a small gathering. Choose the stand when four cups will do, and choose the tree when the cups are the decoration, such as a collection of handmade or travel mugs that deserve to be seen.
4. Give the Mix and the Extras One Caddy
 Save it
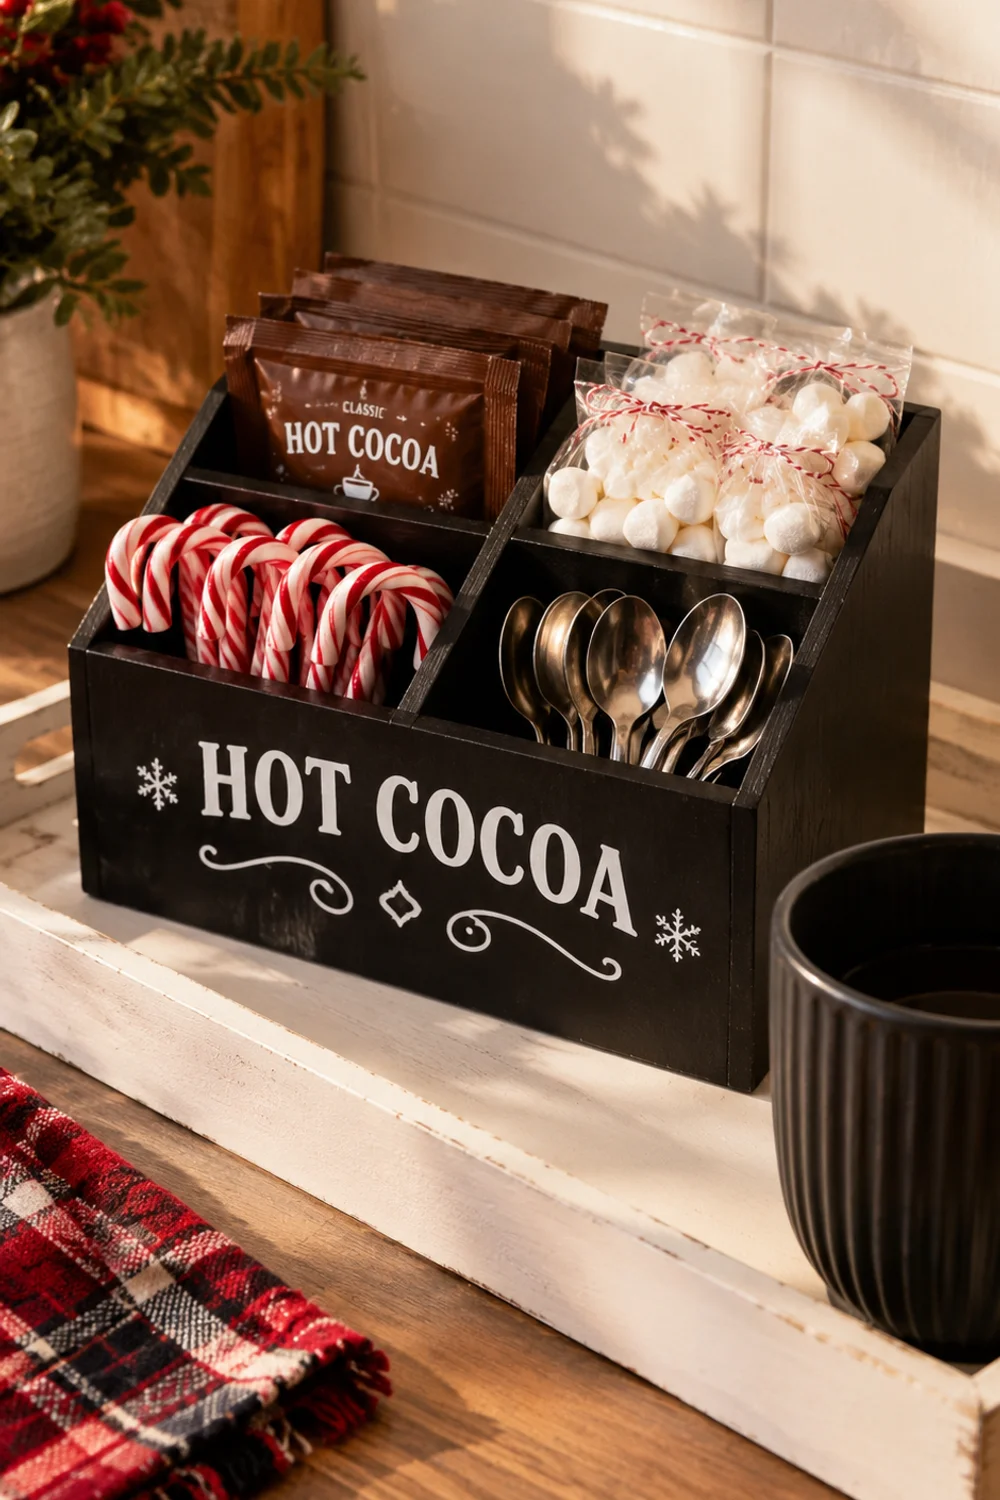
Cocoa bars become cluttered mostly because of small things: sachets, bags, tubs, a bottle of syrup, a tin of peppermint sticks. Individually they are fine, but together they form a loose pile that grows during the party. The fix is to give those items a single container with fixed compartments, so that nothing can spread beyond its own cell.
A black wood organizer is shaped for the job. It measures roughly 12.6 by 8.3 by 5.1 inches and divides into four compartments, and its painted black surface carries classic hot cocoa wording in black and white, so the box reads as a styled object rather than a utility bin. It also works as an anchor: tall and substantial, it gives the bar a clear back edge.
Assign each compartment before the party starts. One holds cocoa packets or a small tin of mix, one holds marshmallow bags, one holds cookie sticks or candy canes standing upright, and the fourth takes spare spoons, napkins or a small bottle of syrup. Naming the cells in advance prevents the slow creep of mixed items, and it also tells guests what is where without a label.
Because the box already carries lettering, you do not need a separate sign on the bar. Skipping the sign is a design decision, not an omission, and it keeps the arrangement from tipping into theme-party territory. Think of the wording as the bar’s only piece of text.
If a coffee corner already lives on your counter, the same principle applies there; 15 Coffee Station Decor Ideas Worth Copying Now shows how a single contained zone can carry personality without spilling across the whole kitchen, and it pairs well with a caddy like this one.
Keep the box slightly off-center toward the back, with the front edge flush with the tray’s back edge if you are using one, so the whole composition appears to rise in layers from the front to the rear.
5. Tier the Toppings in Snowflake Glass
 Save it
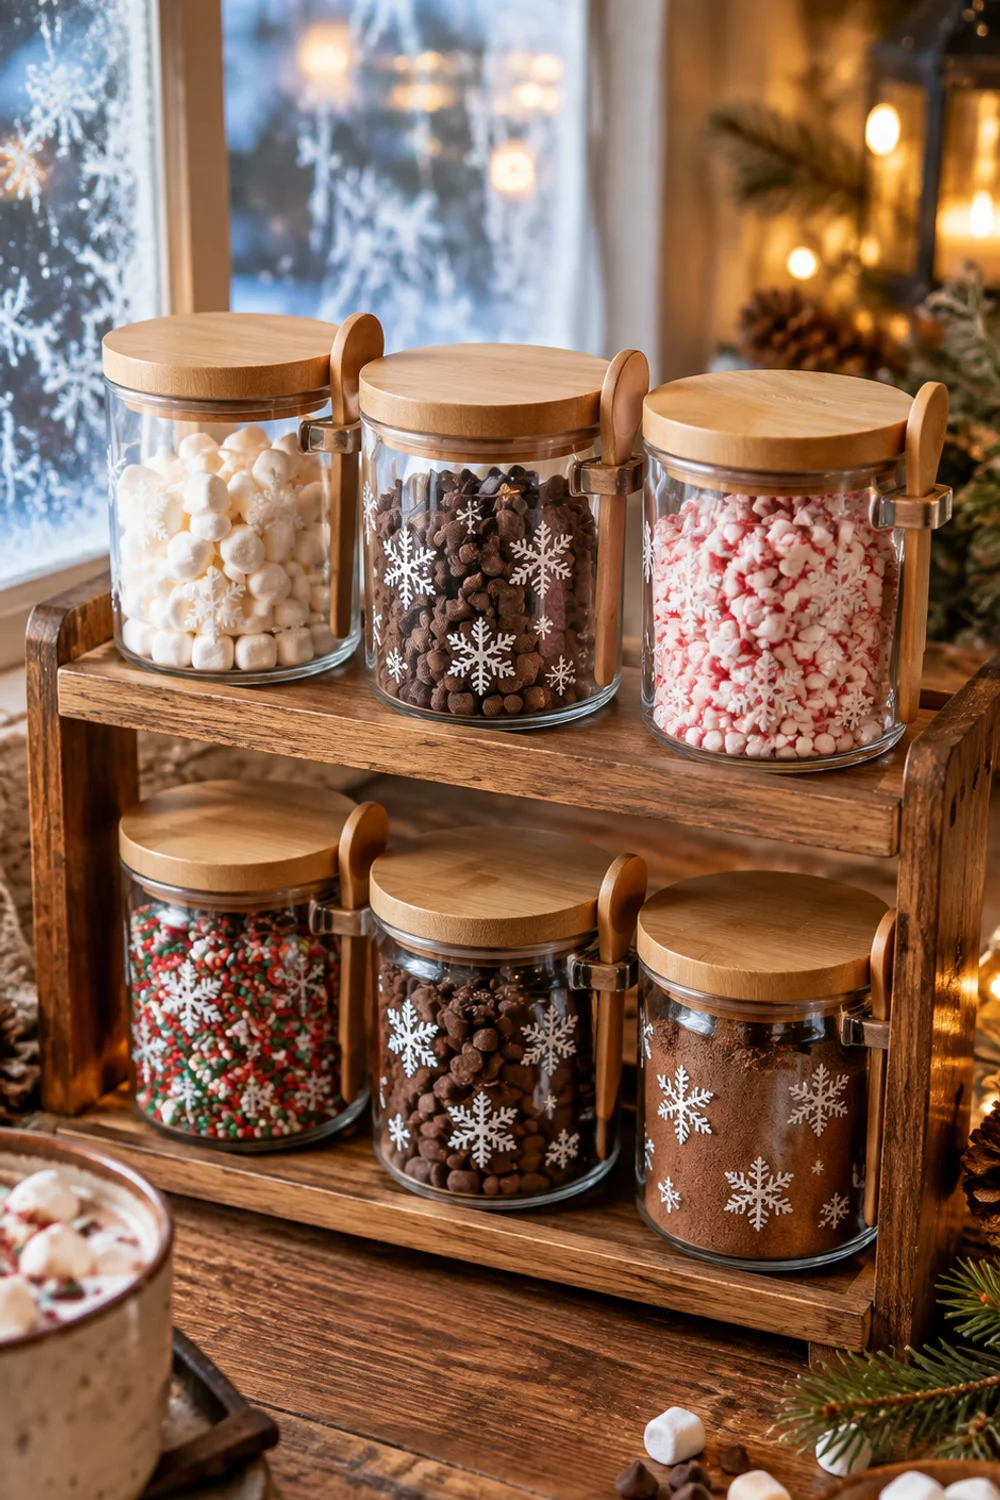
Toppings are where a cocoa bar earns its reputation. Marshmallows, chocolate chips, crushed peppermint, sprinkles and caramel bits look beautiful in themselves, and the most effective styling trick is to let the toppings be the decoration. That requires containers that show them off and a layout that gives them height.
This set puts six clear borosilicate glass jars on a two-tier wooden shelf. Each jar measures about 3.35 inches wide, carries a white snowflake pattern on the glass, and comes with a bamboo lid and a mini wooden spoon. The shelf itself measures 12.6 by 10.63 by 5.91 inches and is removable, so the whole piece can be stored flat or used all year for other jars.
The two tiers do the layout work for you. Place the lighter, more colorful toppings on the top tier, where they catch light, such as pastel mini marshmallows and rainbow sprinkles, and the heavier or darker ones on the lower tier, such as chocolate chips and cookie crumbs. That arrangement keeps weight low and puts the prettiest contents at eye level.
Fill each jar about three quarters full. Jars packed to the top look dense and store-bought; jars with a little air above the contents look composed, and the lid sits cleanly. The snowflake print gives the glass enough pattern that you do not need ribbons, tags or ornaments to make the jars feel festive.
Because the jars and the mini spoons arrive as a set, you avoid the mismatched-ladle problem that makes many bars look improvised. Each topping has its own spoon, and the spoons live in the jars, which means there is nothing extra to find and nothing extra to clean up.
This is the idea to choose if you want the bar to feel like a small display. It is slightly more decorative than the cells in the next idea, and it suits a counter that sees the bar for weeks rather than a single evening.
6. Move to Lidded Cells When the Crowd Grows
 Save it
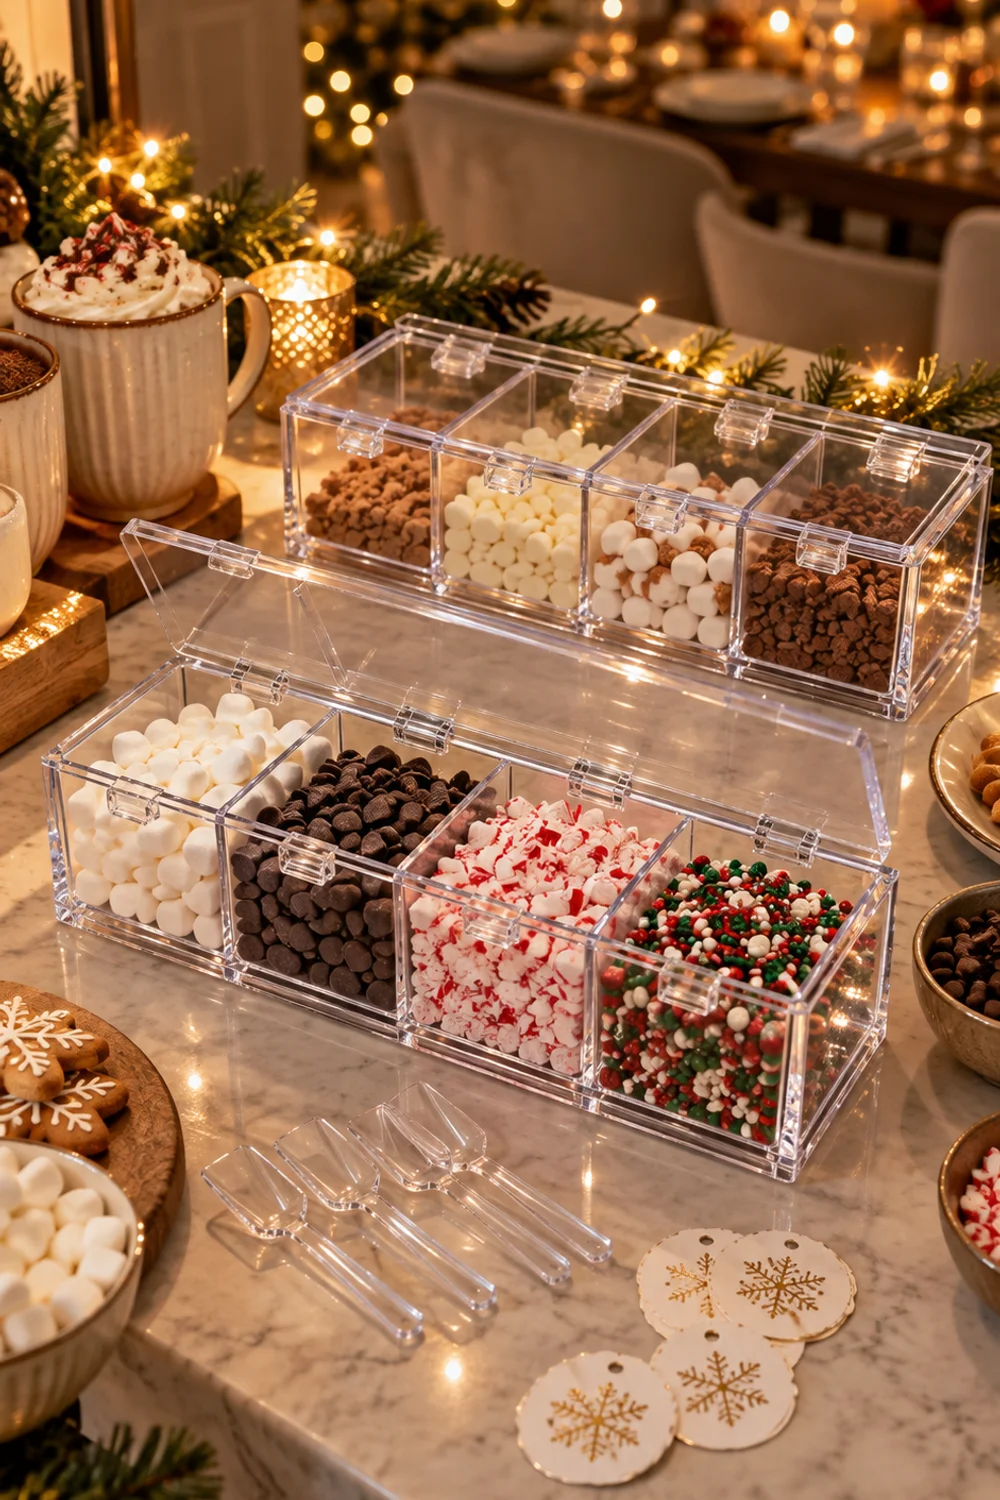
Glass jars are charming, but they ask a little more of the person using them. Lids come off, scoops get set down on the counter and a crowd of guests, especially children, tends to move quickly. When the bar is for a party rather than a quiet evening, the more practical answer is a set of lidded cells that keep everything contained and visible.
This set includes two clear acrylic organizers, each divided into four cells with hinged flip-top lids, for a total of eight cells. Each organizer sits on a base tray, and the set includes clear scoops and snowflake topping labels that name typical options such as marshmallows, chocolate chips, sprinkles, peppermints and caramel. Each organizer is about 9.25 inches wide, so two sit comfortably side by side on a standard counter.
The hinged lids are the practical advantage. They stay attached, so they cannot wander off, and they close between servings, which keeps marshmallows soft and sprinkles from migrating. For a long evening, that matters more than it sounds.
Visually, clear acrylic is quiet. It lets the colors of the toppings do the decorating, and it keeps the arrangement from competing with the mugs or the sign on the bar. The listing notes the pieces are made from clear plastic designed to look like glass, so treat them as a gathering workhorse rather than a precious display object.
Use the labels that come with the set but apply them with a plan. Label only the cells where the contents are not obvious at a glance. White mini marshmallows and chocolate chips identify themselves; crushed peppermint and caramel bits benefit from a name.
Do not combine these with the glass jar set on the same tray. Choose one topping system per bar. If you want the best of both, use the glass tiers for a weekend family bar and keep the cells for larger gatherings, rotating them rather than stacking them side by side.
7. Finish Every Cup With a Gold Spoon
 Save it
Stirrers are tiny and easy to ignore, which is exactly why they cause so much visual noise. Plastic stir sticks in a paper cup, a pile of mismatched teaspoons, a fork someone used because nothing else was within reach. A single consistent spoon, set in a single place, quietly raises the whole bar.
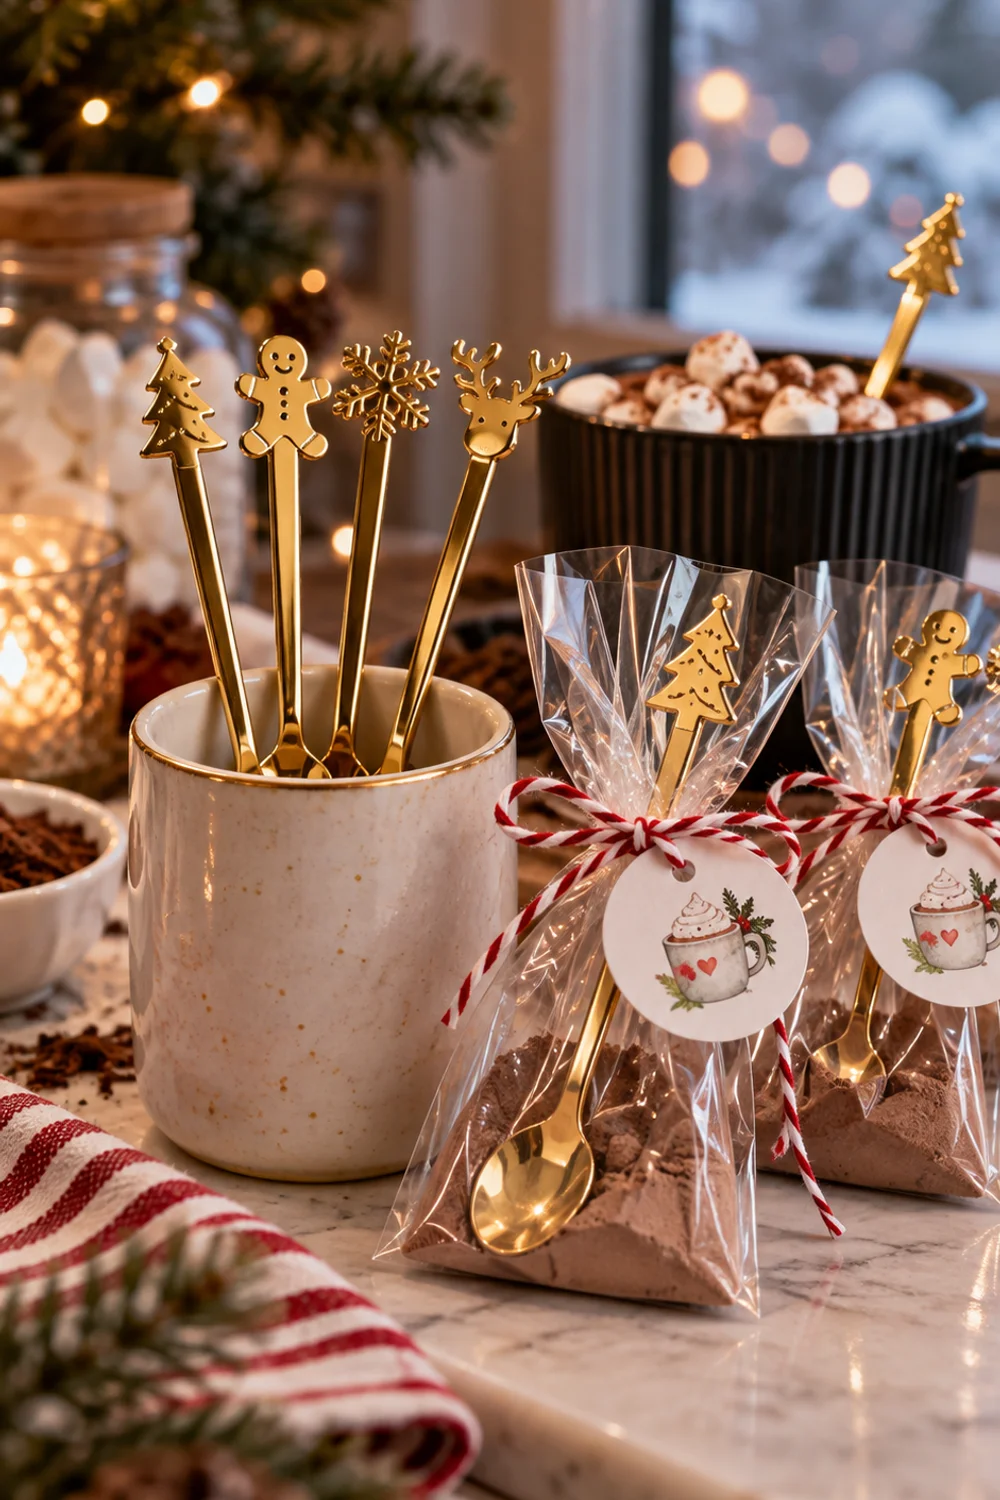
This set includes twelve stainless steel hot chocolate spoons in gold, each about five inches long, with four different Christmas patterns on the handles. The listing adds 25 clear bags, a roll of red and white cotton rope and 25 round cocoa labels, which turns the spoons into a ready-made favor if you prefer to send guests home with something.
Gold is a useful color on a cocoa bar because it is the one metallic that suits almost every palette: it warms white, sharpens black and ties in with wood. Standing a few spoons in a small glass or a short ceramic cup near the mug stand gives the bar a bright, polished highlight at a low, easy-to-reach height.
For a styled-not-cluttered result, display only the spoons you need, perhaps six, and keep the rest in the box. A crowded vase of spoons is just another pile. The patterned handles are a nice touch, but they work best when the rest of the bar stays plain, so skip additional ornaments nearby.
If you want to use the gift option, bag two spoons with a handful of cocoa mix and tie them with the rope and a label. Set a small stack of these on the tray’s open third. They double as decoration while the party lasts, and they leave with guests at the end of the evening.
Place the spoon cup where the bar ends, at the exit of the line. That is the last decision a guest makes before sitting down, and having the stirrer at the end keeps traffic moving in a single direction.
8. Let the Whole Bar Roll to Where the Party Is
 Save it
A cocoa bar is rarely permanent. It begins on a kitchen counter and, sooner or later, someone wants it in the living room near the tree, or on the porch table, or beside the sofa for a movie night. Moving a dozen small objects one by one is exactly the sort of task that makes people abandon the idea, so the final decision is to make the whole bar portable.
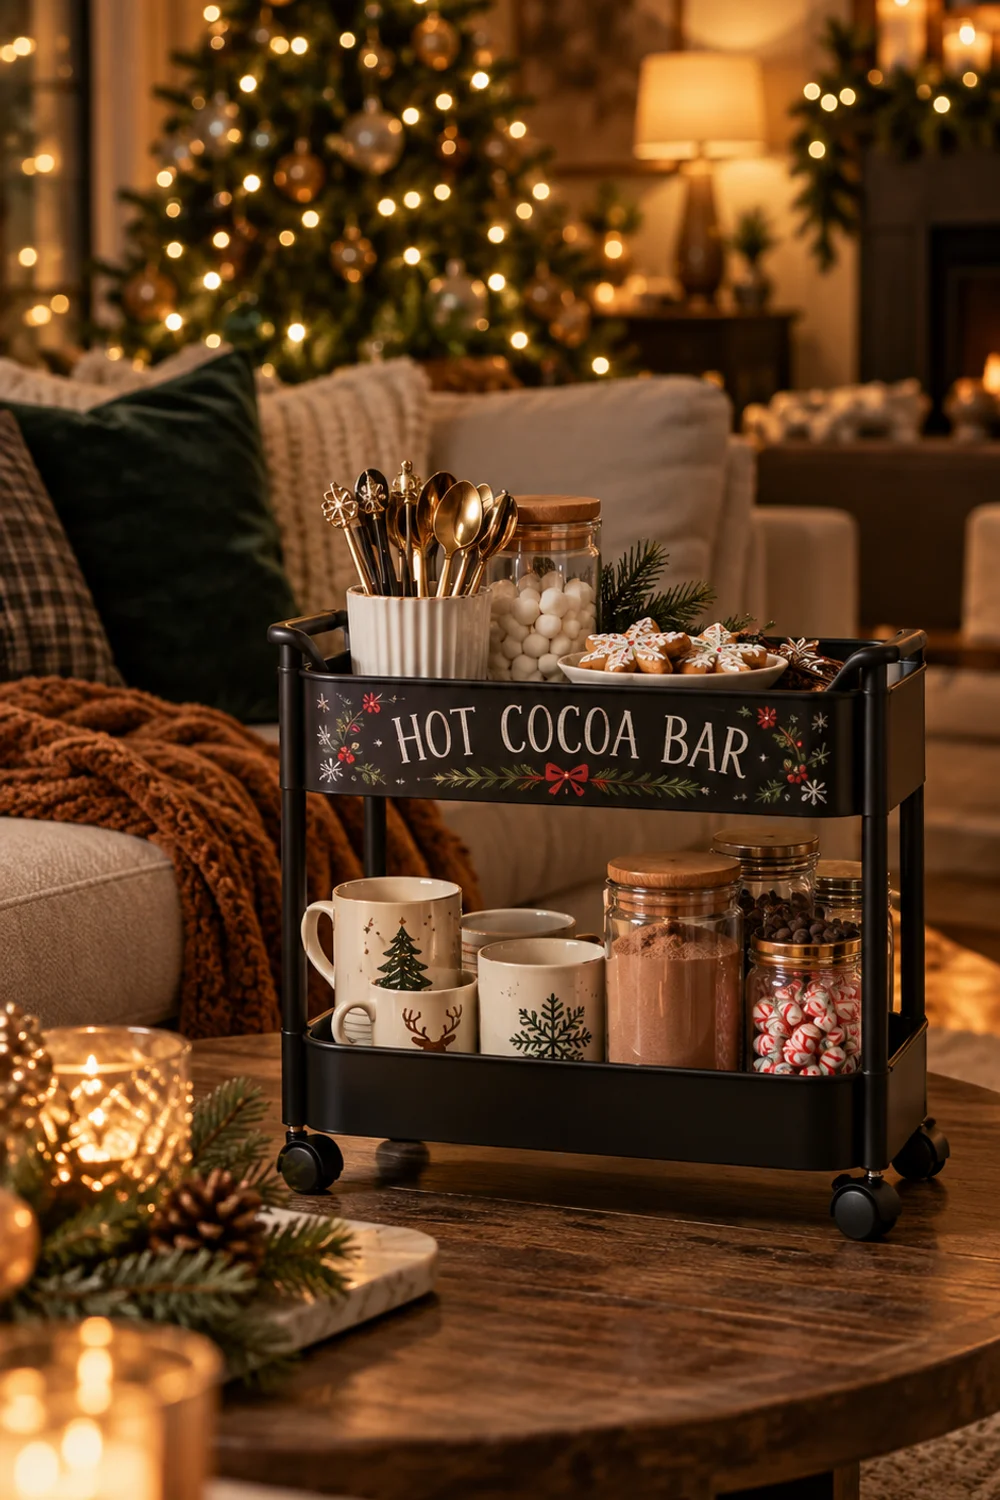
The rolling cart is compact, measuring about 35 by 20 by 38 centimeters, or roughly 14 by 8 by 15 inches, with two tiers, four wheels and a black frame printed with a Hot Cocoa Bar holiday design. The listing describes it as a desktop piece, so think of it as a small mobile station that suits a counter or low table rather than a floor-standing cart.
Load it by weight and use. Mugs, glass jars and anything heavy belong on the lower tier, which keeps the cart stable when it rolls. The upper tier takes lighter objects such as the spoons, a small plate of cookies or a bag of marshmallows. Anything that can spill, a jug of warm milk, should be carried separately and set beside the cart rather than inside it.
The Hot Cocoa Bar print means the cart already contains the bar’s name, so, as with the caddy, you can leave the sign at home. Keep the rest of the arrangement plain and the cart itself becomes the decoration.
When the cart moves into a living room, treat it as part of the room’s story rather than a visitor. Park it near the seating on the side where the lamp or the tree gives it a glow, and keep a coaster for each mug that leaves it. For more ideas about making small rooms feel festive without losing floor space, How to Decorate a Small Living Room for Christmas shows how to layer holiday decor onto surfaces you already have.
After the season, the cart folds into everyday life as a coffee trolley, a snack station or a craft cart. That second life is what makes it a sensible purchase rather than another box in the attic.
Common Mistakes
1. Using every piece at once
A cocoa bar with two mug systems, two topping systems, a sign, a caddy and a cart is not abundance, it is overlap. Choose one answer per job, one cup solution, one topping solution, one stirrer, and let the empty space on the tray do part of the styling work.
2. Putting the bar on the wrong counter
A cocoa bar in the path between the sink and the stove becomes a traffic jam. Place it where guests can approach without crossing the cook’s route, ideally at the end of a counter or on a separate table with room to stand on one side.
3. Filling every container to the brim
Jars and cells filled to the top look dense and are harder to scoop from. Leave a little air above the contents so lids sit cleanly and the toppings look arranged instead of packed.
4. Mixing too many accent colors
A red mug tree, gold spoons, snowflake glass, black mugs and printed lettering can work together only if one color leads. Choose one dominant accent, red or gold, and keep the others in the background so the bar reads as a single idea.
5. Forgetting the landing space for hot cups
Guests will pour a mug of cocoa and then need somewhere to set it down while they reach for toppings. Leave a clear stretch of tray or counter, and keep coasters nearby, so cups do not end up on the edge of the caddy or on top of a jar lid.
6. Treating the sign as the whole design
A cocoa bar sign can be charming, but it cannot organize anything. If the layout underneath has no order, a sign only announces the clutter. Let the arrangement carry the look, and add lettering last, if at all.
Frequently Asked Questions
How many items do I really need for a hot cocoa bar?
Fewer than most shopping lists suggest. A tray, a place for the cups, a container for the mix, two or three toppings and one kind of stirrer are enough for a bar that looks complete. Everything beyond that should earn its place by solving a real problem, such as a larger crowd or a smaller counter.
How do I keep a cocoa bar from looking cluttered?
Arrange it in the order guests use it, cups first, then cocoa, then toppings, then spoons, and keep one third of the tray empty. A clear sequence reads as intentional, while the same objects scattered around the counter read as mess.
Can I set up a cocoa bar in a small kitchen or apartment?
Yes. A single tray, a stack of mugs and a few lidded containers fit on a section of counter about the size of a cutting board. A compact rolling cart is useful in small homes because the bar can live on a shelf or table during the day and roll out when needed.
How far ahead can I set up the bar?
Set up the tray, mugs and dry toppings the day before, then add anything perishable, such as whipped cream or fresh marshmallows, shortly before guests arrive. Keep warm milk or cocoa in a separate pot so the bar itself stays room temperature and tidy.
How do I make the bar feel festive without overdecorating?
Let the supplies be the decoration. Snowflake glass, gold spoons and a single red accent bring the season without extra garland or figurines. One small piece of greenery, placed at the back, is plenty.
Final Thoughts
A cocoa bar looks styled when it has a logic you can read from across the room: a boundary, a starting point, a sequence and a clean finish. The products matter, but the order matters more. A tray that sets the edge, cups at the beginning, mix and toppings in contained, visible places, a single bright spoon and a way to move the whole thing to wherever the evening goes are enough to make a simple setup feel considered.
Start with the tray and the cups, then add only what your counter and your guest list genuinely call for. If something does not solve a problem, leave it in the box. The most memorable bars are rarely the fullest ones. They are the ones where every object had a place to be, and where a guest could walk up with a cold-nosed smile and know, without being told, exactly what to do next.
This post contains affiliate links. I may earn a small commission at no extra cost to you.
Get cozy inspiration delivered to your inbox.
✓ 14-page beautifully designed ebook
✓ Cozy decorating ideas
✓ Practical room-by-room inspiration
You’re in! 🎉
Thanks for joining the NestFlowHome community!
Your free ebook is already on its way to your inbox. If you don’t see it within a few minutes, please check your Promotions or Spam folder.
Join the NestFlowHome community for weekly decorating inspiration.

Timeless home decor ideas and slow living inspiration for a calm, beautiful life.