
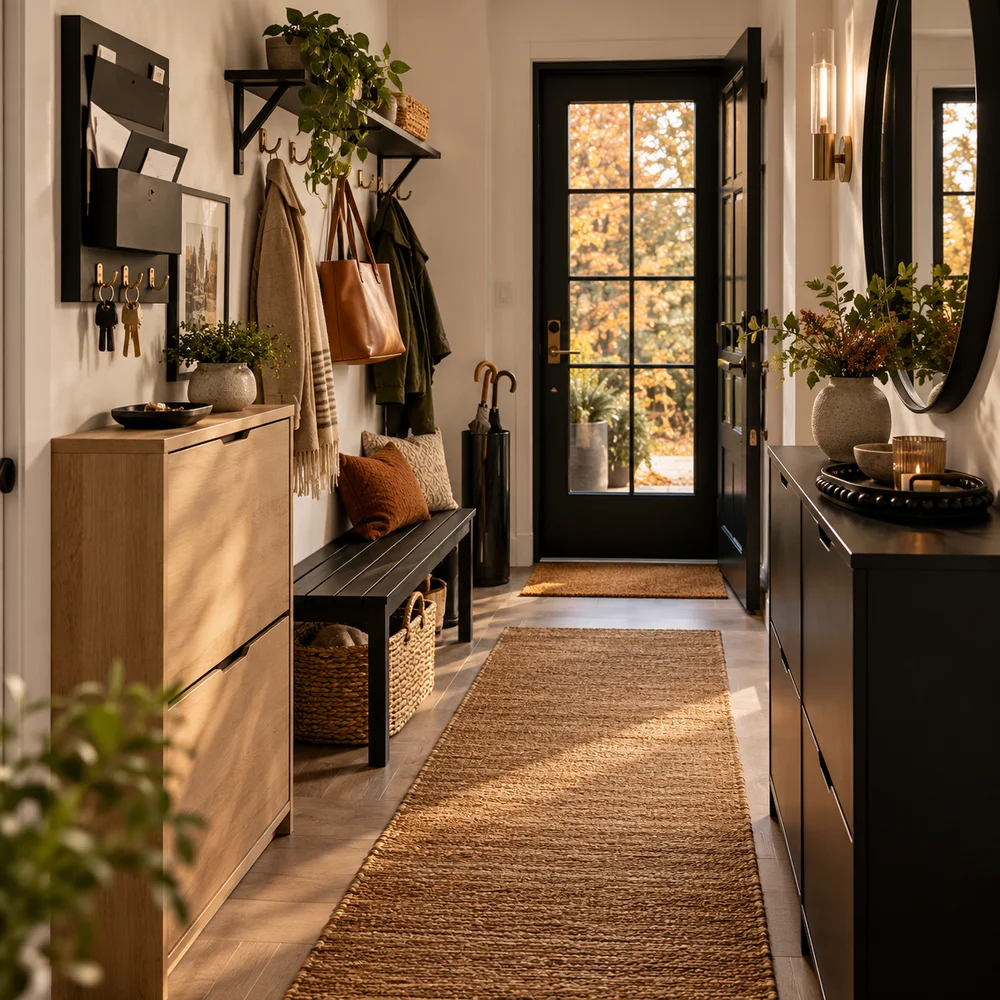
How to Make a Drop Zone in a Small Entryway
By Emily | October 20, 2026
Watch what your hands do in the first thirty seconds after the front door closes. Keys go somewhere. The phone is set down, a package is shifted to the other arm, a bag slides off a shoulder, and a damp umbrella leans against whatever is nearest. None of it is careless. It is simply the body trying to put things down before it has decided where they belong, and in a small entry that improvised routine usually ends with a pile on the closest flat surface.
A drop zone is the answer to that half minute. It is not a single piece of furniture so much as a small, deliberate choreography: a place for keys, a place for mail, somewhere to sit, something to catch the wet, and a light that is already glowing when you come in at dusk. When each of those moments has a designated spot, the entry stops being a place where things land and becomes a place where they are sorted.
This guide builds that choreography one layer at a time, starting with the tall anchor piece and moving through walls, surfaces, floors and light. Every idea is sized for a narrow entry, with real measurements, spacing and styling notes, because the difference between a drop zone that works and one that crowds the door is usually an inch or two. Take what fits your door, your floor and your habits, and let the rest go.
1. Begin With One Slim Tall Piece That Gives the Zone Its Spine
 Save it
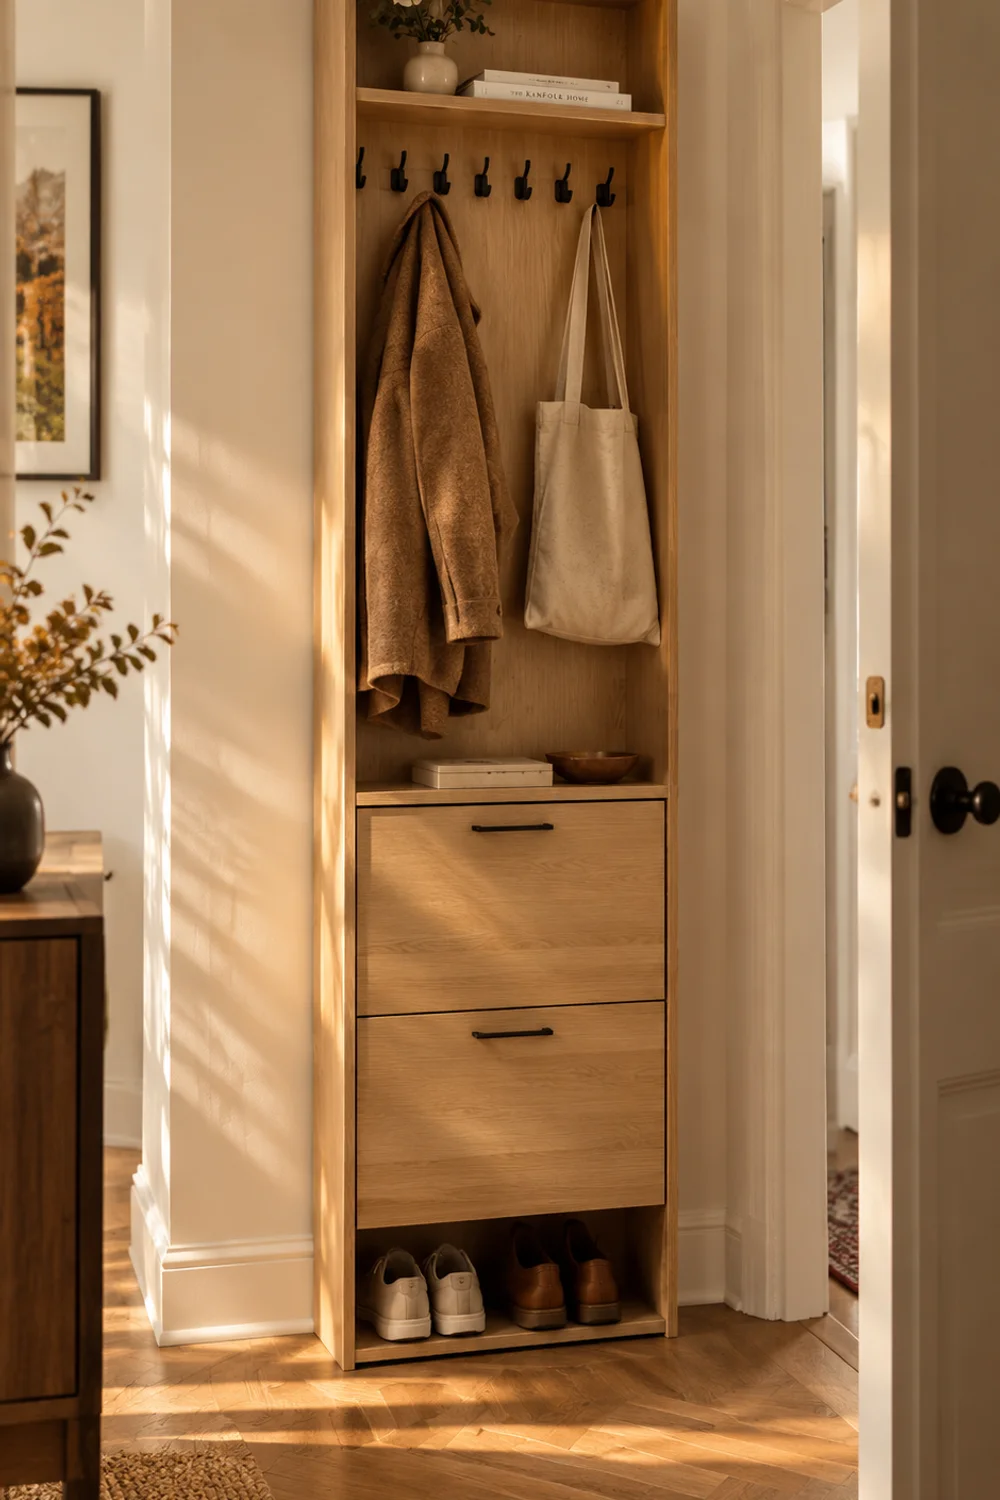
Every drop zone needs a spine, one vertical element that tells the eye where the routine lives. In a small entry the most efficient spine is tall and shallow rather than low and wide, because floor space is the scarcest resource and wall height is almost always unused. A slim column that is under a foot deep and nearly six feet tall can hold coats, shoes, keys and a few decorative objects while borrowing barely any walking room from the door.
A good example is a slim light-oak hall tree that pairs a row of coat hooks with a shoe cabinet beneath, such as this narrow 31-inch-wide piece with seven hooks, two flip-front drawers and an open shelf at the bottom. The listing puts it at roughly 75 inches tall and under ten inches deep, and the drawers are described as holding about four to eight pairs each, which means a household of two can hide most of its footwear behind two quiet panels. The open bottom shelf stays free for the pair you wear daily, so the grab-and-go habit survives.
Styling the top decides whether the column reads as furniture or as storage. Keep the upper shelf for two or three objects only, perhaps a small ceramic vessel, a stack of two books and something organic like dried stems, and let the middle open shelf carry a single tray or basket for daily items. Leave a few inches of breathing room between objects, because a crowded top shelf makes a slim piece look top-heavy.
Placement matters as much as styling. Put the column on the wall you see first when the door swings open, and keep it on the hinge side so the door never knocks against it. Because the piece is tall and narrow, secure it with the anti-tip kit the listing includes, especially if children or pets use the entry. The light wood tone also helps in a tight space, since it reflects daylight back into the corner rather than absorbing it, and it lets everything you add around it, from black hardware to woven textures, read clearly.
2. A Key and Mail Organizer That Makes the Wall Do the Remembering
 Save it
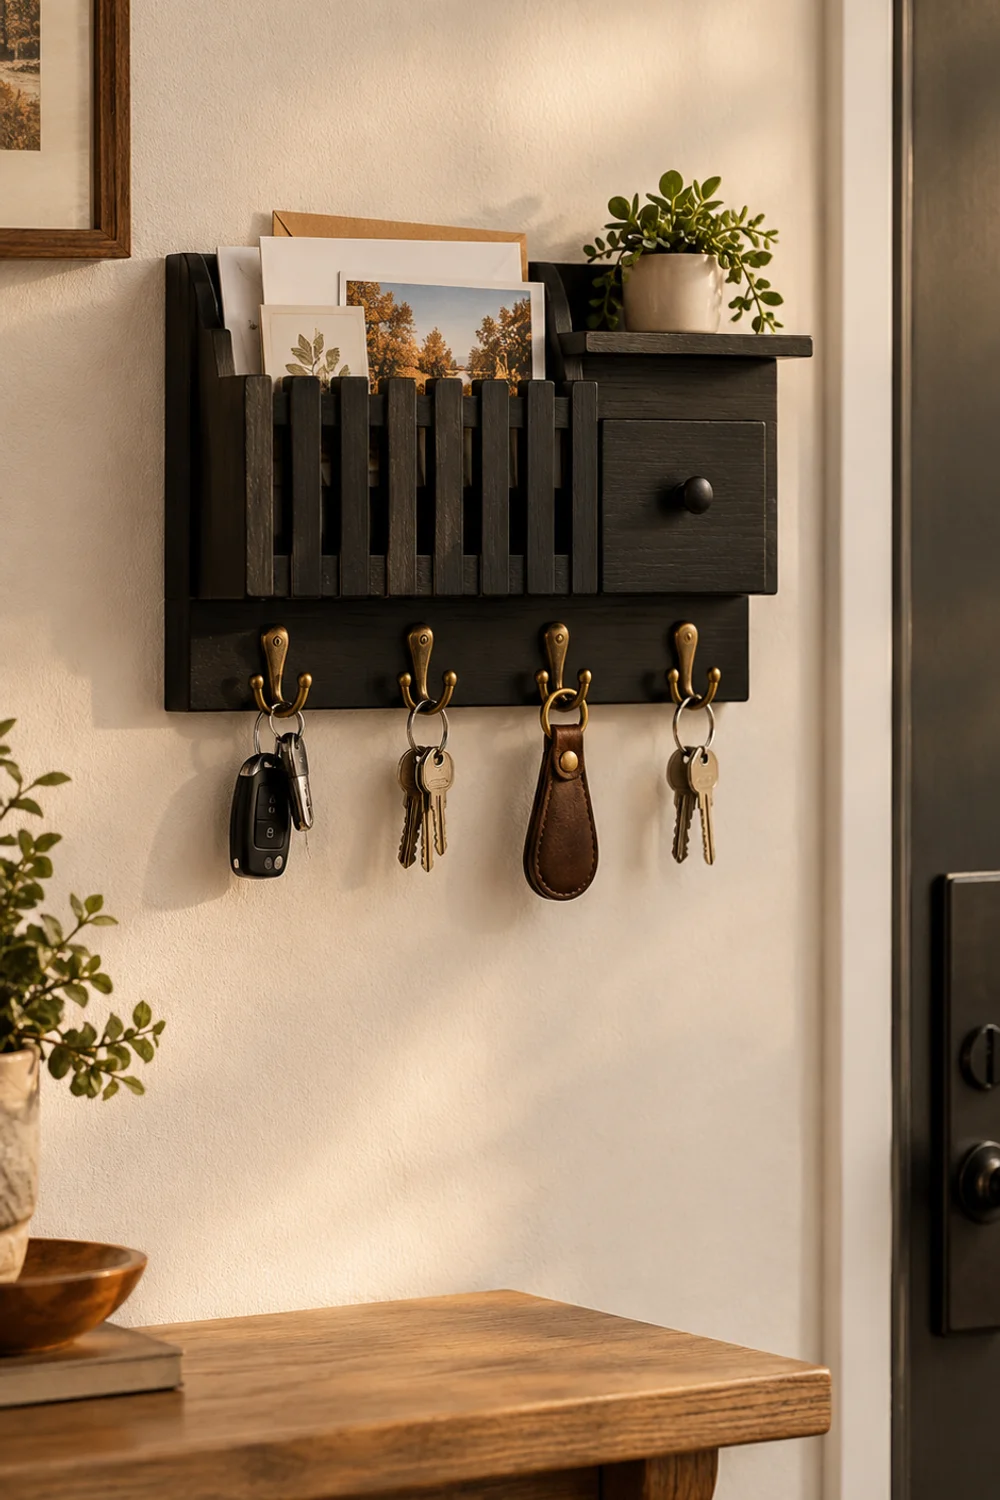
Most lost keys were not lost at all. They were set down in a different place than yesterday, because the entry had no single obvious home for them. A wall organizer solves that by moving the habit from a surface, where objects wander, to a fixed row of hooks where they cannot. Once keys hang at the same height every day, you stop searching and start reaching.
A compact black wood organizer built around a hook rail does most of the work here. This one carries four double hooks in antique brass, which gives eight hanging points, plus a slatted fence-style mail pocket across the front, a small drawer with a round knob and a narrow shelf on top. The brass against black is a quiet detail worth noticing: it gives a utilitarian object a little jewelry, and it echoes well with warm wood nearby. The listing offers two ways to mount it, either screws and expansion tubes with a drilling template or adhesive strips for renters, so you can choose according to the wall.
Mount it at a height where the hooks fall roughly at chest level, around fifty to fifty-four inches from the floor, so keys sit where a hand naturally lifts. Put it on the wall closest to the door handle, within one step of where you stand when the door closes. The distance matters more than people realize: if the hooks are more than a few steps away, keys end up in a coat pocket again.
Give the mail slot a rule of its own. Sort the day’s post standing in front of it, discard what you do not need and let only two or three real items remain, otherwise the fence turns into a paper pile. The small drawer is the right home for stamps, spare batteries or a spare house key tag. Assign the hooks by person rather than by object, one pair of hooks per household member, and the organizer becomes a quiet system rather than just a shelf with hooks.
3. A Beaded Black Tray That Turns a Landing Spot Into a Vignette
 Save it
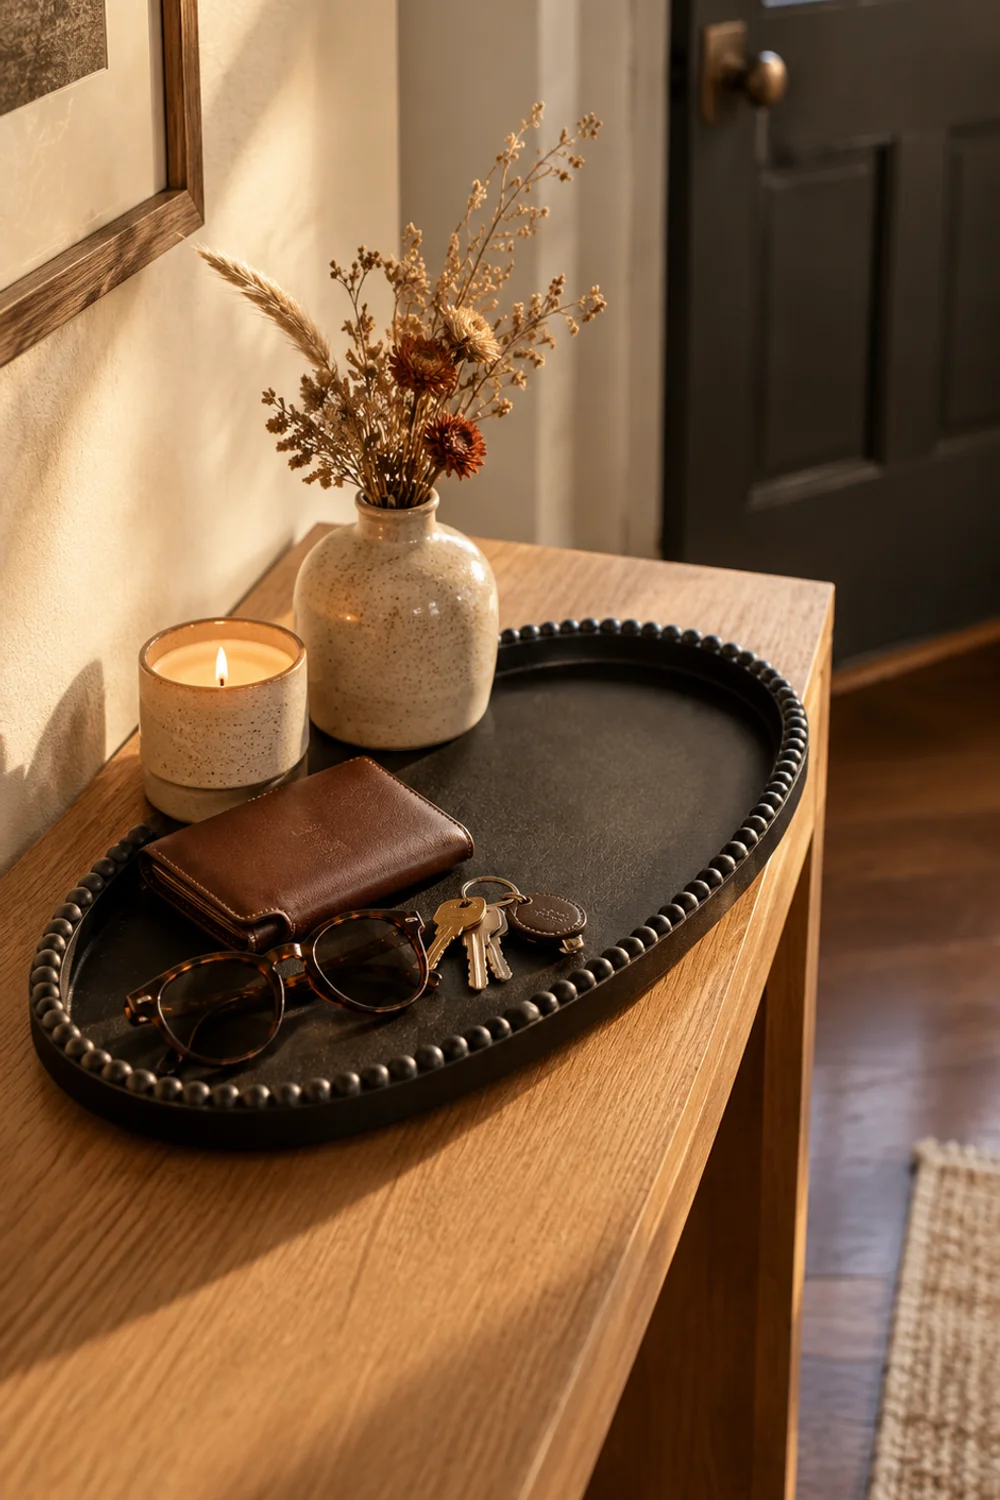
A surface near the door is where phones, wallets, sunglasses and loose change gather, and a bare surface turns that gathering into clutter within a day. A tray changes the arithmetic. It draws a visible boundary around the pile, so the same objects look intentional, and it gives you a single thing to pick up and move when you need to wipe the surface.
Choose the tray for its presence, because it will be seen from the door every day. An oval matte-black wooden tray with a beaded rim, about fifteen inches long and nine inches wide, has the kind of detail that keeps a catchall from looking like office supplies. The beading adds a soft, handcrafted edge, the matte finish absorbs light rather than glaring, and the listing notes a fabric base that protects furniture from scratches, which matters when keys land on it with some force. The shallow rim, just over an inch high, keeps small things in without hiding them.
Think of the tray as a small composition with three parts: something functional, something sculptural and something soft. The functional part is the daily kit, keys and sunglasses and a wallet. The sculptural part is a single object with height, such as a ceramic bud vase or a candle, and the soft part is a little visual relief like a sprig of greenery. Keep the arrangement to roughly two thirds of the tray’s surface, so there is always an empty edge where a phone can land without disturbing anything.
Black is a strong choice in an entry with pale walls, because it anchors the surface and makes everything placed on it look edited. On a dark console, though, a black tray can disappear, and in that case a lighter wood or stone tray will give better contrast. Wipe the matte surface with a dry cloth once a week and empty the tray completely every Sunday evening, returning only what truly belongs.
4. A Wall Shelf With Hooks for the Things You Grab on the Way Out
 Save it
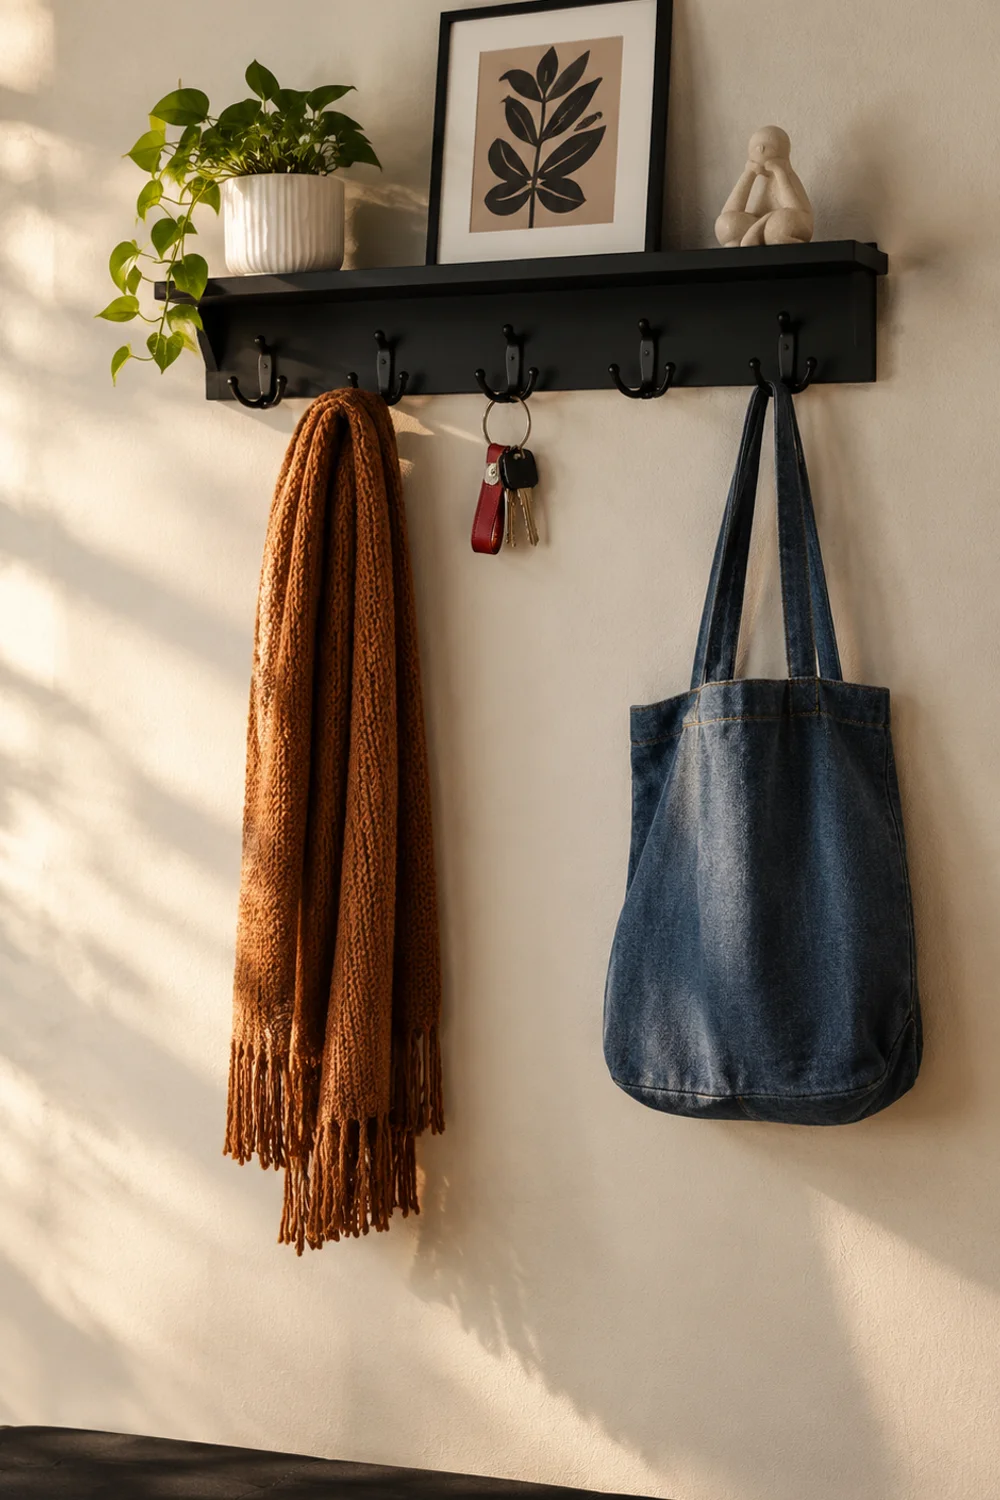
Not everything in a drop zone is coming in. Some objects are waiting to leave: the tote for tomorrow’s errands, a scarf, a dog leash, the umbrella you will want if the sky turns. These need a spot that sits in your line of sight when you are leaving, and the most space-efficient place is a shelf above a row of hooks, mounted at a comfortable height just beside the door.
A long, slim wall shelf with five dual-prong black hooks beneath it, around twenty-nine inches wide, is a useful format for a narrow entry. The hooks, which the listing rates at about eleven pounds each, handle bags and scarves. The ledge above them gives you a display line for a small plant and a framed print, which is exactly how the product is shown in its own photos. The black finish makes the whole thing read as a graphic line along the wall rather than a bulky object.
Height is the detail to get right. Hang the hooks so the lowest point of a loaded bag clears the floor by at least a foot, which in most entries means mounting the rail with the hooks around sixty inches high. If children use the zone, install a second, shorter rail lower on the wall rather than lowering this one, because hooks set too low waste the upper wall. For deeper guidance on hook heights, spacing between hooks and how to carry heavy winter coats, How to Store Coats and Bags in a Small Entryway walks through each solution in detail.
On the shelf itself, resist the urge to line up everything you own. One framed piece of art leaning slightly, one plant and one small object, set with deliberate gaps, will make the shelf feel curated. If you need a place for a spare pair of gloves, tuck them into the plant’s pot cover rather than leaving them in the open. Use the screws and anchors included in the box on drywall, and find a stud if the hooks will carry anything heavy.
5. Small Woven Baskets That Sort the Overflow Without Looking Like Storage
 Save it
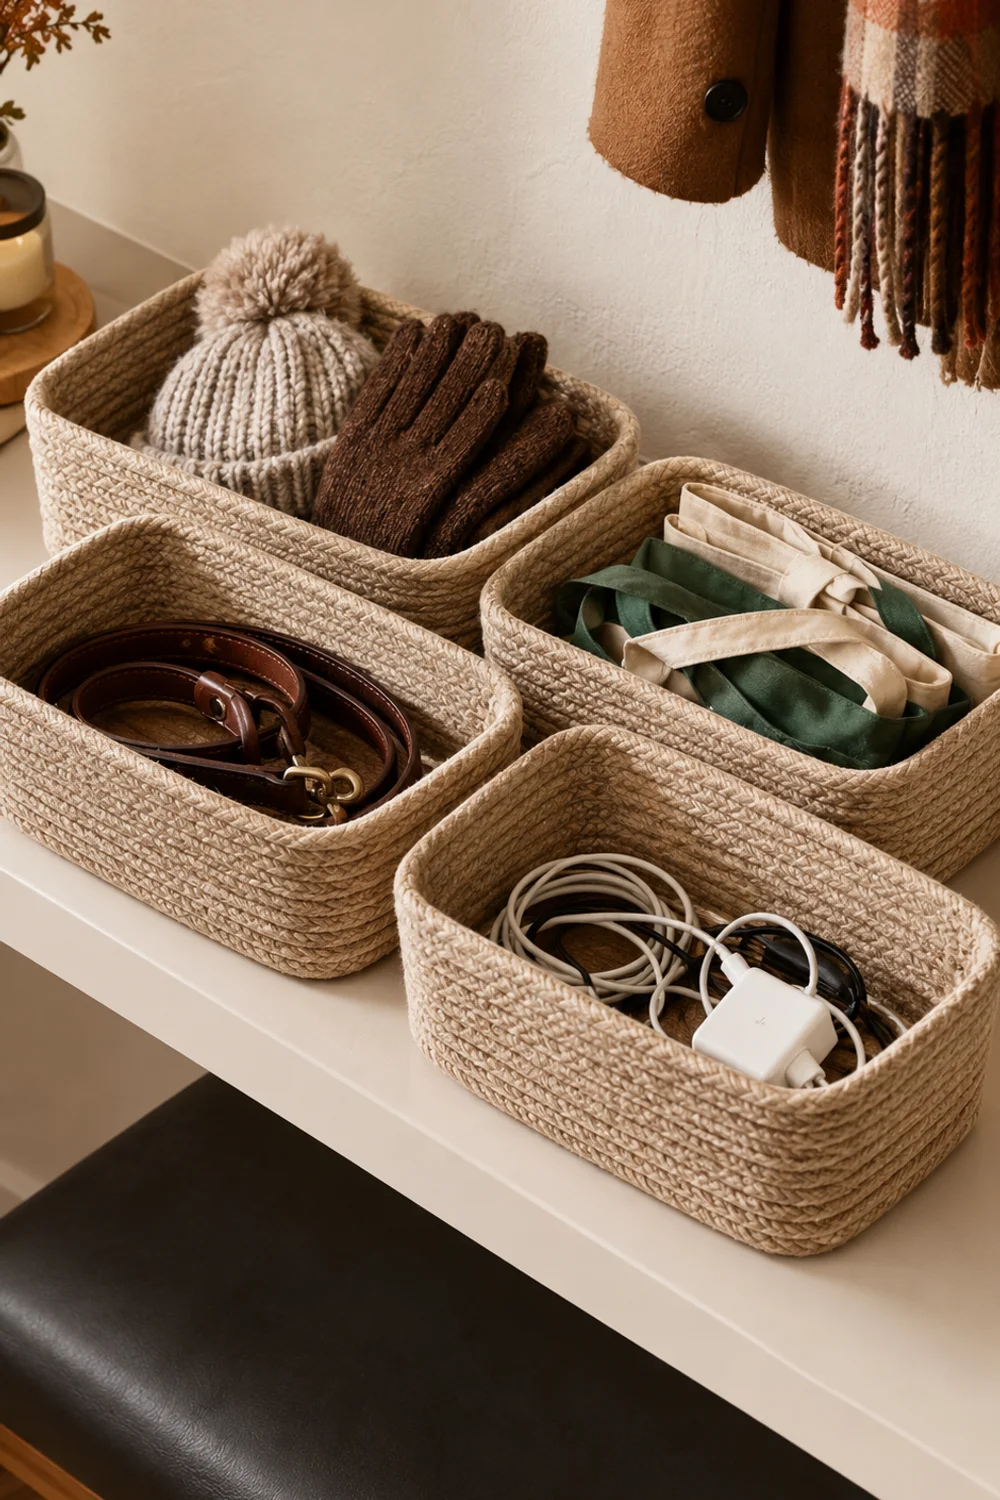
Even with a rack, a tray and a hook rail, a drop zone leaks small things: gloves, hats, dog treats, reusable bags, the charger no one has a home for. These items are too small for hooks and too numerous for a tray, and the only elegant fix is a container with a soft, informal presence. Woven baskets do that work better than boxes because their texture belongs in a room rather than in a closet.
A set of four low rectangular baskets woven from coiled cotton rope is a good fit for a narrow shelf. Each measures about twelve inches long, eight inches wide and under five inches tall, which is shallow enough that you can see what is inside without digging. The oatmeal-tan color sits quietly against almost any wall, and the soft sides forgive the occasional overstuffing. Because the cotton rope is foldable, the baskets arrive flat and shape back up once you fill them, and the listing suggests ironing out the creases if you want a neater form.
Assign each basket one job, and label them in your mind rather than with stickers. One for gloves and hats, one for reusable bags, one for the dog’s leash and treats, one for charging cables and chargers. When four baskets sit side by side on a shelf, the visual rhythm is calm and the sorting is obvious, so children and guests find things without being told where they live.
Resist the urge to line baskets up at the front of a shelf like a store display. Set them slightly back from the edge, and let one slightly overhang on the end, so the arrangement looks like a lived-in stack rather than a catalogue. If you are short on shelf depth, nest two on the floor under a bench, since their height fits comfortably beneath a seat. Cotton rope can pick up dust and damp, so keep the baskets away from the area where wet umbrellas stand, and shake them out every few weeks before the season changes.
6. A Slatted Bench for the Moment You Sit Down to Change Shoes
 Save it
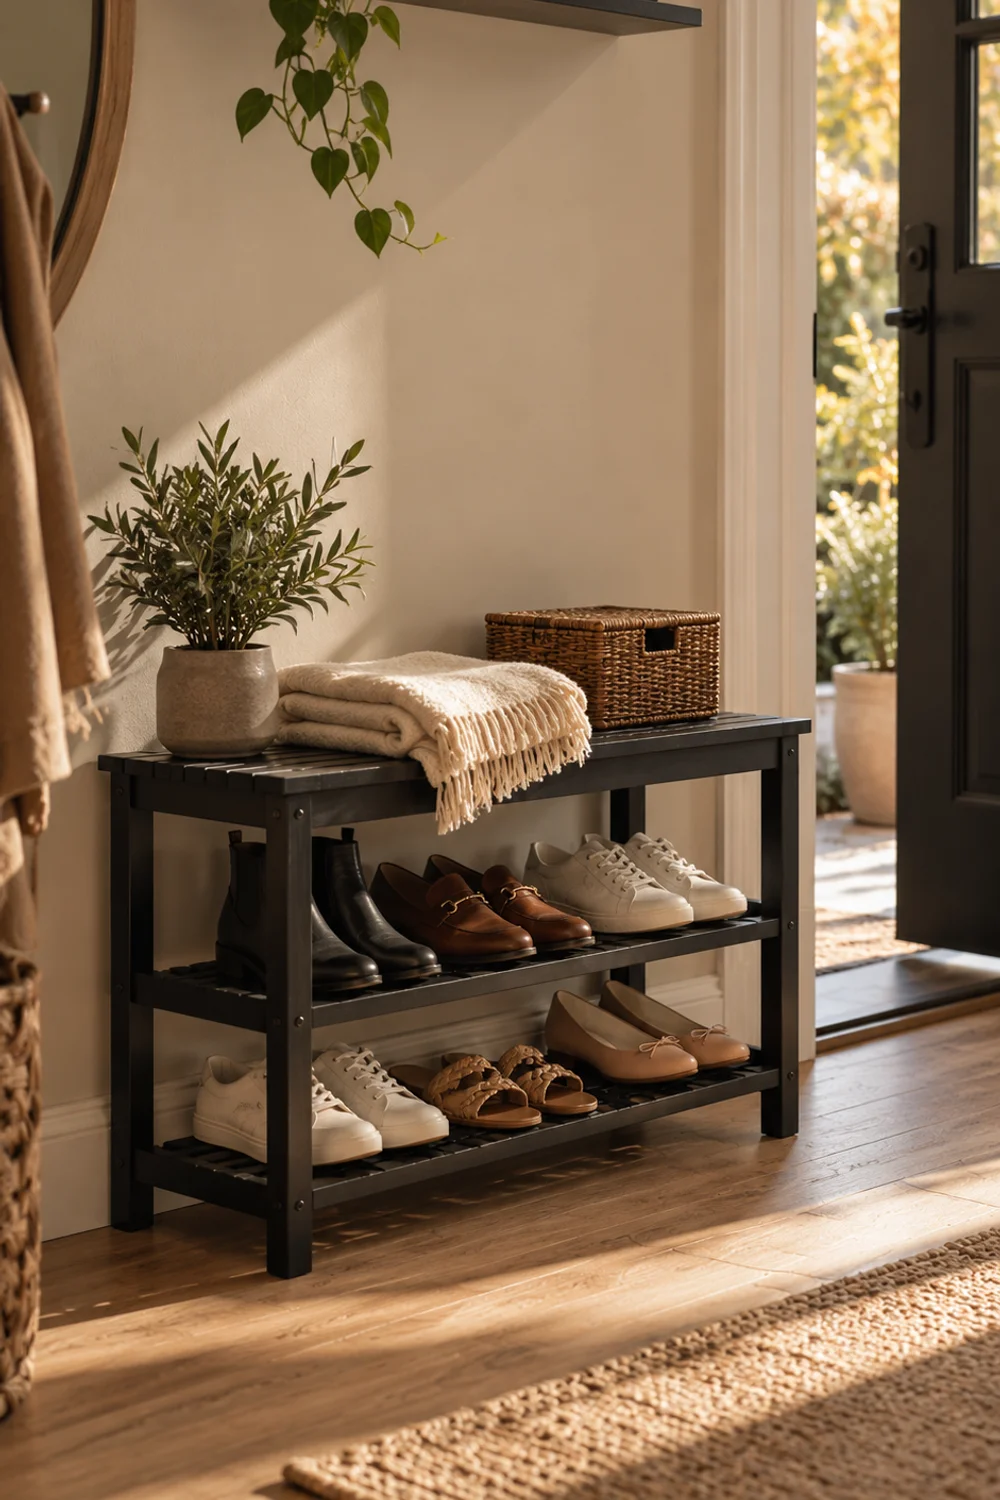
There is a moment in every arrival when you simply need to sit, to unlace a boot, to hold a bag on your lap, to take off the day. A bench gives that moment a place, and it quietly changes how the entry feels. Instead of a corridor you hurry through, it becomes a small room with a pause built in.
In a narrow space the bench should be low, shallow and open, so it does not read as a wall of furniture. A slatted bamboo bench in ink black, roughly twenty-eight inches wide, eleven inches deep and eighteen inches high, comes with two open shelves underneath that the listing says hold at least six pairs of shoes. The seat supports up to 286 pounds on the top, and each shelf takes about twenty-two pounds, so it is sturdy enough to sit on to pull on boots. The slats let air move around damp footwear, and the open structure keeps the bench visually light.
The best placement is directly under the wall shelf or the hook rail, so the seat sits beneath the things you reach for. Leave at least thirty inches of clear walkway in front of it, and keep the bench off the swing path of the door. Even in a hallway that is only three feet wide, a bench of this depth leaves enough room to pass.
Style the top lightly, because a seat you cannot sit on is a shelf. A single folded wool throw or a small cushion softens the slats, and a tote or a bag can rest there for a moment while you take off your coat. Decide which pairs live on the lower shelves, usually the ones worn most this week, and leave the rest in a closet. Six pairs in a row looks orderly, and twelve looks like a shoe store storeroom. Wipe the slats with a damp cloth when the weather has been wet, and let the shelves dry fully before putting shoes back.
7. An Umbrella Holder That Handles Wet-Weather Arrivals
 Save it
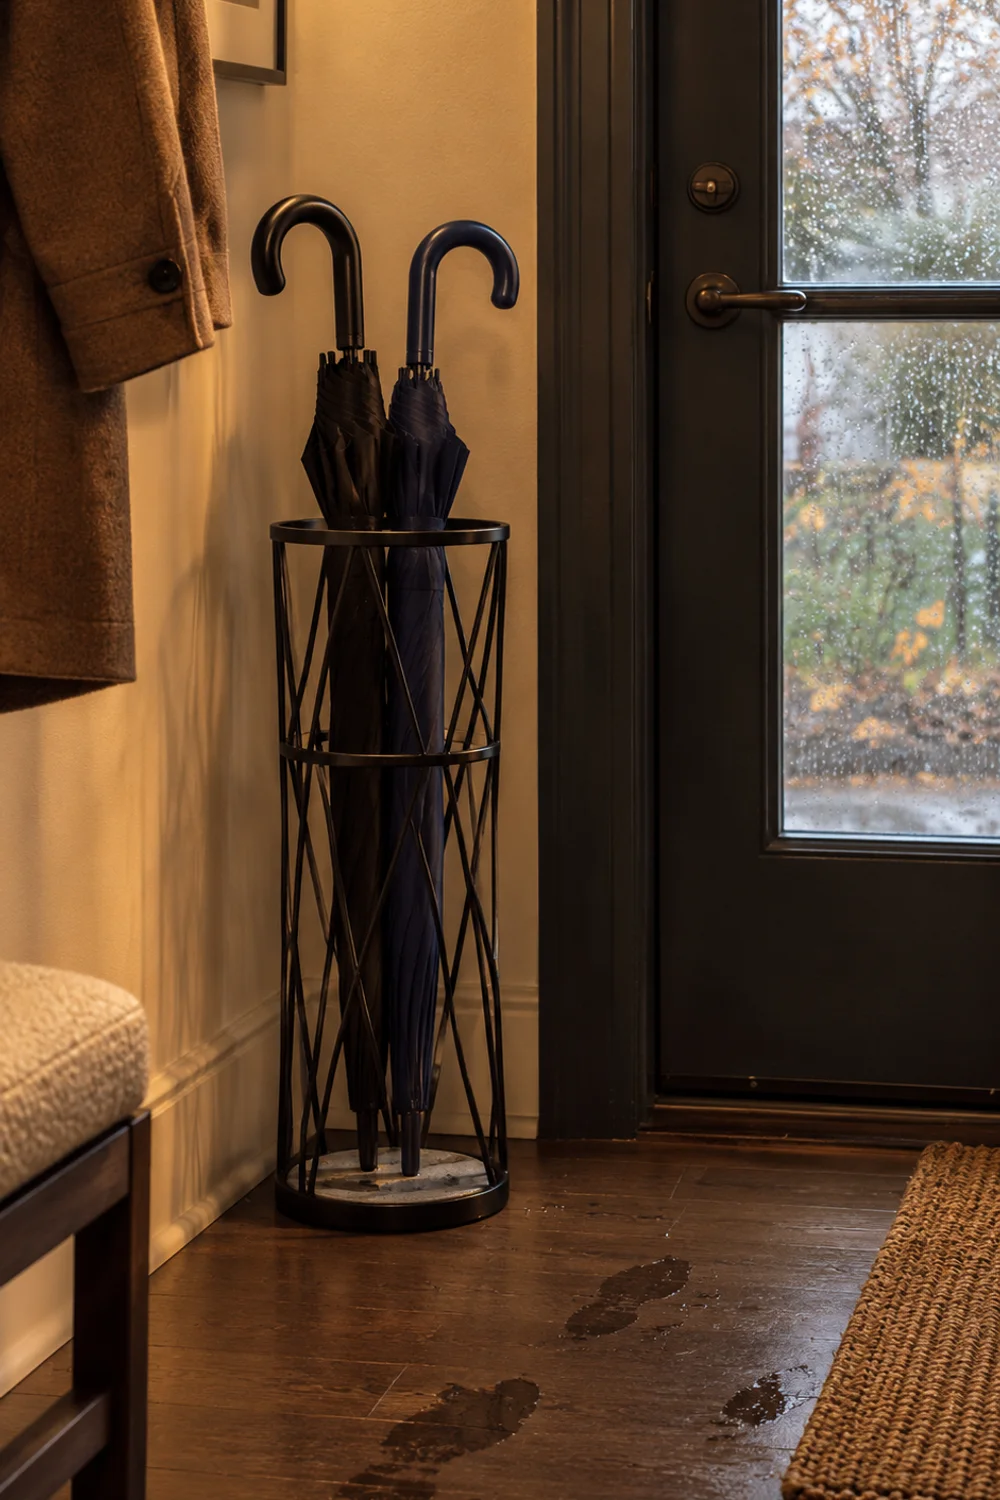
In autumn, the entry becomes a wet room for a few months. Umbrellas drip, boots shed water and the floor near the door turns into a small lake. A drop zone that ignores wet weather will look beautiful in photographs and misbehave on a real Tuesday, so it helps to plan for water at the doorway.
A tall open-frame umbrella holder works well because it lets air reach the canopy while the umbrella dries. This black metal stand, about twenty-two inches tall and seven inches across, is built from crossing rods between slim rings, so it has a sculptural, almost lantern-like profile. Its open structure means wet fabric dries faster, which the listing highlights, and it comes with a soakstone tray that absorbs water quickly and keeps the floor dry. Because it is narrow, it fits in the corner beside the door or beside a console without claiming real floor area, and it can also hold long golf umbrellas or walking canes.
Place the holder on the side of the door where wet things naturally arrive, so you can slide an umbrella in without crossing the room. Keep it at least a few inches from the wall, so a dripping umbrella does not leave a mark, and avoid positioning it right at the foot of a wooden bench or a runner, where moisture could cause damage. A small corner works best, since the vertical form fills dead space.
An umbrella holder is also a styling tool. A tall black form next to a pale wall creates a strong vertical, which balances the horizontal lines of a bench and a tray. If you own two or three umbrellas, choose them in a quiet palette, such as black, navy or tan, so the holder looks composed instead of chaotic. Lift the soakstone tray out and let it dry on a windowsill after a particularly wet week, and the stone will stay fresh for the next storm.
8. A Low Flip-Drawer Cabinet When the Wall Above Is Spoken For
 Save it
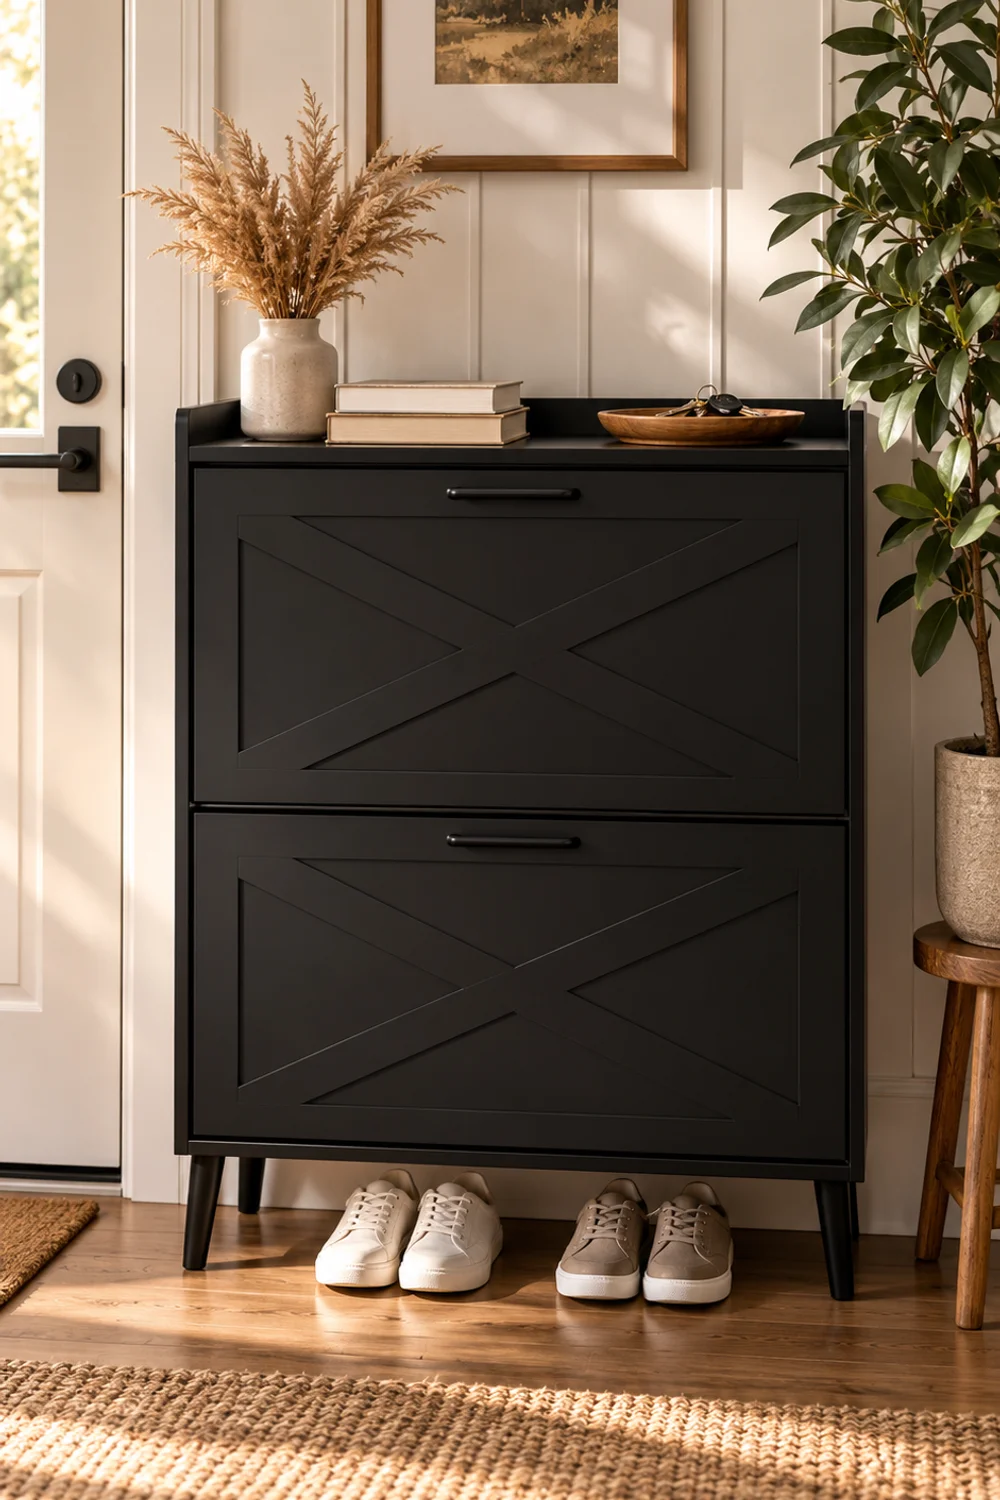
Sometimes the wall above eye level is not available. A window sits where you would hang a rack, a sloped ceiling cuts off the height, or the wall is already carrying art you love. In those entries a tall hall tree is the wrong tool, and a low shoe cabinet, with its flat top acting as a landing surface, is the better answer.
A slim cabinet with two flip-front drawers does this neatly. This black version, about thirty-two inches wide, nine and a half inches deep and thirty-nine inches high, uses an X-brace barn-door pattern on each front, slim handles and tapered legs that lift the body off the floor. Each drawer folds forward to reveal a compartment with a removable divider, so you can adjust the space for flats, sneakers or taller shoes, and the listing includes a wall-anchoring device for stability. The open gap beneath the legs gives you a spot for the pair you wear daily.
The top is the real asset. At thirty-nine inches it sits at the height of a console table, which makes it a convenient landing surface for keys, mail and a bag. Treat it the way you would treat a console: a lamp or a small plant at one end, a tray in the middle and a framed piece leaning at the back. The listing’s own photos show a plant at one side and books and a vase on top, which is exactly the right scale. Keep the top about half empty so the surface stays useful.
The farmhouse X-brace gives the cabinet a slightly traditional character, so keep the surrounding styling modern: clean lines, a muted palette and few decorative objects. If your household has more shoes than a two-drawer cabinet can hold, the ideas in Stunning Shoe Storage Ideas for Small Spaces That Look Amazing cover the question of how to edit and store a larger collection. Fill the drawers by season, with this month’s boots on top and sandals at the back, and rotate them when the weather turns.
9. A Round Mirror That Doubles the Light and Closes the Routine
 Save it
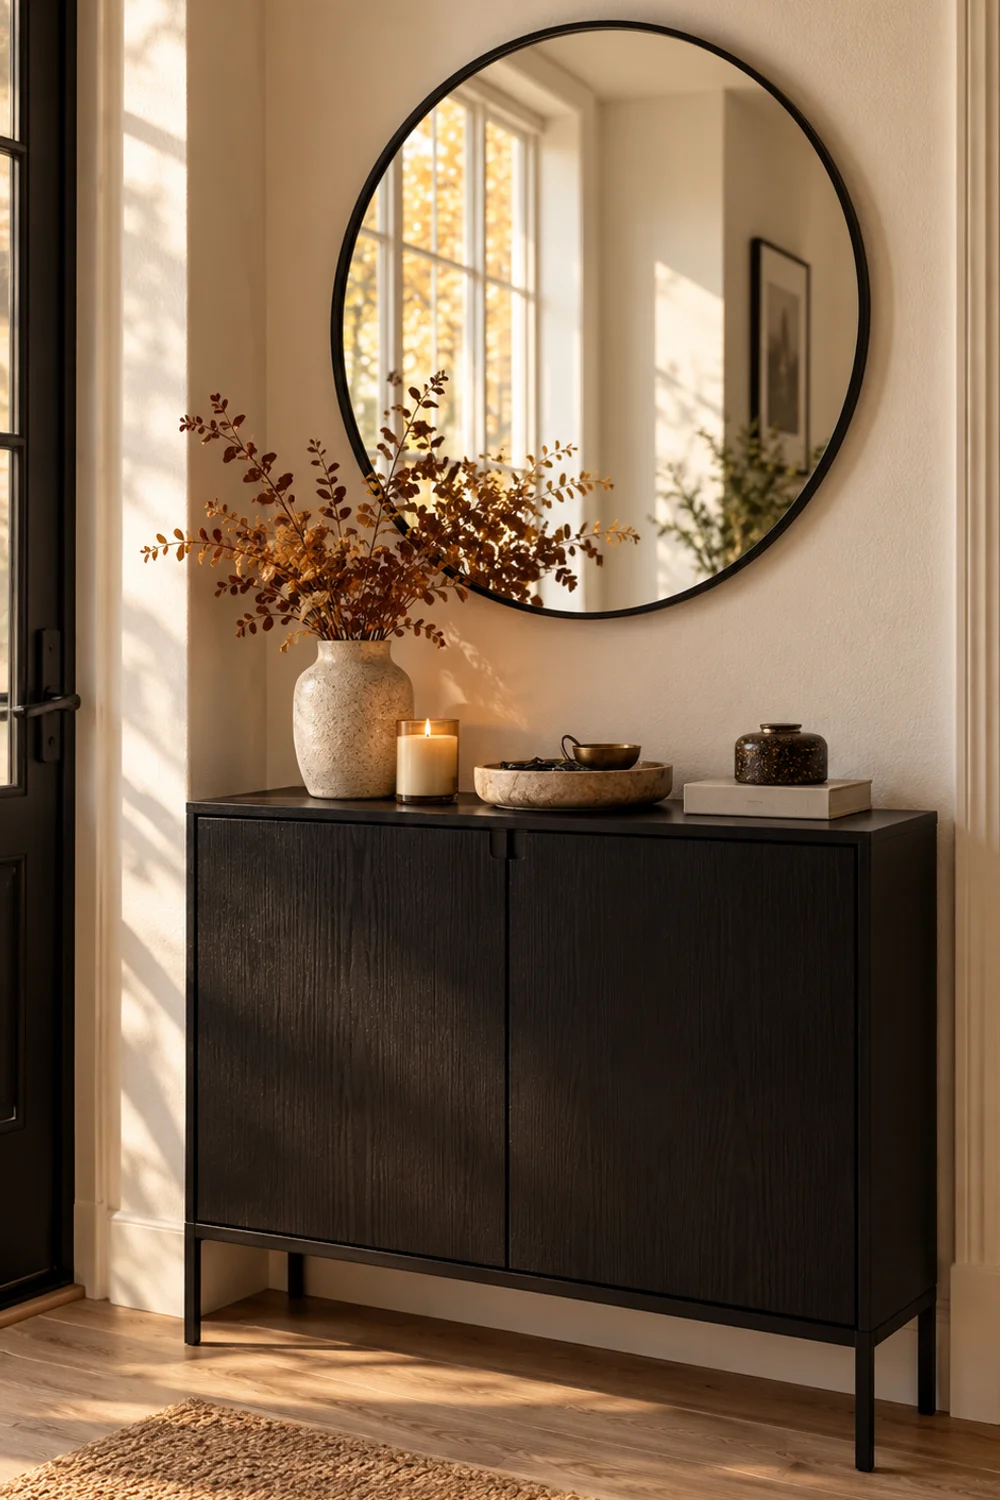
A mirror is the last stop in a drop zone, the place where you check your collar on the way out and notice the day on the way in. It is also one of the cheapest ways to make a small entry feel bigger, because it bounces light back across the room and extends the apparent depth of a short wall.
A round mirror has a particular advantage in a cluster of rectangles. A bench, a cabinet and a shelf all have straight edges, and a circle softens them. A twenty-four-inch round mirror with a thin matte-black metal frame, made of tempered glass, is large enough to read as a feature and small enough to hang above a narrow cabinet without overwhelming it. The listing says it can be hung or leaned, which gives you flexibility if you rent and do not want another hole in the wall.
Hang it so the center sits around sixty inches from the floor, roughly eye level for an average adult, and leave a gap of six to ten inches above the surface beneath it. If the mirror sits above a cabinet, its width should be a little narrower than the piece below, which makes the grouping look anchored. Check the angle before you commit: stand at the door and see what is reflected. A mirror that faces a closet door or a pile of shoes will double the clutter, while one that faces a window or a pale wall will double the light.
Black frames echo the black hardware you may already have, from hooks to cabinet handles, so the mirror ties the group together without extra decoration. If the frame feels too stark, a small plant or a sprig of dried stems beneath it softens the line. Wipe the glass with a microfiber cloth, since entry mirrors collect fingerprints and dust quickly.
10. A Runner That Defines the Path From Door to Home
 Save it
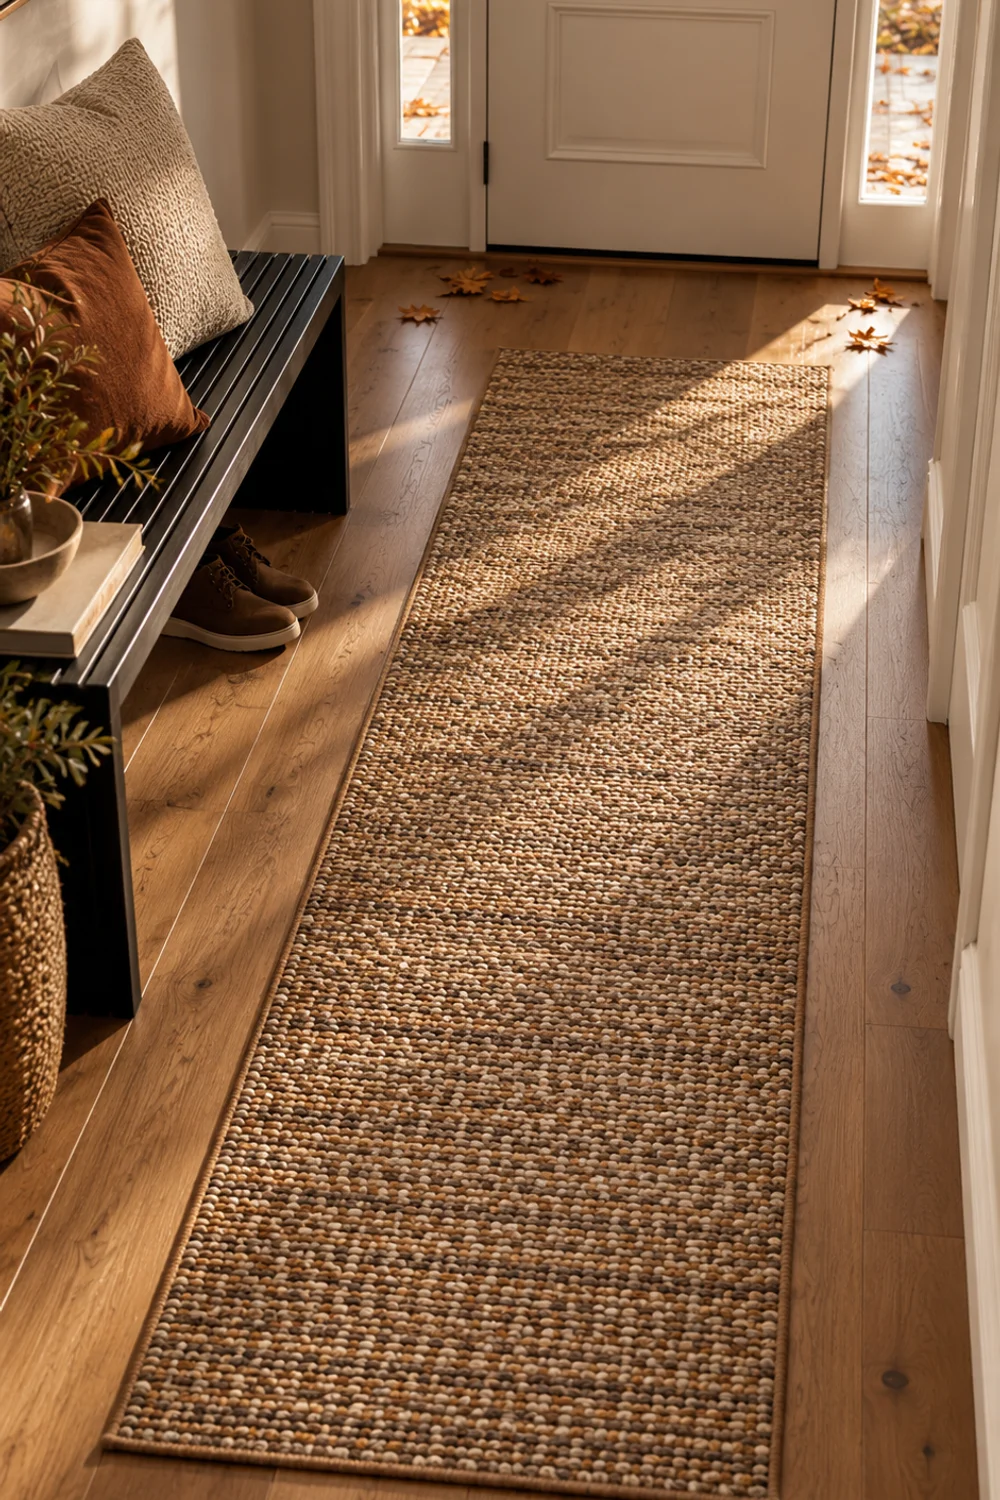
The floor is the last thing people think about in a drop zone, and often the first thing guests walk on. A runner draws a visible path from the door to the rest of the house, absorbs the first bit of grit and softens the sound of footsteps. In a narrow entry it does one more job: it makes the space look longer.
A slim two-by-five-foot flat-woven runner fits most narrow halls. This one has a braided basket-weave texture in a blend of beige, tan and brown, with a rubber backing and a thin profile of about two tenths of an inch, which makes it easier to live with in a busy walkway. The listing says it is machine washable on a gentle cold cycle, which is a real advantage when mud and wet leaves arrive on every pair of shoes. The multi-tone color hides dirt better than a solid pale rug, so it still looks composed after a week of rain.
Check the door clearance before you buy. The listing notes that the reinforced edges are slightly higher than the surface, and it may affect doors with less than about four tenths of an inch of clearance under them. Place the runner so that it starts a few inches inside the door and runs along the longest wall, with the short end stopping before the bench or cabinet, so it does not tuck under furniture. On smooth floors, add a rug pad underneath for grip, as the listing recommends.
A runner also helps with scale. A two-foot width reads as a path, not a rug, so it does not compete with the furniture. Leave a hand’s width of bare floor on either side, so the edges of the room stay visible. If the rug arrives folded with creases, lay it flat, press the edges down and let it rest for a few days under a few heavy books. A warm tan-and-brown weave will also help the black pieces in the room feel less severe.
11. Motion-Sensing Night Lights for the Hours When Nobody Turns On a Lamp
 Save it
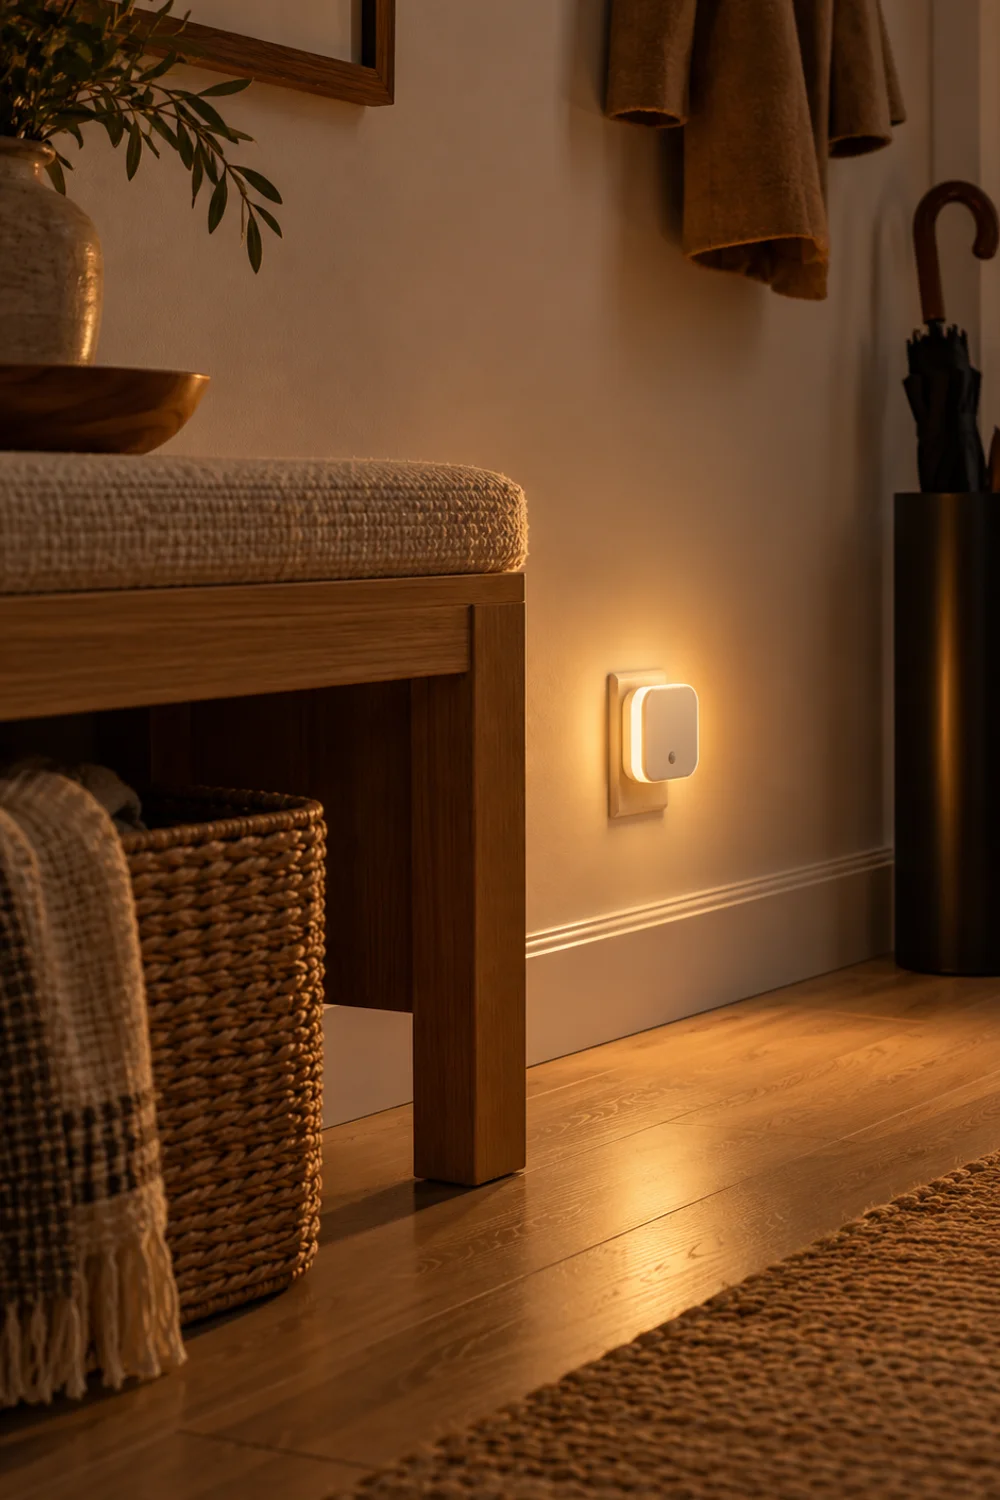
A drop zone is used most at the edges of the day, early in the morning and after dark, when the main light feels harsh and no one wants to hunt for a switch. A small, low light that comes on by itself solves that without turning the entry into a spotlight. It also changes the mood: a soft glow along the wall makes the entry feel considered even at midnight.
A plug-in night light with a diffused backlight does this well. This one is a small rounded-square white unit with a warm 2200K glow, and the listing describes it as casting light onto the wall rather than into your eyes. It has two modes, one that switches on with motion in the dark and another that follows dusk and dawn, and the brightness can be dimmed between one and fifty lumens. The four-pack format lets you place one near the entry, one near the bench and others along the hallway. The compact body leaves the second outlet free.
Choose the outlet carefully. A light at about knee height near the bench will pick up your movement when you come in, and it throws a pool of light on the floor, which is where you need it. Use the dimmer to keep the glow low, because the aim is atmosphere rather than visibility. If you wake early or come home late, set the dusk-to-dawn mode on one unit, so the entry never starts the evening in the dark.
Warm light changes the colors nearby. It brings out the honey in light wood, makes black hardware look softer and gives woven baskets a golden cast. Avoid placing the light directly under a mirror, where it will reflect straight back into your eyes. A fixed, low source also lets you keep the overhead light off for most of the night, which makes the entry look calmer on the way in.
Common Mistakes
1. Buying furniture before measuring the door swing
A slim cabinet or bench can look perfect on paper and still collide with the door once it opens fully. Measure the door’s full arc, then add a few inches, and place the tallest piece on the hinge side where it can never be struck.
2. Giving every item the same home
When keys, mail, shoes and bags all share one surface, the surface becomes a pile. Assign each category a different height or container, so keys hang, mail slots, shoes drawer and bags hook.
3. Filling every shelf and tray to the edge
Styling a drop zone like a shop display leaves nowhere to put what you are carrying. Keep at least a third of each surface empty so there is always room for the thing in your hand.
4. Ignoring wet weather
An entry designed in summer often has no answer to a rainy October. Plan for a stand for umbrellas, a tray for wet shoes and a washable floor layer before the season arrives, not after the first puddle.
5. Mounting hooks and mirrors at a single height
Hooks, mirrors and shelves set to one adult’s reach leave children and shorter family members out. Stagger heights, and place a second lower row where it will actually be used.
6. Choosing every piece in the same finish
Black hardware, black tray and black cabinet can look heavy without a counterweight. Bring in wood, rope or woven texture so the group has warmth and contrast.
Frequently Asked Questions
How much space do I need to make a drop zone?
A usable drop zone can fit in a wall section only about thirty inches wide, if you build vertically. A slim column, a hook rail and a small tray cover most of the routine, and a bench or a runner only needs to be added if there is a few extra feet. The most important measurement is the walking path, which should stay at least thirty inches clear.
What if I rent and cannot drill into the walls?
Freestanding pieces carry most of the load, such as a tall hall tree, a bench, an umbrella holder and a leaning mirror. For lightweight items like a key organizer, adhesive mounting strips and removable hooks work if you follow the weight limits. Anchor any tall freestanding furniture with the included anti-tip hardware where your lease allows.
How do I keep a drop zone from looking cluttered?
Limit each surface to two or three objects, assign each category its own container and edit the contents weekly. Visible clutter comes from too many unrelated items sharing one space, so giving every object a specific home does more than any decorative tray.
Where should the mirror go in a drop zone?
Hang it near the exit side of the zone, at about eye level, where you will naturally glance as you leave. Make sure it reflects a window or a pale wall rather than a pile of shoes or a closed closet, so it adds light instead of doubling mess.
Final Thoughts
A drop zone is less about furniture than about kindness to your future self. Each hook, tray and basket removes one small decision from the moment you walk in, and a day with fewer small decisions feels quieter. The most beautiful entries are rarely the ones with the most objects. They are the ones where every piece has a clear job and enough space around it to do it.
You do not need to install everything at once. Start with the moment that frustrates you most, whether that is lost keys, wet shoes or a bag on the floor, and give it a proper home. Live with that change for a couple of weeks, notice what still wanders, and add the next layer. A drop zone grows the way a good routine does, one small habit at a time.
If one of these ideas suits your entry, save it to a Pinterest board so it is waiting when you are ready to measure, and keep exploring the other small-space guides here as your home evolves. The doorway is the first thing you see coming home and the last thing you see leaving, and with a little thought it can become one of the calmest corners of the house.
This post contains affiliate links. I may earn a small commission at no extra cost to you.
Get cozy inspiration delivered to your inbox.
✓ 14-page beautifully designed ebook
✓ Cozy decorating ideas
✓ Practical room-by-room inspiration
You’re in! 🎉
Thanks for joining the NestFlowHome community!
Your free ebook is already on its way to your inbox. If you don’t see it within a few minutes, please check your Promotions or Spam folder.
Join the NestFlowHome community for weekly decorating inspiration.

Timeless home decor ideas and slow living inspiration for a calm, beautiful life.